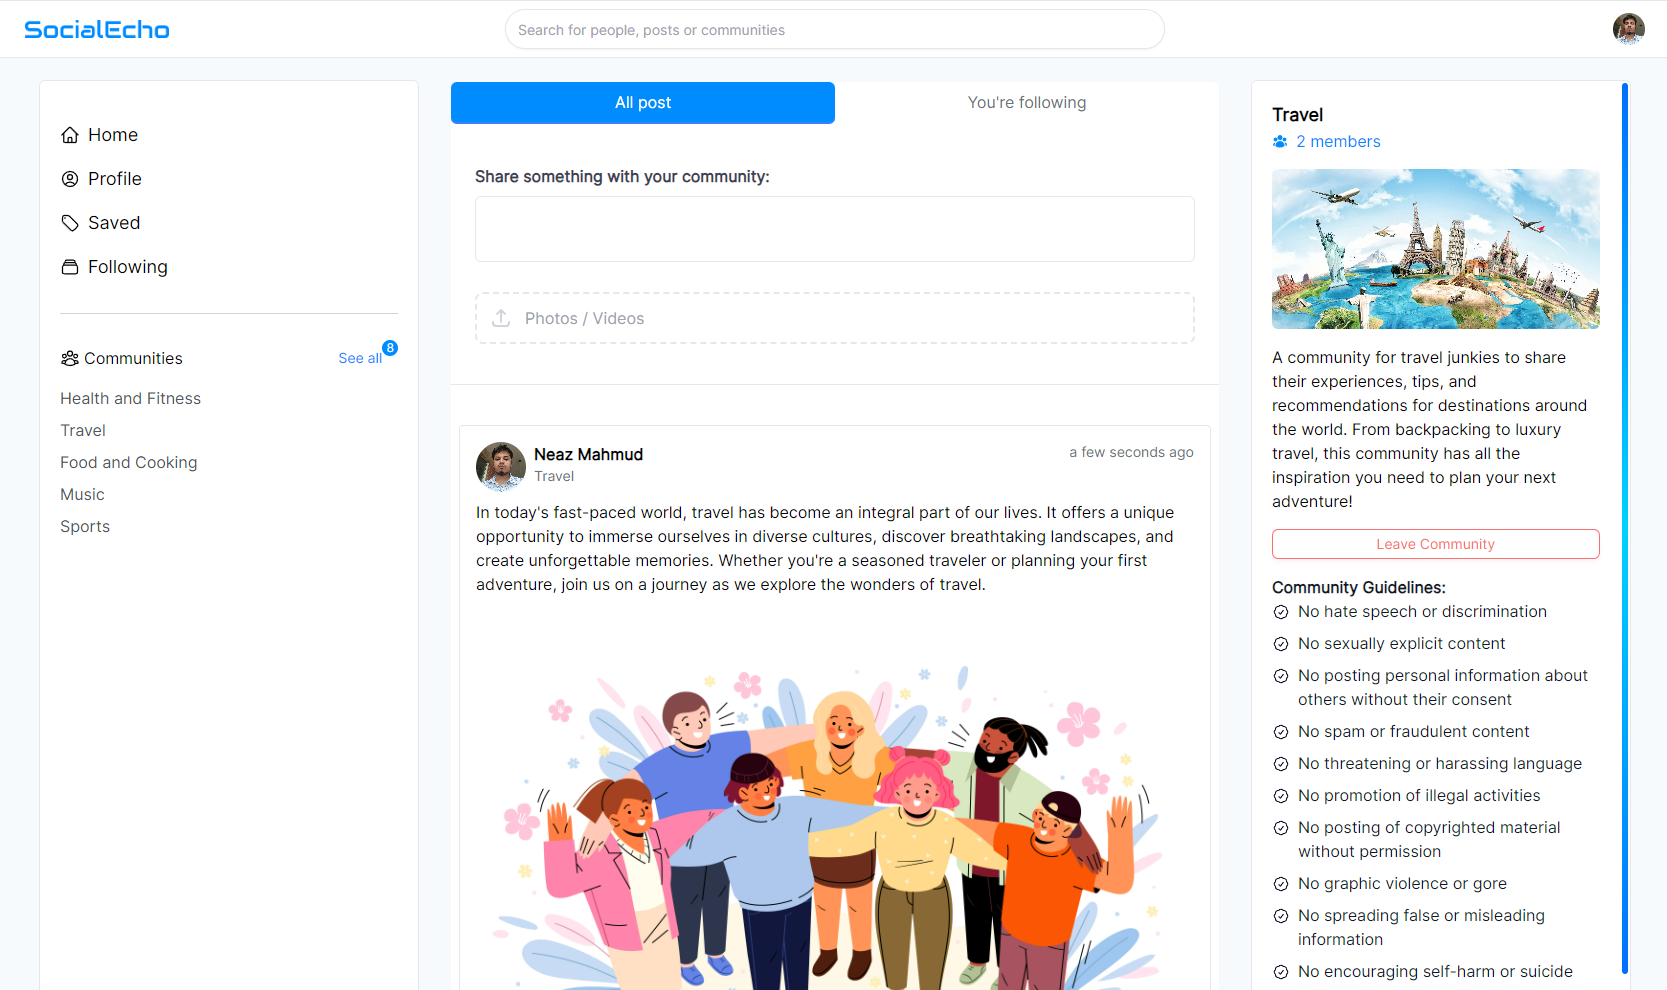
MERN Projects

MERN_Projects
🚀 MERN_Projects 💻 🔥 Hub for full-stack MERN applications & experiments! ⚡ Powered by MongoDB, Express, React & Node.js 🛠️ Featuring CRUD operations, REST APIs 🔗, state management 📊 & responsive UI 🎨. Real-time features ⚡, clean architecture 🏗️ & live deployments 🌐!
- 19
- MIT
- 8 wk ago
Repo MehmoodCoder/MERN_Projects, read from GitHub 7 h ago. MehmoodCoder has not joined Take My Repo.
In short
MehmoodCoder/MERN_Projects is a public repo on GitHub by MehmoodCoder. 🚀 MERN_Projects 💻 🔥 Hub for full-stack MERN applications & experiments! ⚡ Powered by MongoDB, Express, React & Node.js 🛠️ Featuring CRUD operations, REST APIs 🔗, state management 📊 & responsive UI 🎨. Real-time features ⚡, clean architecture 🏗️ & live deployments 🌐! It declares the MIT license on GitHub. It is written mainly in TypeScript, has 19 stars and last changed on 2026-09-26. Nobody has reviewed it on Take My Repo yet, which says nothing about its quality. Read from GitHub on 2026-11-22.
In the maintainer's words. Shown from GitHub; Take My Repo does not keep a copy.
🚀 MERN Projects Hub 💻 🔥
💻 🔥 Hub for full-stack MERN applications & experiments! ⚡ Powered by MongoDB, Express, React & Node.js 🛠️ Featuring CRUD operations, REST APIs 🔗, state management 📊 & responsive UI 🎨. Real-time features ⚡, clean architecture 🏗️ & live deployments 🌐!
Welcome to the ultimate MERN Projects Hub! ⚡ This repository serves as a central collection for building, experimenting with, and deploying full-stack web applications powered by the MERN Stack (MongoDB, Express.js, React.js, Node.js).
From fundamental CRUD operations to advanced real-time applications, this space is dedicated to showcasing scalable, modern web architecture, clean code practices, and production-ready implementations.
🛠️ Key Technologies & Core Concepts
- Frontend Architecture: Built with React (
useState,useEffect), utilizing Axios for async HTTP calls (GET,POST,PUT,DELETE),react-router-domfor dynamic routing (useParams,useNavigate), and Bootstrap for responsive styling. - Backend Infrastructure: Modular RESTful APIs engineered with Node.js & Express.js, structured using Express Routers, custom middlewares, and controller logic.
- Database Persistence: Scalable document modeling via MongoDB & Mongoose, implementing queries like
findById,findByIdAndUpdate, andfindByIdAndDelete. - Full-Stack REST Architecture: Seamless integration between React frontend and Express backend with cross-origin communication handled via CORS.
- DevOps & Environment Setup: Secure configuration using
dotenvenvironment variables, clean project architecture, and production-ready code structure.
💡 What's Inside This Repository?
This workspace continuously expands to include diverse full-stack solutions and modular components:
- 🔗 Full-Stack Applications: End-to-end integration of React frontends with Express/Node APIs.
- ⚙️ CRUD Systems: Complete Create, Read, Update, and Delete data operations.
- 📊 State & Data Management: Optimized state persistence and API data fetching.
- 🎨 Responsive UI/UX: Clean, accessible layouts designed for desktop, tablet, and mobile views.
💻 Projects Included
👥 MERN CRUD User Management System (TypeScript)
Main Folder:
CRUD_Project/Subfolders:
backend/(Node/Express/TypeScript REST API) &frontend/(React/TypeScript SPA)
A full-stack user management module built on the MERN stack and migrated to TypeScript with strict type safety, offering dynamic record operations, MongoDB Atlas persistence, and instant UI state synchronization.
Live App 🔗 : https://mh56-crud-project.vercel.app/
- Features:
- Fetch and render all stored user records on the main dashboard (
GET /api) with robust array safety checks. - Add new user entries via form inputs with strict type validation (
POST /api/create). - Pre-populate dynamic user data for inline profile modifications (
GET /api/getuser/:id&PUT /api/update/:id). - Delete user entries instantly with direct MongoDB sync and state re-rendering (
DELETE /api/delete/:id). - Serverless architecture support with configured route rewrites for cloud deployments (
vercel.json) and optimized Vite builds.
- Fetch and render all stored user records on the main dashboard (
- Concepts: Full-stack TypeScript architecture (
.ts,.tsx,IUser), strict type checking (noImplicitAny), modular Express routing, Mongoose schema modeling, Axios relative paths, React Hooks (useState,useEffect,useParams,useNavigate), client-side routing (react-router-dom), Bootstrap 5 layouts, and modern ESM runtime execution viatsx.
🛠️ Tech Stack & Dependencies
| Tool / Library | Type | Purpose |
|---|---|---|
| TypeScript | Language / Superset | Adds static typing, robust interfaces, and error prevention across frontend and backend |
| Node.js | Runtime | Server-side JavaScript/TypeScript execution environment |
| Express.js | Backend Framework | Web framework for handling RESTful API routes & HTTP requests |
| React.js | Frontend Library | Declarative UI library for building component-based client views (.tsx) |
| MongoDB Atlas | Database | Cloud-hosted NoSQL document database for user data storage |
| Mongoose | Backend ODM | Schema-based data modeling and async queries for MongoDB |
| Axios | Frontend HTTP Client | Promise-based client for sending HTTP requests to backend endpoints |
| React Router DOM | Client Routing | Declarative routing for single-page dynamic view navigation |
| Bootstrap 5 | Frontend Styling | Responsive component layout, tables, forms, and dark-theme views |
| Vite | Frontend Tooling | High-performance build tool and optimized ESM bundling pipeline |
| Nodemon | Dev Dependency | Automatically restarts Node app when server-side file changes occur |
| dotenv | Utility | Loads environment variables from .env file into process.env |
| CORS | Backend Middleware | Enables cross-origin resource sharing between React and Express |
| Vercel | Hosting / Serverless | Platform for deploying frontend SPA and serverless backend API functions |
| Postman | API Client | Manual testing tool for REST endpoints (GET, POST, PUT, DELETE) |
📂 Project Directory Structure
Generated: 8/7/2026, 4:55:19 PM
Root Path: workspace\MERN_Projects
📁 MERN_Projects
├── 📂 CRUD_Project
│   ├── 📄 vercel.json
│   ├── 📝 README.md
│   ├── ⚡ backend
│   └── 💻 frontend
├── 📄 LICENSE
├── 🙈 .gitignore
└── 📝 README.md
🌐 Deployment & Environment Setup
1. MongoDB Atlas Configuration
Before deploying, ensure your database access is open to Vercel:
- Go to MongoDB Atlas.
- Navigate to Network Access under Security.
- Click Add IP Address and select Allow Access from Anywhere (
0.0.0.0/0). - Save changes.
2. Environment Variables on Vercel
Set up your environment variables in Vercel before or after deployment:
- In your Vercel Project Dashboard, go to Settings ➔ Environment Variables.
- Add your environment key-value pairs (e.g.,
MONGO_URL,JWT_SECRET,PORT). - ⚠️ Important Requirement:
- Ensure Production, Preview, and Development targets are ALL CHECKED.
- DO NOT toggle on the "Sensitive" option for
MONGO_URLto prevent variable save/sync issues.
3. Deploy to Vercel
- Push your latest code to GitHub.
- Go to vercel.com and log in.
- Click "New Project".
- Connect your GitHub repository.
- Select/Connect the exact project root folder containing
package.json(to avoid nested directory deployment issues). - Configure Build Settings:
- Vercel automatically detects Vite/Node settings.
- Toggle the "Build Command" switch and manually type
npm run buildto override it (if using a build step).
- Ensure all Environment Variables (
MONGO_URL, etc.) are added under the project settings. - Click "Deploy".
💡 Note: If you edit or update any Environment Variable after deploying, always go to the Deployments tab, click the three dots (
...) on the latest deployment, and select Redeploy to apply changes! & Make sure your project structure strictly follows the root layout:
Project_Folder/
├── backend/
├── frontend/
└── vercel.json
📦 MERN Stack: Frontend Architecture Setup Guide
This documentation provides a step-by-step guide to setting up a production-ready Frontend Workspace for a MERN stack application using React + Vite. It covers project initialization, dependency configuration, and local setup—preparing the UI layer to seamlessly connect with an Express/Node.js backend.
1. Initialize Vite Project
Run the following command in your terminal:
npm init vite
During the prompt configuration, fill out the selections exactly like this:
Proceed? y
Project Name: name
Package Name: name
Select a framework: React
Select a variant: JavaScript
Select oxlintrc? Yes
Install with npm? Yes
💻 How to Run the frontend of the MERN Project Locally
If you want to pull this project and run it again locally, simply execute these commands:
# Navigate to the project folder
cd Project_dir

# create node_modules folder by running this command
npm i

# Install TypeScript Globally
npm i -g typescript


# create dist folder by running this command
tsc

# Start the local development server
npm run dev
2. Installing Core Dependencies for MERN Stack Backend
Run this command inside your project directory to install npm pakages in pakages.json file:
npm i axios
npm i react-router-dom
npm i bootstrap
It automatically Create package.json if not exists. Like
{
  "name": "frontend",
  "private": true,
  "version": "0.0.0",
  "type": "module",
  "scripts": {
    "dev": "vite",
    "build": "vite build",
    "lint": "oxlint",
    "preview": "vite preview"
  },
  "dependencies": {
    "axios": "^1.19.0",
    "bootstrap": "^5.3.8",
    "react": "^19.2.8",
    "react-dom": "^19.2.8",
    "react-router-dom": "^7.18.2"
  },
  "devDependencies": {
    "@types/react": "^19.3.0",
    "@types/react-dom": "^19.3.0",
    "@vitejs/plugin-react": "^6.0.4",
    "oxlint": "^1.75.0",
    "vite": "^8.2.0"
  }
}
Note: Install packages when needed
📦 MERN Stack: Backend Architecture Setup Guide
1. Installing Node.js & NPM
Download and install the LTS version from Node.js Official Site. Verify installation in your terminal:
node -v
npm -v
2. Installing MongoDB Community Server & Mongosh
- Download MongoDB Community Server from MongoDB Download Center.
- Download MongoDB Shell (
mongosh) to run CLI database operations. - Start the local server daemon:
# Verify connection using mongosh CLI
mongosh
3. Setting Up package.json with ES Modules
Initialize your Node project inside any project directory:
npm init
During the prompt configuration, fill out the selections like this:
package name: (name)
version: (1.0.0)
description: may add entry point: (app.js)
test command: just enter
git repository: (https://github.com/username/repo_name.git)
keywords: may add
author: may add
license: (ISC) may be MIT for open source
type: (commonjs) recommended module
Is this OK? (yes)
💻 How to Run the backend of the MERN Project Locally
If you want to pull this project and run it again locally, simply execute these commands:
# Navigate to the project folder
cd Project_dir

# create node_modules folder by running this command
npm i

# create dist folder by running this command
tsc

# Start the local development server
npm run dev
To enable modern ES6 import/export syntax instead of require(), open package.json and add "type": "module":
{
  "name": "node",
  "version": "1.0.0",
  "bugs": {
    "url": "https://github.com/username/repo/issues"
  },
  "repository": {
    "type": "git",
    "url": "git+https://github.com/username/repo.git"
  },
  "license": "ISC",
  "author": "",
  "type": "commonjs",
  "main": "app.js",
  "scripts": {
    "test": "echo \"Error: no test specified\" && exit 1",
    "start": "node app.js" // add manually write "nodemon index.js" if installed
  }
}
4. Installing Core Dependencies for MERN Stack Backend
Run this command inside your project directory to install npm pakages in pakages.json file:
npm i express
npm i mongoose
npm i nodemon
npm i cors
npm i dotenv
npm i @types/cors
npm i @types/express
npm i @types/node
npm i typescript
npm i -D tsx
It automatically Create package.json if not exists. Like
{
  "name": "pakage name",
  "version": "1.0.0",
  "description": "Something",
  "keywords": [
    "keywords"
  ],
  "homepage": "https://github.com/github.com/username#readme",
  "bugs": {
    "url": "https://github.com/github.com/username/issues"
  },
  "repository": {
    "type": "git",
    "url": "git+https://github.com/github.com/username.git"
  },
  "license": "MIT",
  "author": "Author",
  "type": "module",
  "main": "dist/app.js",
  "scripts": {
    "start": "node dist/app.js",
    "dev": "nodemon --exec tsx app.ts"
  },
  "dependencies": {
    "@types/cors": "^2.8.19",
    "@types/express": "^5.0.6",
    "@types/node": "^26.6.2",
    "cors": "^2.8.6",
    "dotenv": "^17.4.2",
    "express": "^5.2.1",
    "mongoose": "^9.9.1",
    "nodemon": "^3.1.14",
    "typescript": "^7.0.2"
  },
  "devDependencies": {
    "tsx": "^4.19.0"
  }
}
Note: Install packages when needed
⚙️ Setup of TypeScript
1. Clone the Repository
git clone <your-repository-url>
cd Main_folder/Project_Folder
2. Global TypeScript Installation
Install TypeScript globally on your system to use tsc commands directly:
npm install -g typescript
3. Install Dependencies
TypeScript is already listed as a project dependency. Install it locally with:
npm install
Or
npm i typescript
Using the local dependency keeps the project compiler version consistent across different machines.
4. Initialize TypeScript Configuration
Generate the tsconfig.json file to configure compiler settings and strict type-checking rules:
tsc --init
Note: This creates a tsconfig.json file in your root folder with "strict": true enabled by default.
5. Explore the Source File
Open src/Notes.ts and review the examples covering the concepts listed above.
🧰 TypeScript Commands
Run these commands from inside the Project Folder directory.
Compile the Project
tsc
This reads tsconfig.json, compiles TypeScript files from src/, and writes JavaScript, declaration, and source map files to dist/.
Watch for Changes
tsc --watch
The compiler will rebuild the project whenever a source file changes. Press Ctrl + C to stop watch mode.
Run the Compiled JavaScript
node dist/FileName.js
Run Compiled Code
node dist/FileName.js
Type-Check Without Emitting Files
tsc --noEmit
This checks the project for type errors without creating or changing files in dist/.
⚡ Optional: Convenient npm Scripts
You can add these shortcut scripts to your package.json file:
"scripts": {
  "build": "tsc",
  "watch": "tsc --watch",
  "start": "tsc && node dist/Notes.js",
  "check": "tsc --noEmit"
}
Now you can run:
npm run buildto compilenpm run watchfor auto-rebuildnpm startto compile and run in one stepnpm run checkfor quick type checks
🚀 Getting Started
Prerequisites
- Node.js (v16 or higher)
- npm package manager
- Basic knowledge of React and JavaScript & TypeScript
📚 Learning Resources & Documentation
Frontend & UI:
- React Documentation – Official guide for building component-based UIs and hooks.
- React Router Documentation – Learn client-side routing, dynamic navigation, and parameter handling.
- Vite Guide – Documentation for high-performance frontend tooling and bundling.
- Bootstrap 5 Documentation – Reference for responsive grid layouts, styling, and dark-theme classes.
Backend & Database:
- Node.js Official Docs – Core runtime environment and server-side JavaScript APIs.
- Express.js Guide – Framework guide for building RESTful APIs and middleware pipelines.
- Mongoose ODM Docs – Schema modeling, data validation, and MongoDB query execution.
- MongoDB Atlas Documentation – Cloud database setup, clusters, and security configuration.
Language & Utilities:
- TypeScript Documentation – Comprehensive guide to static typing, interfaces, and compiler configurations.
- Axios HTTP Client – Promise-based HTTP requests for browser and Node environments.
- W3Schools All Language Tutorials – Comprehensive tutorials and quick reference guides for JavaScript, TypeScript, Node, React, CSS, and Bootstrap.
- MDN Web Docs (Mozilla) – In-depth reference for JavaScript, HTML, CSS, and web APIs.
👤 Author
MehmoodCoder
- 🔗 GitHub: https://github.com/MehmoodCoder
- 🌐 Portfolio: My Portfolio Link
📄 License
This project is open source and available under the MIT License.
🤝 Contributing
Contributions are welcome! Please feel free to submit a Pull Request.
- Fork the repository
- Create a feature branch (
git checkout -b feature/amazing-feature) - Commit your changes (
git commit -m 'Add amazing feature') - Push to the branch (
git push origin feature/amazing-feature) - Open a Pull Request
Happy coding without chai ! ☕
Questions
What is MERN_Projects?
MehmoodCoder/MERN_Projects is a public repo on GitHub by MehmoodCoder. 🚀 MERN_Projects 💻 🔥 Hub for full-stack MERN applications & experiments! ⚡ Powered by MongoDB, Express, React & Node.js 🛠️ Featuring CRUD operations, REST APIs 🔗, state management 📊 & responsive UI 🎨. Real-time features ⚡, clean architecture 🏗️ & live deployments 🌐!
Is MERN_Projects open source?
It declares the MIT license on GitHub.
Does MERN_Projects run on macOS, Windows or Linux?
Its maker has not tagged a system, so it is unknown here. Its README says what it needs.
How do I install MERN_Projects?
Open "Take it" on its page: Take My Repo writes an install plan for your machine and hands it to your AI agent (Claude Code, Codex or Cursor), which asks you before each step. Take My Repo has not tested it on any machine.
Is MERN_Projects still maintained?
Its last change on GitHub was on 2026-09-26. GitHub counts 0 open issues and pull requests. Take My Repo does not judge from that whether it is maintained.