linux-kernel-module-cheat
The perfect emulation setup to study and develop the Linux kernel, kernel modules, QEMU, gem5 and x86_64, ARMv7 and ARMv8 userland and baremetal assembly, ANSI C, C++ and POSIX. GDB step debug and KGDB just work. Powered by Buildroot and crosstool-NG. Highly automated. Thoroughly documented. Automated tests. "Tested" in an Ubuntu 24.04 host.
- 4.5k
- GPL-3.0
- 5 mo ago
Repo cirosantilli/linux-kernel-module-cheat, read from GitHub 1 min ago. cirosantilli has not joined Take My Repo.
In short
cirosantilli/linux-kernel-module-cheat is a public repo on GitHub by cirosantilli. The perfect emulation setup to study and develop the Linux kernel, kernel modules, QEMU, gem5 and x86_64, ARMv7 and ARMv8 userland and baremetal assembly, ANSI C, C++ and POSIX. GDB step debug and KGDB just work. Powered by Buildroot and crosstool-NG. Highly automated. Thoroughly documented. Automated tests. "Tested" in an Ubuntu 24.04 host. It declares the GPL-3.0 license on GitHub. It is written mainly in Python, has 4,523 stars and last changed on 2026-06-16. Nobody has reviewed it on Take My Repo yet, which says nothing about its quality. Read from GitHub on 2026-11-19.
Linux Kernel Module Cheat
The perfect emulation setup to study and develop the Linux kernel v5.9.2, kernel modules, QEMU, gem5 and x86_64, ARMv7 and ARMv8 userland and baremetal assembly, ANSI C, C++ and POSIX. EVERYTHING is built from source. GDB step debug and KGDB just work. Powered by Buildroot and crosstool-NG. Highly automated. Thoroughly documented. Automated tests. "Tested" in an Ubuntu 20.04 host.
TL;DR: Section 2.2.1, “QEMU Buildroot setup getting started” tested on Ubuntu 24.04:
git clone https://github.com/cirosantilli/linux-kernel-module-cheat
cd linux-kernel-module-cheat
sudo apt install docker
python3 -m venv .venv
. .venv/bin/activate
./setup
./run-docker create
./run-docker sh
This leaves you inside a Docker shell. Then inside Docker:
./build --download-dependencies qemu-buildroot
./run
and you are now in a Linux userland shell running on QEMU with everything built fully from source.
The source code for this page is located at: https://github.com/cirosantilli/linux-kernel-module-cheat. Due to a GitHub limitation, this README is too long and not fully rendered on github.com, so either use:


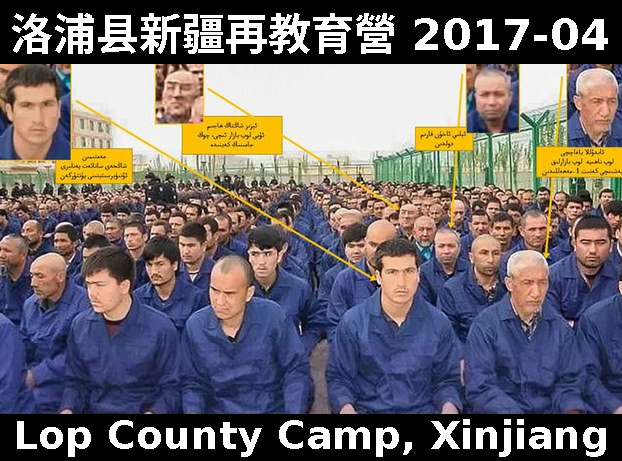
https://github.com/cirosantilli/china-dictatorship | https://cirosantilli.com/china-dictatorship/xinjiang
- 1.
--china - 2. Getting started
- 3. GDB step debug
- 3.1. GDB step debug kernel boot
- 3.2. GDB step debug kernel post-boot
- 3.3. tmux
- 3.4. GDB step debug kernel module
- 3.5. GDB step debug early boot
- 3.6. GDB step debug userland processes
- 3.7. GDB call
- 3.8. GDB view ARM system registers
- 3.9. GDB step debug multicore userland
- 3.10. Linux kernel GDB scripts
- 3.11. Debug the GDB remote protocol
- 4. KGDB
- 5. gdbserver
- 6. CPU architecture
- 7. init
- 8. initrd
- 9. Device tree
- 10. KVM
- 11. User mode simulation
- 12. Kernel module utilities
- 13. Filesystems
- 14. Graphics
- 15. Networking
- 16. Operating systems
- 17. Linux kernel
- 17.1. vscode clangd Linux kenrel symbols
- 17.2. Linux kernel configuration
- 17.3. Kernel version
- 17.4. Kernel command line parameters
- 17.5. printk
- 17.6. Kernel module APIs
- 17.7. Kernel panic and oops
- 17.8. Pseudo filesystems
- 17.9. Pseudo files
- 17.10. kthread
- 17.11. Timers
- 17.12. IRQ
- 17.13. Kernel utility functions
- 17.14. Linux kernel tracing
- 17.15. Linux kernel hardening
- 17.16. User mode Linux
- 17.17. UIO
- 17.18. Linux kernel interactive stuff
- 17.19. DRM
- 17.20. Linux kernel testing
- 17.21. Linux kernel build system
- 17.22. Virtio
- 17.23. Kernel modules
- 18. FreeBSD
- 19. RTOS
- 20. Xen
- 21. U-Boot
- 22. Emulators
- 23. QEMU
- 23.1. Introduction to QEMU
- 23.2. Binary translation
- 23.3. Disk persistency
- 23.4. gem5 qcow2
- 23.5. Snapshot
- 23.6. Device models
- 23.7. QEMU monitor
- 23.8. Debug the emulator
- 23.9. Tracing
- 23.10. QEMU GUI is unresponsive
- 24. gem5
- 24.1. gem5 vs QEMU
- 24.2. gem5 run benchmark
- 24.3. gem5 system parameters
- 24.4. gem5 kernel command line parameters
- 24.5. gem5 GDB step debug
- 24.6. gem5 checkpoint
- 24.7. Pass extra options to gem5
- 24.8. m5ops
- 24.9. gem5 arm Linux kernel patches
- 24.10. m5out directory
- 24.11. m5term
- 24.12. gem5 Python scripts without rebuild
- 24.13. gem5 fs_bigLITTLE
- 24.14. gem5 in-tree tests
- 24.15. gem5 simulate() limit reached
- 24.16. gem5 build options
- 24.17. gem5 CPU types
- 24.18. gem5 ARM platforms
- 24.19. gem5 upstream images
- 24.20. gem5 bootloaders
- 24.21. gem5 memory system
- 24.22. gem5 internals
The most important functionality of this repository is the --china option, sample usage:
python3 -m venv .venv
. .venv/bin/activate
./setup
./run --china > index.html
firefox index.html
The secondary systems programming functionality is described on the sections below starting from Getting started.

Each child section describes a possible different setup for this repo.
If you don’t know which one to go for, start with QEMU Buildroot setup getting started.
Design goals of this project are documented at: [design-goals].
Being the hardcore person who fully understands an important complex system such as a computer, it does have a nice ring to it doesn’t it?
But before you dedicate your life to this nonsense, do consider the following points:
-
almost all contributions to the kernel are done by large companies, and if you are not an employee in one of them, you are likely not going to be able to do much.
This can be inferred by the fact that the
devices/directory is by far the largest in the kernel.The kernel is of course just an interface to hardware, and the hardware developers start developing their kernel stuff even before specs are publicly released, both to help with hardware development and to have things working when the announcement is made.
Furthermore, I believe that there are in-tree devices which have never been properly publicly documented. Linus is of course fine with this, since code == documentation for him, but it is not as easy for mere mortals.
There are some less hardware bound higher level layers in the kernel which might not require being in a hardware company, and a few people must be living off it.
But of course, those are heavily motivated by the underlying hardware characteristics, and it is very likely that most of the people working there were previously at a hardware company.
In that sense, therefore, the kernel is not as open as one might want to believe.
Of course, if there is some super useful and undocumented hardware that is just waiting there to be reverse engineered, then that’s a much juicier target :-)
-
it is impossible to become rich with this knowledge.
This is partly implied by the fact that you need to be in a big company to make useful low level things, and therefore you will only be a tiny cog in the engine.
The key problem is that the entry cost of hardware design is just too insanely high for startups in general.
-
Is learning this the most useful thing that you think can do for society?
Or are you just learning it for job security and having a nice sounding title?
I’m not a huge fan of the person, but I think Jobs said it right: https://www.youtube.com/watch?v=FF-tKLISfPE
First determine the useful goal, and then backtrack down to the most efficient thing you can do to reach it.
-
there are two things that sadden me compared to physics-based engineering:
-
you will never become eternally famous. All tech disappears sooner or later, while laws of nature, at least as useful approximations, stay unchanged.
-
every problem that you face is caused by imperfections introduced by other humans.
It is much easier to accept limitations of physics, and even natural selection in biology, which are not produced by a sentient being (?).
Physics-based engineering, just like low level hardware, is of course completely closed source however, since wrestling against the laws of physics is about the most expensive thing humans can do, so there’s also a downside to it.
-
Are you fine with those points, and ready to continue wasting your life with this crap?
Good. In that case, read on, and let’s have some fun together ;-)
Related: [soft-topics].
This setup has been tested on Ubuntu 20.04.
The Buildroot build is already broken on Ubuntu 21.04 onwards: #155, so just do this from inside a 20.04 Docker instead as shown in the Docker host setup setup. We could fix the build on Ubuntu 21.04, but it will break again inevitably later on.
For other host operating systems see: [supported-hosts].
Reserve 12Gb of disk and run:
git clone https://github.com/cirosantilli/linux-kernel-module-cheat
cd linux-kernel-module-cheat
python3 -m venv .venv
. .venv/bin/activate
./setup
./build --download-dependencies qemu-buildroot
./run
You don’t need to clone recursively even though we have .git submodules: download-dependencies fetches just the submodules that you need for this build to save time.
If something goes wrong, see: [common-build-issues] and use our issue tracker: https://github.com/cirosantilli/linux-kernel-module-cheat/issues
The initial build will take a while (30 minutes to 2 hours) to clone and build, see [benchmark-builds] for more details.
If you don’t want to wait, you could also try the following faster but much more limited methods:
but you will soon find that they are simply not enough if you anywhere near serious about systems programming.
After ./run, QEMU opens up leaving you in the /lkmc/ directory, and you can start playing with the kernel modules inside the simulated system:
insmod hello.ko
insmod hello2.ko
rmmod hello
rmmod hello2
This should print to the screen:
hello init
hello2 init
hello cleanup
hello2 cleanup
which are printk messages from init and cleanup methods of those modules.
Sources:
Quit QEMU with:
Ctrl-A X
See also: Section 14.1.1, “Quit QEMU from text mode”.
All available modules can be found in the kernel_modules directory.
It is super easy to build for different CPU architectures, just use the --arch option:
python3 -m venv .venv
. .venv/bin/activate
./setup
./build --arch aarch64 --download-dependencies qemu-buildroot
./run --arch aarch64
To avoid typing --arch aarch64 many times, you can set the default arch as explained at: [default-command-line-arguments]
I now urge you to read the following sections which contain widely applicable information:
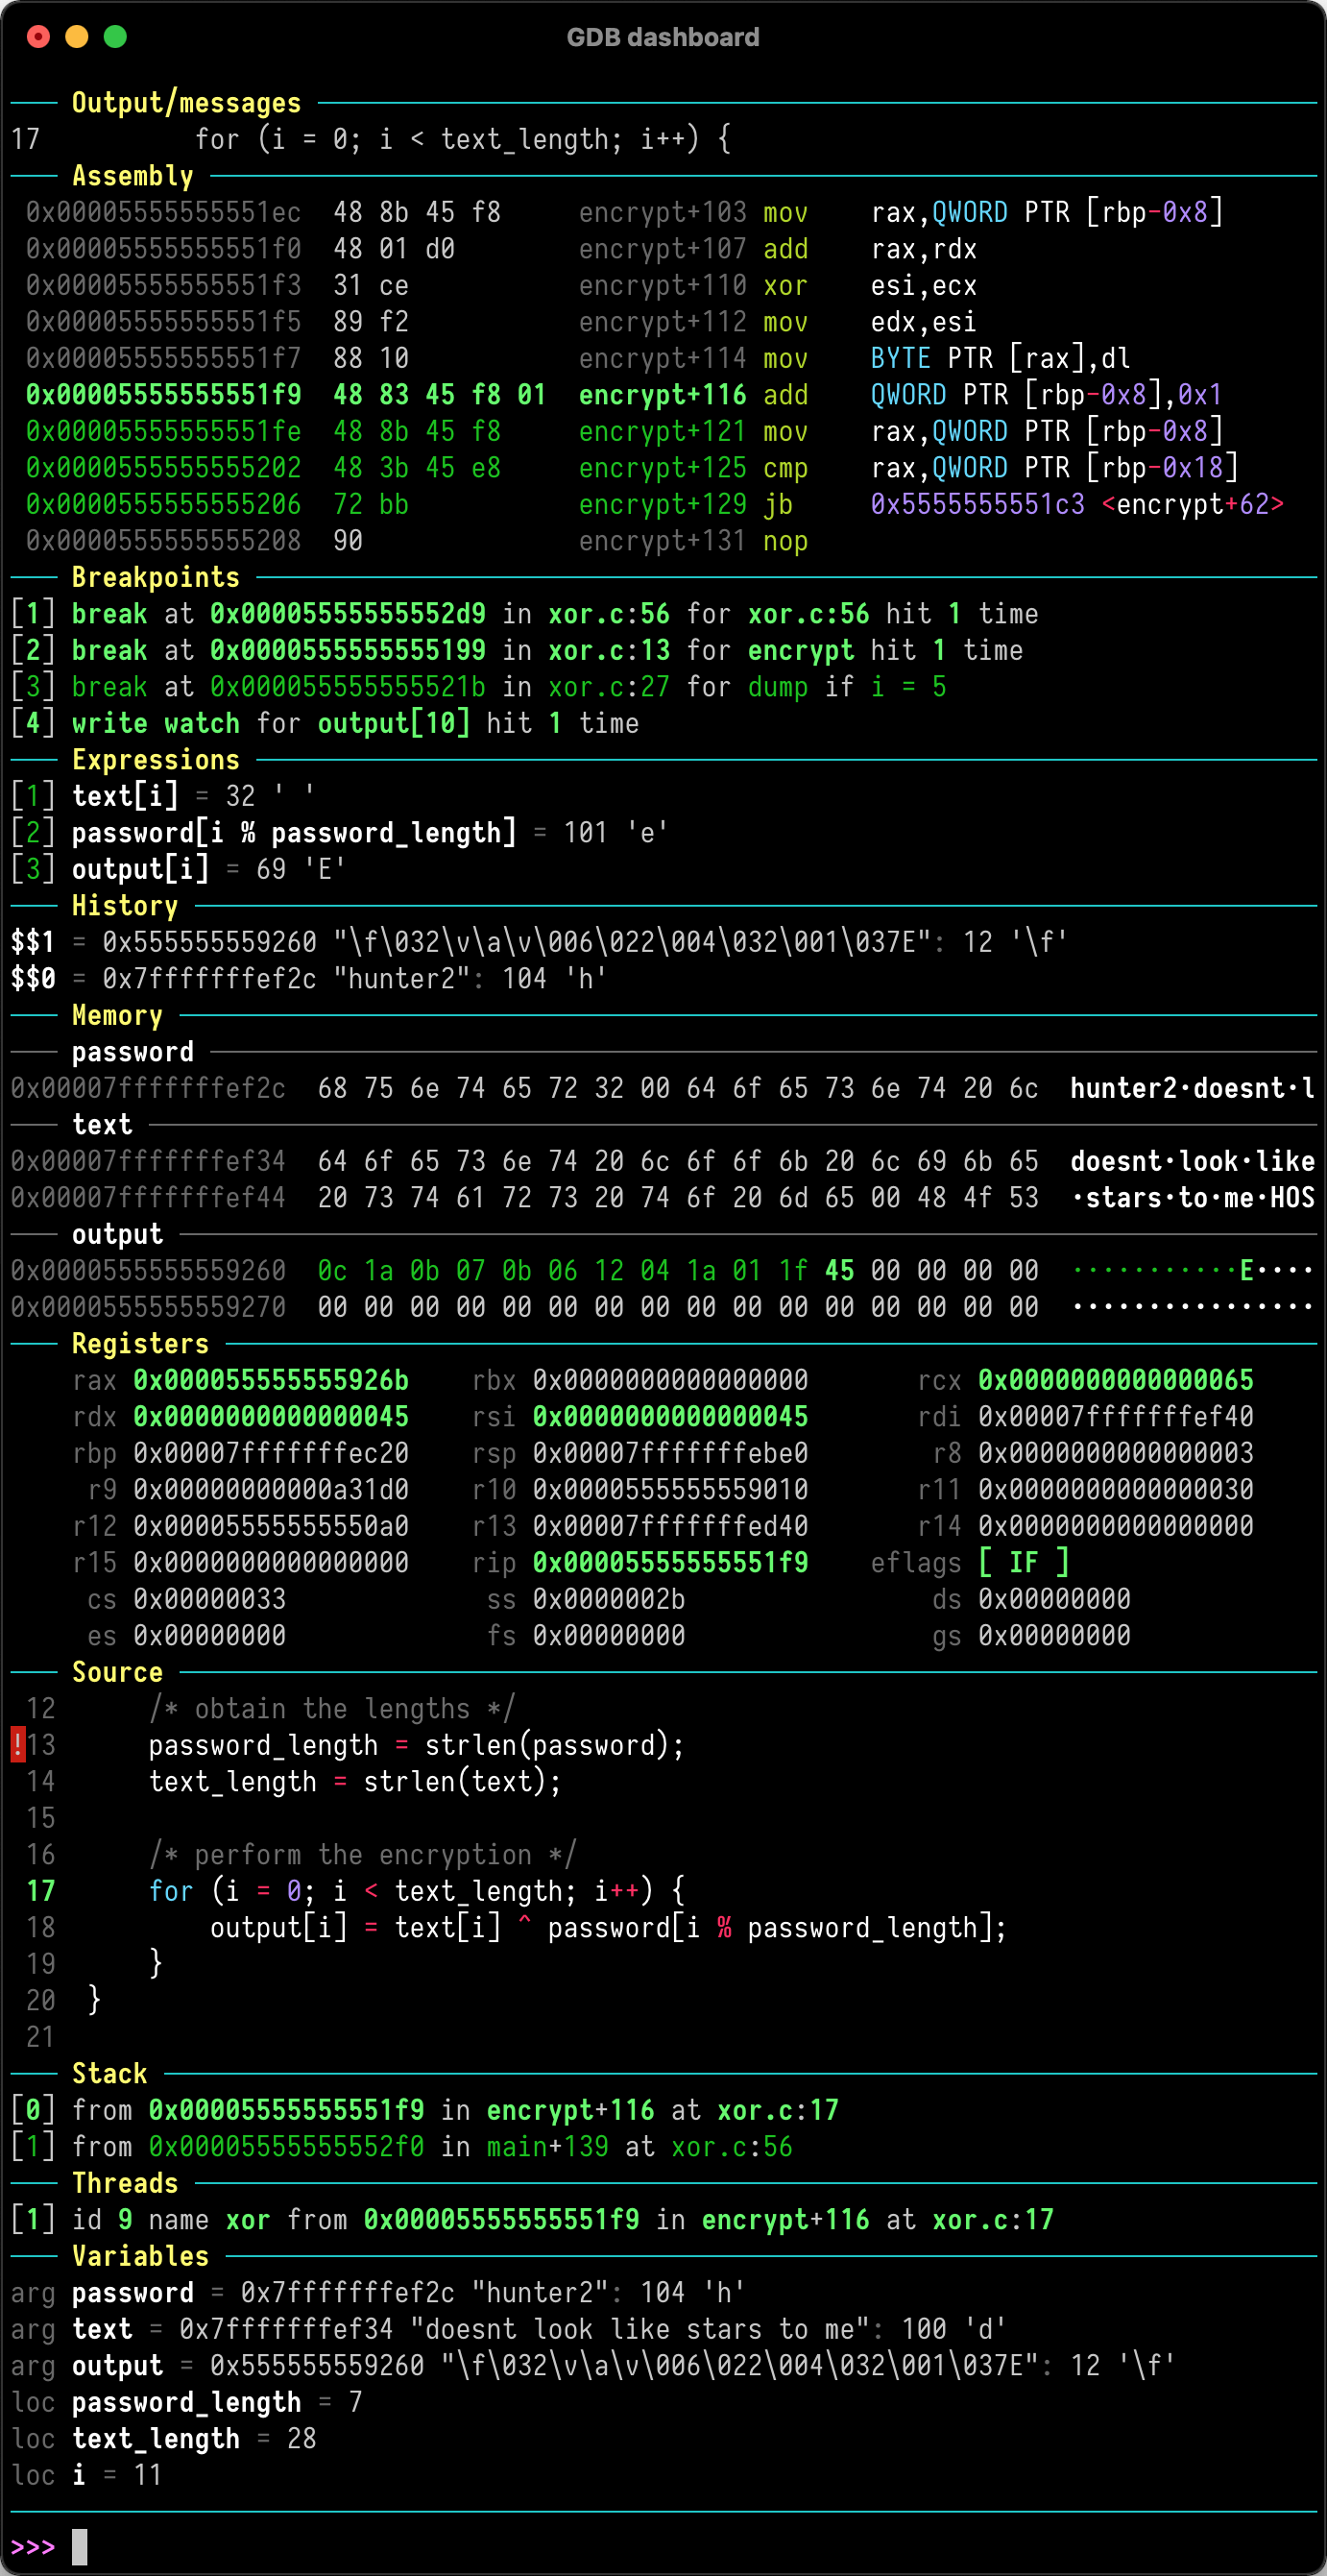
Once you use GDB step debug and tmux, your terminal will look a bit like this:
[    1.451857] input: AT Translated Set 2 keyboard as /devices/platform/i8042/s1│loading @0xffffffffc0000000: ../kernel_modules-1.0//timer.ko
[    1.454310] ledtrig-cpu: registered to indicate activity on CPUs             │(gdb) b lkmc_timer_callback
[    1.455621] usbcore: registered new interface driver usbhid                  │Breakpoint 1 at 0xffffffffc0000000: file /home/ciro/bak/git/linux-kernel-module
[    1.455811] usbhid: USB HID core driver                                      │-cheat/out/x86_64/buildroot/build/kernel_modules-1.0/./timer.c, line 28.
[    1.462044] NET: Registered protocol family 10                               │(gdb) c
[    1.467911] Segment Routing with IPv6                                        │Continuing.
[    1.468407] sit: IPv6, IPv4 and MPLS over IPv4 tunneling driver              │
[    1.470859] NET: Registered protocol family 17                               │Breakpoint 1, lkmc_timer_callback (data=0xffffffffc0002000 <mytimer>)
[    1.472017] 9pnet: Installing 9P2000 support                                 │    at /linux-kernel-module-cheat//out/x86_64/buildroot/build/
[    1.475461] sched_clock: Marking stable (1473574872, 0)->(1554017593, -80442)│kernel_modules-1.0/./timer.c:28
[    1.479419] ALSA device list:                                                │28      {
[    1.479567]   No soundcards found.                                           │(gdb) c
[    1.619187] ata2.00: ATAPI: QEMU DVD-ROM, 2.5+, max UDMA/100                 │Continuing.
[    1.622954] ata2.00: configured for MWDMA2                                   │
[    1.644048] scsi 1:0:0:0: CD-ROM            QEMU     QEMU DVD-ROM     2.5+ P5│Breakpoint 1, lkmc_timer_callback (data=0xffffffffc0002000 <mytimer>)
[    1.741966] tsc: Refined TSC clocksource calibration: 2904.010 MHz           │    at /linux-kernel-module-cheat//out/x86_64/buildroot/build/
[    1.742796] clocksource: tsc: mask: 0xffffffffffffffff max_cycles: 0x29dc0f4s│kernel_modules-1.0/./timer.c:28
[    1.743648] clocksource: Switched to clocksource tsc                         │28      {
[    2.072945] input: ImExPS/2 Generic Explorer Mouse as /devices/platform/i8043│(gdb) bt
[    2.078641] EXT4-fs (vda): couldn't mount as ext3 due to feature incompatibis│#0  lkmc_timer_callback (data=0xffffffffc0002000 <mytimer>)
[    2.080350] EXT4-fs (vda): mounting ext2 file system using the ext4 subsystem│    at /linux-kernel-module-cheat//out/x86_64/buildroot/build/
[    2.088978] EXT4-fs (vda): mounted filesystem without journal. Opts: (null)  │kernel_modules-1.0/./timer.c:28
[    2.089872] VFS: Mounted root (ext2 filesystem) readonly on device 254:0.    │#1  0xffffffff810ab494 in call_timer_fn (timer=0xffffffffc0002000 <mytimer>,
[    2.097168] devtmpfs: mounted                                                │    fn=0xffffffffc0000000 <lkmc_timer_callback>) at kernel/time/timer.c:1326
[    2.126472] Freeing unused kernel memory: 1264K                              │#2  0xffffffff810ab71f in expire_timers (head=<optimized out>,
[    2.126706] Write protecting the kernel read-only data: 16384k               │    base=<optimized out>) at kernel/time/timer.c:1363
[    2.129388] Freeing unused kernel memory: 2024K                              │#3  __run_timers (base=<optimized out>) at kernel/time/timer.c:1666
[    2.139370] Freeing unused kernel memory: 1284K                              │#4  run_timer_softirq (h=<optimized out>) at kernel/time/timer.c:1692
[    2.246231] EXT4-fs (vda): warning: mounting unchecked fs, running e2fsck isd│#5  0xffffffff81a000cc in __do_softirq () at kernel/softirq.c:285
[    2.259574] EXT4-fs (vda): re-mounted. Opts: block_validity,barrier,user_xatr│#6  0xffffffff810577cc in invoke_softirq () at kernel/softirq.c:365
hello S98                                                                       │#7  irq_exit () at kernel/softirq.c:405
                                                                                │#8  0xffffffff818021ba in exiting_irq () at ./arch/x86/include/asm/apic.h:541
Apr 15 23:59:23 login[49]: root login on 'console'                              │#9  smp_apic_timer_interrupt (regs=<optimized out>)
hello /root/.profile                                                            │    at arch/x86/kernel/apic/apic.c:1052
# insmod /timer.ko                                                              │#10 0xffffffff8180190f in apic_timer_interrupt ()
[    6.791945] timer: loading out-of-tree module taints kernel.                 │    at arch/x86/entry/entry_64.S:857
# [    7.821621] 4294894248                                                     │#11 0xffffffff82003df8 in init_thread_union ()
[    8.851385] 4294894504                                                       │#12 0x0000000000000000 in ?? ()
                                                                                │(gdb)
Besides a seamless initial build, this project also aims to make it effortless to modify and rebuild several major components of the system, to serve as an awesome development setup.
Let’s hack up the Linux kernel entry point, which is an easy place to start.
Open the file:
vim submodules/linux/init/main.c
and find the start_kernel function, then add there a:
pr_info("I'VE HACKED THE LINUX KERNEL!!!");
Then rebuild the Linux kernel, quit QEMU and reboot the modified kernel:
./build-linux
./run
and, surely enough, your message has appeared at the beginning of the boot:
<6>[ 0.000000] I'VE HACKED THE LINUX KERNEL!!!
So you are now officially a Linux kernel hacker, way to go!
We could have used just build to rebuild the kernel as in the initial build instead of build-linux, but building just the required individual components is preferred during development:
-
saves a few seconds from parsing Make scripts and reading timestamps
-
makes it easier to understand what is being done in more detail
-
allows passing more specific options to customize the build
The build script is just a lightweight wrapper that calls the smaller build scripts, and you can see what ./build does with:
./build --dry-run
see also: Dry run to get commands for your project.
When you reach difficulties, QEMU makes it possible to easily GDB step debug the Linux kernel source code, see: Section 3, “GDB step debug”.
Edit kernel_modules/hello.c to contain:
pr_info("hello init hacked\n");
and rebuild with:
./build-modules
Now there are two ways to test it out: the fast way, and the safe way.
The fast way is, without quitting or rebooting QEMU, just directly re-insert the module with:
insmod /mnt/9p/out_rootfs_overlay/lkmc/hello.ko
and the new pr_info message should now show on the terminal at the end of the boot.
If you are simultaneously developing the test script and the kernel module, some smart test scripts should take the kernel module as first argument so you can directly run:
/mnt/9p/rootfs_overlay/lkmc/scull.sh /mnt/9p/out_rootfs_overlay/lkmc/scull.ko
and it will pick up both the test script and the kernel module from host.
This works because we have a 9P mount there setup by default, which mounts the host directory that contains the build outputs on the guest:
ls "$(./getvar out_rootfs_overlay_dir)"
The fast method is slightly risky because your previously insmodded buggy kernel module attempt might have corrupted the kernel memory, which could affect future runs.
Such failures are however unlikely, and you should be fine if you don’t see anything weird happening.
The safe way is to fist quit QEMU, rebuild the modules put them somewhere QEMU can see and then reboot. So you could either place it in the root filesystem:
./build-modules
./build-buildroot
./run --eval-after 'insmod hello.ko'
where ./build-buildroot is required after ./build-modules because it re-generates the root filesystem with the modules that we compiled at ./build-modules.
Alternatively, for a slightly faster turnaround just leave it on 9p and use it from there:
./build-modules
./run --eval-after 'insmod /mnt/9p/out_rootfs_overlay/lkmc/hello.ko'
You can see that ./build does that as well, by running:
./build --dry-run
See also: Dry run to get commands for your project.
--eval-after is optional: you could just type insmod hello.ko in the terminal, but this makes it run automatically at the end of boot, and then drops you into a shell.
If the guest and host are the same arch, typically x86_64, you can speed up boot further with KVM:
./run --kvm
All of this put together makes the safe procedure acceptably fast for regular development as well.
It is also easy to GDB step debug kernel modules with our setup, see: Section 3.4, “GDB step debug kernel module”.
We use glibc as our default libc now, and it is tracked as an unmodified submodule at submodules/glibc, at the exact same version that Buildroot has it, which can be found at: package/glibc/glibc.mk. Buildroot 2018.05 applies no patches.
Let’s hack up the puts function:
./build-buildroot -- glibc-reconfigure
with the patch:
diff --git a/libio/ioputs.c b/libio/ioputs.c
index 706b20b492..23185948f3 100644
--- a/libio/ioputs.c
+++ b/libio/ioputs.c
@@ -38,8 +38,9 @@ _IO_puts (const char *str)
   if ((_IO_vtable_offset (_IO_stdout) != 0
        || _IO_fwide (_IO_stdout, -1) == -1)
       && _IO_sputn (_IO_stdout, str, len) == len
+      && _IO_sputn (_IO_stdout, " hacked", 7) == 7
       && _IO_putc_unlocked ('\n', _IO_stdout) != EOF)
-    result = MIN (INT_MAX, len + 1);
+    result = MIN (INT_MAX, len + 1 + 7);

   _IO_release_lock (_IO_stdout);
   return result;
And then:
./run --eval-after './c/hello.out'
outputs:
hello hacked
Lol!
We can also test our hacked glibc on User mode simulation with:
./run --userland userland/c/hello.c
I just noticed that this is actually a good way to develop glibc for other archs.
In this example, we got away without recompiling the userland program because we made a change that did not affect the glibc ABI, see this answer for an introduction to ABI stability: https://stackoverflow.com/questions/2171177/what-is-an-application-binary-interface-abi/54967743#54967743
Note that for arch agnostic features that don’t rely on bleeding kernel changes that you host doesn’t yet have, you can develop glibc natively as explained at:
-
https://stackoverflow.com/questions/2856438/how-can-i-link-to-a-specific-glibc-version/52550158#52550158 more focus on symbol versioning, but no one knows how to do it, so I answered
Tested on a30ed0f047523ff2368d421ee2cce0800682c44e + 1.
Have you ever felt that a single inc instruction was not enough? Really? Me too!
So let’s hack the [gnu-gas-assembler], which is part of GNU Binutils, to add a new shiny version of inc called… myinc!
GCC uses GNU GAS as its backend, so we will test out new mnemonic with an [gcc-inline-assembly] test program: userland/arch/x86_64/binutils_hack.c, which is just a copy of userland/arch/x86_64/binutils_nohack.c but with myinc instead of inc.
The inline assembly is disabled with an #ifdef, so first modify the source to enable that.
Then, try to build userland:
./build-userland
and watch it fail with:
binutils_hack.c:8: Error: no such instruction: `myinc %rax'
Now, edit the file
vim submodules/binutils-gdb/opcodes/i386-tbl.h
and add a copy of the "inc" instruction just next to it, but with the new name "myinc":
diff --git a/opcodes/i386-tbl.h b/opcodes/i386-tbl.h
index af583ce578..3cc341f303 100644
--- a/opcodes/i386-tbl.h
+++ b/opcodes/i386-tbl.h
@@ -1502,6 +1502,19 @@ const insn_template i386_optab[] =
     { { { 1, 1, 1, 1, 0, 0, 0, 0, 0, 0, 0, 0, 0, 0, 0, 0, 0, 0, 0, 0,
 	  0, 0, 1, 1, 1, 1, 0, 0, 0, 1, 0, 0, 0, 0, 0, 0, 1, 1, 1, 0,
 	  1, 0, 0, 0, 0, 1, 0, 0, 0, 0, 0 } } } },
+  { "myinc", 1, 0xfe, 0x0, 1,
+    { { 0, 0, 0, 0, 0, 0, 0, 0, 0, 0, 0, 0, 0, 0, 0, 0, 0, 0, 0, 0,
+        0, 0, 0, 0, 0, 0, 0, 0, 0, 0, 0, 0, 0, 0, 0, 0, 0, 0, 0, 0,
+        0, 0, 0, 0, 0, 0, 0, 0, 0, 0, 0, 0, 0, 0, 0, 0, 0, 0, 0, 0,
+        0, 0, 0, 0, 0, 0, 0, 0, 0, 0, 0, 0, 0, 0, 0, 0, 0, 0, 0, 0,
+        0, 0, 0, 0, 0, 0, 0, 0, 0, 0, 0, 0, 0, 0, 0, 0 } },
+    { 0, 1, 0, 1, 0, 0, 0, 0, 0, 0, 0, 0, 0, 0, 0, 0, 0, 0, 0, 0,
+      0, 1, 0, 1, 0, 0, 0, 0, 1, 0, 0, 0, 1, 0, 0, 0, 0, 0, 0, 0,
+      0, 0, 0, 0, 0, 0, 0, 0, 0, 0, 0, 0, 0, 0, 0, 0, 0, 0, 0, 0,
+      0, 0, 0, 0, 0, 0 },
+    { { { 1, 1, 1, 1, 0, 0, 0, 0, 0, 0, 0, 0, 0, 0, 0, 0, 0, 0, 0, 0,
+	  0, 0, 1, 1, 1, 1, 0, 0, 0, 1, 0, 0, 0, 0, 0, 0, 1, 1, 1, 0,
+	  1, 0, 0, 0, 0, 1, 0, 0, 0, 0, 0 } } } },
   { "sub", 2, 0x28, None, 1,
     { { 0, 0, 0, 0, 0, 0, 0, 0, 0, 0, 0, 0, 0, 0, 0, 0, 0, 0, 0, 0,
         0, 0, 0, 0, 0, 0, 0, 0, 0, 0, 0, 0, 0, 0, 0, 0, 0, 0, 0, 0,
Finally, rebuild Binutils, userland and test our program with User mode simulation:
./build-buildroot -- host-binutils-rebuild
./build-userland --static
./run --static --userland userland/arch/x86_64/binutils_hack.c
and we se that myinc worked since the assert did not fail!
Tested on b60784d59bee993bf0de5cde6c6380dd69420dda + 1.
OK, now time to hack GCC.
For convenience, let’s use the User mode simulation.
If we run the program userland/c/gcc_hack.c:
./build-userland --static
./run --static --userland userland/c/gcc_hack.c
it produces the normal boring output:
i = 2
j = 0
So how about we swap ++ and -- to make things more fun?
Open the file:
vim submodules/gcc/gcc/c/c-parser.c
and find the function c_parser_postfix_expression_after_primary.
In that function, swap case CPP_PLUS_PLUS and case CPP_MINUS_MINUS:
diff --git a/gcc/c/c-parser.c b/gcc/c/c-parser.c
index 101afb8e35f..89535d1759a 100644
--- a/gcc/c/c-parser.c
+++ b/gcc/c/c-parser.c
@@ -8529,7 +8529,7 @@ c_parser_postfix_expression_after_primary (c_parser *parser,
 		expr.original_type = DECL_BIT_FIELD_TYPE (field);
 	    }
 	  break;
-	case CPP_PLUS_PLUS:
+	case CPP_MINUS_MINUS:
 	  /* Postincrement.  */
 	  start = expr.get_start ();
 	  finish = c_parser_peek_token (parser)->get_finish ();
@@ -8548,7 +8548,7 @@ c_parser_postfix_expression_after_primary (c_parser *parser,
 	  expr.original_code = ERROR_MARK;
 	  expr.original_type = NULL;
 	  break;
-	case CPP_MINUS_MINUS:
+	case CPP_PLUS_PLUS:
 	  /* Postdecrement.  */
 	  start = expr.get_start ();
 	  finish = c_parser_peek_token (parser)->get_finish ();
Now rebuild GCC, the program and re-run it:
./build-buildroot -- host-gcc-final-rebuild
./build-userland --static
./run --static --userland userland/c/gcc_hack.c
and the new ouptut is now:
i = 2
j = 0
We need to use the ugly -final thing because GCC has to packages in Buildroot, -initial and -final: https://stackoverflow.com/questions/54992977/how-to-select-an-override-srcdir-source-for-gcc-when-building-buildroot No one is able to example precisely with a minimal example why this is required:
What QEMU and Buildroot are:
This is our reference setup, and the best supported one, use it unless you have good reason not to.
It was historically the first one we did, and all sections have been tested with this setup unless explicitly noted.
Read the following sections for further introductory material:
One of the major features of this repository is that we try to support the --dry-run option really well for all scripts.
This option, as the name suggests, outputs the external commands that would be run (or more precisely: equivalent commands), without actually running them.
This allows you to just clone this repository and get full working commands to integrate into your project, without having to build or use this setup further!
For example, we can obtain a QEMU run for the file userland/c/hello.c in User mode simulation by adding --dry-run to the normal command:
./run --dry-run --userland userland/c/hello.c
which as of LKMC a18f28e263c91362519ef550150b5c9d75fa3679 + 1 outputs:
+ /path/to/linux-kernel-module-cheat/out/qemu/default/opt/x86_64-linux-user/qemu-x86_64 \
  -L /path/to/linux-kernel-module-cheat/out/buildroot/build/default/x86_64/target \
  -r 5.2.1 \
  -seed 0 \
  -trace enable=load_file,file=/path/to/linux-kernel-module-cheat/out/run/qemu/x86_64/0/trace.bin \
  -cpu max \
  /path/to/linux-kernel-module-cheat/out/userland/default/x86_64/c/hello.out \
;
So observe that the command contains:
-
+: sign to differentiate it from program stdout, much like bash-xoutput. This is not a valid part of the generated Bash command however. -
the actual command nicely, indented and with arguments broken one per line, but with continuing backslashes so you can just copy paste into a terminal
For setups that don’t support the newline e.g. Eclipse debugging, you can turn them off with
--print-cmd-oneline -
;: both a valid part of the Bash command, and a visual mark the end of the command
For the specific case of running emulators such as QEMU, the last command is also automatically placed in a file for your convenience and later inspection:
cat "$(./getvar run_dir)/run.sh"
Since we need this so often, the last run command is also stored for convenience at:
cat out/run.sh
although this won’t of course work well for [simultaneous-runs].
Furthermore, --dry-run also automatically specifies, in valid Bash shell syntax:
-
environment variables used to run the command with syntax
+ ENV_VAR_1=abc ENV_VAR_2=def ./some/command -
change in working directory with
+ cd /some/new/path && ./some/command
This setup is like the QEMU Buildroot setup, but it uses gem5 instead of QEMU as a system simulator.
QEMU tries to run as fast as possible and give correct results at the end, but it does not tell us how many CPU cycles it takes to do something, just the number of instructions it ran. This kind of simulation is known as functional simulation.
The number of instructions executed is a very poor estimator of performance because in modern computers, a lot of time is spent waiting for memory requests rather than the instructions themselves.
gem5 on the other hand, can simulate the system in more detail than QEMU, including:
-
simplified CPU pipeline
-
caches
-
DRAM timing
and can therefore be used to estimate system performance, see: Section 24.2, “gem5 run benchmark” for an example.
The downside of gem5 much slower than QEMU because of the greater simulation detail.
See gem5 vs QEMU for a more thorough comparison.
For the most part, if you just add the --emulator gem5 option or *-gem5 suffix to all commands and everything should magically work.
If you haven’t built Buildroot yet for QEMU Buildroot setup, you can build from the beginning with:
python3 -m venv .venv
. .venv/bin/activate
./setup
./build --download-dependencies gem5-buildroot
./run --emulator gem5
If you have already built previously, don’t be afraid: gem5 and QEMU use almost the same root filesystem and kernel, so ./build will be fast.
Remember that the gem5 boot is considerably slower than QEMU since the simulation is more detailed.
If you have a relatively new GCC version and the gem5 build fails on your machine, see: [gem5-build-broken-on-recent-compiler-version].
To get a terminal, either open a new shell and run:
./gem5-shell
You can quit the shell without killing gem5 by typing tilde followed by a period:
~.
If you are inside tmux, which I highly recommend, you can both run gem5 stdout and open the guest terminal on a split window with:
./run --emulator gem5 --tmux
See also: Section 3.3.1, “tmux gem5”.
At the end of boot, it might not be very clear that you have the shell since some printk messages may appear in front of the prompt like this:
# <6>[    1.215329] clocksource: tsc: mask: 0xffffffffffffffff max_cycles: 0x1cd486fa865, max_idle_ns: 440795259574 ns
<6>[    1.215351] clocksource: Switched to clocksource tsc
but if you look closely, the PS1 prompt marker # is there already, just hit enter and a clear prompt line will appear.
If you forgot to open the shell and gem5 exit, you can inspect the terminal output post-mortem at:
less "$(./getvar --emulator gem5 m5out_dir)/system.pc.com_1.device"
More gem5 information is present at: Section 24, “gem5”
Good next steps are:
-
gem5 run benchmark: how to run a benchmark in gem5 full system, including how to boot Linux, checkpoint and restore to skip the boot on a fast CPU
-
m5out directory: understand the output files that gem5 produces, which contain information about your run
-
m5ops: magic guest instructions used to control gem5
-
[add-new-files-to-the-buildroot-image]: how to add your own files to the image if you have a benchmark that we don’t already support out of the box (also send a pull request!)
This repository has been tested inside clean Docker containers.
This is a good option if you are on a Linux host, but the native setup failed due to your weird host distribution, and you have better things to do with your life than to debug it. See also: [supported-hosts].
For example, to do a QEMU Buildroot setup inside Docker, run:
sudo apt-get install docker
python3 -m venv .venv
. .venv/bin/activate
./setup
./run-docker create && \
./run-docker sh -- ./build --download-dependencies qemu-buildroot
./run-docker
You are now left inside a shell in the Docker! From there, just run as usual:
./run
The host git top level directory is mounted inside the guest with a Docker volume, which means for example that you can use your host’s GUI text editor directly on the files. Just don’t forget that if you nuke that directory on the guest, then it gets nuked on the host as well!
Command breakdown:
-
./run-docker create: create the image and container.Needed only the very first time you use Docker, or if you run
./run-docker DESTROYto restart for scratch, or save some disk space.The image and container name is
lkmc. The container shows under:docker ps -a
and the image shows under:
docker images
-
./run-docker: open a shell on the container.If it has not been started previously, start it. This can also be done explicitly with:
./run-docker start
Quit the shell as usual with
Ctrl-DThis can be called multiple times from different host terminals to open multiple shells.
-
./run-docker stop: stop the container.This might save a bit of CPU and RAM once you stop working on this project, but it should not be a lot.
-
./run-docker DESTROY: delete the container and image.This doesn’t really clean the build, since we mount the guest’s working directory on the host git top-level, so you basically just got rid of the
apt-getinstalls.To actually delete the Docker build, run on host:
# sudo rm -rf out.docker
To use GDB step debug from inside Docker, you need a second shell inside the container. You can either do that from another shell with:
./run-docker
or even better, by starting a tmux session inside the container. We install tmux by default in the container.
You can also start a second shell and run a command in it at the same time with:
./run-docker sh -- ./run-gdb start_kernel
To use QEMU graphic mode from Docker, run:
./run --graphic --vnc
and then on host:
sudo apt-get install vinagre
./vnc
TODO make files created inside Docker be owned by the current user in host instead of root:
We may need to improve this, but this is working for now:
./run-docker sh -- bash -c './build-modules && ./run --exec-after "insmod /mnt/9p/out_rootfs_overlay/lkmc/hello.ko;./linux/poweroff.out"'
This setup uses prebuilt binaries that we upload to GitHub from time to time.
We don’t currently provide a full prebuilt because it would be too big to host freely, notably because of the cross toolchain.
Our prebuilts currently include:
-
QEMU Buildroot setup binaries
-
Linux kernel
-
root filesystem
-
-
Baremetal setup binaries for QEMU
For more details, see our our release procedure.
Advantage of this setup: saves time and disk space on the initial install, which is expensive in largely due to building the toolchain.
The limitations are severe however:
-
can’t GDB step debug the kernel, since the source and cross toolchain with GDB are not available. Buildroot cannot easily use a host toolchain: [prebuilt-toolchain].
Maybe we could work around this by just downloading the kernel source somehow, and using a host prebuilt GDB, but we felt that it would be too messy and unreliable.
-
you won’t get the latest version of this repository. Our [travis] attempt to automate builds failed, and storing a release for every commit would likely make GitHub mad at us anyway.
-
gem5 is not currently supported. The major blocking point is how to avoid distributing the kernel images twice: once for gem5 which uses
vmlinux, and once for QEMU which usesarch/*images, see also:
This setup might be good enough for those developing simulators, as that requires less image modification. But once again, if you are serious about this, why not just let your computer build the full featured setup while you take a coffee or a nap? :-)
Checkout to the latest tag and use the Ubuntu packaged QEMU to boot Linux:
sudo apt-get install qemu-system-x86
git clone https://github.com/cirosantilli/linux-kernel-module-cheat
cd linux-kernel-module-cheat
git checkout "$(git rev-list --tags --max-count=1)"
./release-download-latest
unzip lkmc-*.zip
./run --qemu-which host
You have to checkout to the latest tag to ensure that the scripts match the release format: https://stackoverflow.com/questions/1404796/how-to-get-the-latest-tag-name-in-current-branch-in-git
This is known not to work for aarch64 on an Ubuntu 16.04 host with QEMU 2.5.0, presumably because QEMU is too old, the terminal does not show any output. I haven’t investigated why.
Or to run a baremetal example instead:
./run \
  --arch aarch64 \
  --baremetal userland/c/hello.c \
  --qemu-which host \
;
Be saner and use our custom built QEMU instead:
python3 -m venv .venv
. .venv/bin/activate
./setup
./build --download-dependencies qemu
./run
To build the kernel modules as in Your first kernel module hack do:
git submodule update --depth 1 --init --recursive "$(./getvar linux_source_dir)"
./build-linux --no-modules-install -- modules_prepare
./build-modules --gcc-which host
./run
TODO: for now the only way to test those modules out without building Buildroot is with 9p, since we currently rely on Buildroot to manipulate the root filesystem.
Command explanation:
-
modules_preparedoes the minimal build procedure required on the kernel for us to be able to compile the kernel modules, and is way faster than doing a full kernel build. A full kernel build would also work however. -
--gcc-which hostselects your host Ubuntu packaged GCC, since you don’t have the Buildroot toolchain -
--no-modules-installis required otherwise themake modules_installtarget we run by default fails, since the kernel wasn’t built
To modify the Linux kernel, build and use it as usual:
git submodule update --depth 1 --init --recursive "$(./getvar linux_source_dir)"
./build-linux
./run
THIS IS DANGEROUS (AND FUN), YOU HAVE BEEN WARNED
This method runs the kernel modules directly on your host computer without a VM, and saves you the compilation time and disk usage of the virtual machine method.
It has however severe limitations:
-
can’t control which kernel version and build options to use. So some of the modules will likely not compile because of kernel API changes, since the Linux kernel does not have a stable kernel module API.
-
bugs can easily break you system. E.g.:
-
segfaults can trivially lead to a kernel crash, and require a reboot
-
your disk could get erased. Yes, this can also happen with
sudofrom userland. But you should not usesudowhen developing newbie programs. And for the kernel you don’t have the choice not to usesudo. -
even more subtle system corruption such as not being able to rmmod
-
-
can’t control which hardware is used, notably the CPU architecture
-
can’t step debug it with GDB easily. The alternatives are JTAG or KGDB, but those are less reliable, and require extra hardware.
Still interested?
./build-modules --host
Compilation will likely fail for some modules because of kernel or toolchain differences that we can’t control on the host.
The best workaround is to compile just your modules with:
./build-modules --host -- hello hello2
which is equivalent to:
./build-modules \
  --gcc-which host \
  --host \
  -- \
  kernel_modules/hello.c \
  kernel_modules/hello2.c \
;
Or just remove the .c extension from the failing files and try again:
cd "$(./getvar kernel_modules_source_dir)"
mv broken.c broken.c~
Once you manage to compile, and have come to terms with the fact that this may blow up your host, try it out with:
cd "$(./getvar kernel_modules_build_host_subdir)"
sudo insmod hello.ko

# Our module is there.
sudo lsmod | grep hello

# Last message should be: hello init
dmesg -T

sudo rmmod hello

# Last message should be: hello exit
dmesg -T

# Not present anymore
sudo lsmod | grep hello
Minimal host build system example:
cd hello_host_kernel_module
make
sudo insmod hello.ko
dmesg
sudo rmmod hello.ko
dmesg
In order to test the kernel and emulators, userland content in the form of executables and scripts is of course required, and we store it mostly under:
When we started this repository, it only contained content that interacted very closely with the kernel, or that had required performance analysis.
However, we soon started to notice that this had an increasing overlap with other userland test repositories: we were duplicating build and test infrastructure and even some examples.
Therefore, we decided to consolidate other userland tutorials that we had scattered around into this repository.
Notable userland content included / moving into this repository includes:
There are several ways to run our [userland-content], notably:
-
natively on the host as shown at: Section 2.8.2.1, “Userland setup getting started natively”
Can only run examples compatible with your host CPU architecture and OS, but has the fastest setup and runtimes.
-
from user mode simulation with:
-
the host prebuilt toolchain: Section 2.8.2.2, “Userland setup getting started with prebuilt toolchain and QEMU user mode”
-
the Buildroot toolchain you built yourself: Section 11.1, “QEMU user mode getting started”
This setup:
-
can run most examples, including those for other CPU architectures, with the notable exception of examples that rely on kernel modules
-
can run reproducible approximate performance experiments with gem5, see e.g. [bst-vs-heap-vs-hashmap]
-
-
from full system simulation as shown at: Section 2.2.1, “QEMU Buildroot setup getting started”.
This is the most reproducible and controlled environment, and all examples work there. But also the slower one to setup.
With this setup, we will use the host toolchain and execute executables directly on the host.
No toolchain build is required, so you can just download your distro toolchain and jump straight into it.
Build, run and example, and clean it in-tree with:
sudo apt-get install gcc
cd userland
./build c/hello
./c/hello.out
./build --clean
Source: userland/c/hello.c.
Build an entire directory and test it:
cd userland
./build c
./test c
Build the current directory and test it:
cd userland/c
./build
./test
As mentioned at [userland-libs-directory], tests under userland/libs require certain optional libraries to be installed, and are not built or tested by default.
You can install those libraries with:
cd linux-kernel-module-cheat
python3 -m venv .venv
. .venv/bin/activate
./setup
./build --download-dependencies userland-host
and then build the examples and test with:
./build --package-all
./test --package-all
Pass custom compiler options:
./build --ccflags='-foptimize-sibling-calls -foptimize-strlen' --force-rebuild
Here we used --force-rebuild to force rebuild since the sources weren’t modified since the last build.
Some CLI options have more specialized flags, e.g. -O for the [optimization-level-of-a-build]:
./build --optimization-level 3 --force-rebuild
See also User mode static executables for --static.
The build scripts inside userland/ are just symlinks to build-userland-in-tree which you can also use from toplevel as:
./build-userland-in-tree
./build-userland-in-tree userland/c
./build-userland-in-tree userland/c/hello.c
build-userland-in-tree is in turn just a thin wrapper around build-userland:
./build-userland --gcc-which host --in-tree userland/c
So you can use any option supported by build-userland script freely with build-userland-in-tree and build.
The situation is analogous for userland/test, test-executables-in-tree and test-executables, which are further documented at: Section 11.2, “User mode tests”.
Do a more clean out-of-tree build instead and run the program:
./build-userland --gcc-which host --userland-build-id host
./run --emulator native --userland userland/c/hello.c --userland-build-id host
Here we:
-
put the host executables in a separate build variant to avoid conflict with Buildroot builds.
-
ran with the
--emulator nativeoption to run the program natively
In this case you can debub the program with:
./run --debug-vm --emulator native --userland userland/c/hello.c --userland-build-id host
as shown at: Section 23.8, “Debug the emulator”, although direct GDB host usage works as well of course.
If you are lazy to built the Buildroot toolchain and QEMU, but want to run e.g. ARM [userland-assembly] in User mode simulation, you can get away on Ubuntu 18.04 with just:
sudo apt-get install gcc-aarch64-linux-gnu qemu-system-aarch64
./build-userland \
  --arch aarch64 \
  --gcc-which host \
  --userland-build-id host \
;
./run \
  --arch aarch64 \
  --qemu-which host \
  --userland-build-id host \
  --userland userland/c/command_line_arguments.c \
  --cli-args 'asdf "qw er"' \
;
where:
-
--gcc-which host: use the host toolchain.We must pass this to
./runas well because QEMU must know which dynamic libraries to use. See also: Section 11.5, “User mode static executables”. -
--userland-build-id host: put the host built into a [build-variants]
This present the usual trade-offs of using prebuilts as mentioned at: Section 2.6, “Prebuilt setup”.
Other functionality are analogous, e.g. testing:
./test-executables \
  --arch aarch64 \
  --gcc-which host \
  --qemu-which host \
  --userland-build-id host \
;
and User mode GDB:
./run \
  --arch aarch64 \
  --gdb \
  --gcc-which host \
  --qemu-which host \
  --userland-build-id host \
  --userland userland/c/command_line_arguments.c \
  --cli-args 'asdf "qw er"' \
;
First ensure that QEMU Buildroot setup is working.
After doing that setup, you can already execute your userland programs from inside QEMU: the only missing step is how to rebuild executables and run them.
And the answer is exactly analogous to what is shown at: Section 2.2.2.2, “Your first kernel module hack”
For example, if we modify userland/c/hello.c to print out something different, we can just rebuild it with:
./build-userland
Source: build-userland. ./build calls that script automatically for us when doing the initial full build.
Now, run the program either without rebooting use the 9P mount:
/mnt/9p/out_rootfs_overlay/c/hello.out
or shutdown QEMU, add the executable to the root filesystem:
./build-buildroot
reboot and use the root filesystem as usual:
./hello.out
This setup does not use the Linux kernel nor Buildroot at all: it just runs your very own minimal OS.
x86_64 is not currently supported, only arm and aarch64: I had made some x86 bare metal examples at: https://github.com/cirosantilli/x86-bare-metal-examples but I’m lazy to port them here now. Pull requests are welcome.
The main reason this setup is included in this project, despite the word "Linux" being on the project name, is that a lot of the emulator boilerplate can be reused for both use cases.
This setup allows you to make a tiny OS and that runs just a few instructions, use it to fully control the CPU to better understand the simulators for example, or develop your own OS if you are into that.
You can also use C and a subset of the C standard library because we enable Newlib by default. See also:
Our C bare-metal compiler is built with crosstool-NG. If you have already built Buildroot previously, you will end up with two GCCs installed. Unfortunately I don’t see a solution for this, since we need separate toolchains for Newlib on baremetal and glibc on Linux: https://stackoverflow.com/questions/38956680/difference-between-arm-none-eabi-and-arm-linux-gnueabi/38989869#38989869
Every .c file inside baremetal/ and .S file inside baremetal/arch/<arch>/ generates a separate baremetal image.
For example, to run baremetal/arch/aarch64/dump_regs.c in QEMU do:
python3 -m venv .venv
. .venv/bin/activate
./setup
./build --arch aarch64 --download-dependencies qemu-baremetal
./run --arch aarch64 --baremetal baremetal/arch/aarch64/dump_regs.c
And the terminal prints the values of certain system registers. This example prints registers that are only accessible from EL1 or higher, and thus could not be run in userland.
In addition to the examples under baremetal/, several of the userland examples can also be run in baremetal! This is largely due to the awesomeness of Newlib.
The examples that work include most C examples that don’t rely on complicated syscalls such as threads, and almost all the [userland-assembly] examples.
The exact list of userland programs that work in baremetal is specified in [path-properties] with the baremetal property, but you can also easily find it out with a baremetal test dry run:
./test-executables --arch aarch64 --dry-run --mode baremetal
For example, we can run the C hello world userland/c/hello.c simply as:
./run --arch aarch64 --baremetal userland/c/hello.c
and that outputs to the serial port the string:
hello
which QEMU shows on the host terminal.
To modify a baremetal program, simply edit the file, e.g.
vim userland/c/hello.c
and rebuild:
./build-baremetal --arch aarch64
./run --arch aarch64 --baremetal userland/c/hello.c
./build qemu-baremetal that we run previously is only needed for the initial build. That script calls build-baremetal for us, in addition to building prerequisites such as QEMU and crosstool-NG.
./build-baremetal uses crosstool-NG, and so it must be preceded by build-crosstool-ng, which ./build qemu-baremetal also calls.
Now let’s run userland/arch/aarch64/add.S:
./run --arch aarch64 --baremetal userland/arch/aarch64/add.S
This time, the terminal does not print anything, which indicates success: if you look into the source, you will see that we just have an assertion there.
You can see a sample assertion fail in userland/c/assert_fail.c:
./run --arch aarch64 --baremetal userland/c/assert_fail.c
and the terminal contains:
lkmc_exit_status_134
error: simulation error detected by parsing logs
and the exit status of our script is 1:
echo $?
You can run all the baremetal examples in one go and check that all assertions passed with:
./test-executables --arch aarch64 --mode baremetal
To use gem5 instead of QEMU do:
python3 -m venv .venv
. .venv/bin/activate
./setup
./build --download-dependencies gem5-baremetal
./run --arch aarch64 --baremetal userland/c/hello.c --emulator gem5
and then as usual open a shell with:
./gem5-shell
Or as usual, tmux users can do both in one go with:
./run --arch aarch64 --baremetal userland/c/hello.c --emulator gem5 --tmux
TODO: the carriage returns are a bit different than in QEMU, see: [gem5-baremetal-carriage-return].
Note that ./build-baremetal requires the --emulator gem5 option, and generates separate executable images for both, as can be seen from:
echo "$(./getvar --arch aarch64 --baremetal userland/c/hello.c --emulator qemu image)"
echo "$(./getvar --arch aarch64 --baremetal userland/c/hello.c --emulator gem5 image)"
This is unlike the Linux kernel that has a single image for both QEMU and gem5:
echo "$(./getvar --arch aarch64 --emulator qemu image)"
echo "$(./getvar --arch aarch64 --emulator gem5 image)"
The reason for that is that on baremetal we don’t parse the device tress from memory like the Linux kernel does, which tells the kernel for example the UART address, and many other system parameters.
gem5 also supports the RealViewPBX machine, which represents an older hardware compared to the default VExpress_GEM5_V1:
./build-baremetal --arch aarch64 --emulator gem5 --machine RealViewPBX
./run --arch aarch64 --baremetal userland/c/hello.c --emulator gem5 --machine RealViewPBX
see also: Section 24.18, “gem5 ARM platforms”.
This generates yet new separate images with new magic constants:
echo "$(./getvar --arch aarch64 --baremetal userland/c/hello.c --emulator gem5 --machine VExpress_GEM5_V1 image)"
echo "$(./getvar --arch aarch64 --baremetal userland/c/hello.c --emulator gem5 --machine RealViewPBX      image)"
But just stick to newer and better VExpress_GEM5_V1 unless you have a good reason to use RealViewPBX.
When doing baremetal programming, it is likely that you will want to learn userland assembly first, see: [userland-assembly].
For more information on baremetal, see the section: [baremetal].
The following subjects are particularly important:
You don’t need to depend on GitHub.
For a quick and dirty build, install Asciidoctor however you like and build:
asciidoctor README.adoc
xdg-open README.html
For development, you will want to do a more controlled build with extra error checking as follows.
TODO: get this working seamlessly on Docker. For now some quick instructions for host building. For the initial build, first install RVM and Ruby as per https://www.rvm.io/rvm/install:
\curl -sSL https://get.rvm.io | bash
rvm install 3.2.3
The TODO Docker instructions which are not yet working should look simply something like this:
./run-docker
./build --download-dependencies doc
which also downloads build dependencies.
Then the following times just to the faster:
./build-doc
Source: build-doc
The HTML output is located at:
xdg-open out/README.html
More information about our documentation internals can be found at: [documentation]
--gdb-wait makes QEMU and gem5 wait for a GDB connection, otherwise we could accidentally go past the point we want to break at:
./run --gdb-wait
Say you want to break at start_kernel. So on another shell:
./run-gdb start_kernel
or at a given line:
./run-gdb init/main.c:1088
Now QEMU will stop there, and you can use the normal GDB commands:
list
next
continue
See also:
Just don’t forget to pass --arch to ./run-gdb, e.g.:
./run --arch aarch64 --gdb-wait
and:
./run-gdb --arch aarch64 start_kernel
O=0 is an impossible dream, O=2 being the default.
So get ready for some weird jumps, and <value optimized out> fun. Why, Linux, why.
The -O level of some other userland content can be controlled as explained at: [optimization-level-of-a-build].
Let’s observe the kernel write system call as it reacts to some userland actions.
Start QEMU with just:
./run
and after boot inside a shell run:
./count.sh
which counts to infinity to stdout. Source: rootfs_overlay/lkmc/count.sh.
Then in another shell, run:
./run-gdb
and then hit:
Ctrl-C
break __x64_sys_write
continue
continue
continue
And you now control the counting on the first shell from GDB!
Before v4.17, the symbol name was just sys_write, the change happened at d5a00528b58cdb2c71206e18bd021e34c4eab878. As of Linux v 4.19, the function is called sys_write in arm, and __arm64_sys_write in aarch64. One good way to find it if the name changes again is to try:
rbreak .*sys_write
or just have a quick look at the sources!
When you hit Ctrl-C, if we happen to be inside kernel code at that point, which is very likely if there are no heavy background tasks waiting, and we are just waiting on a sleep type system call of the command prompt, we can already see the source for the random place inside the kernel where we stopped.
tmux just makes things even more fun by allowing us to see both the terminal for:
-
emulator stdout
at once without dragging windows around!
First start tmux with:
tmux
Now that you are inside a shell inside tmux, you can start GDB simply with:
./run --gdb
which is just a convenient shortcut for:
./run --gdb-wait --tmux --tmux-args start_kernel
This splits the terminal into two panes:
-
left: usual QEMU with terminal
-
right: GDB
and focuses on the GDB pane.
Now you can navigate with the usual tmux shortcuts:
-
switch between the two panes with:
Ctrl-B O -
close either pane by killing its terminal with
Ctrl-Das usual
See the tmux manual for further details:
man tmux
To start again, switch back to the QEMU pane with Ctrl-O, kill the emulator, and re-run:
./run --gdb
This automatically clears the GDB pane, and starts a new one.
The option --tmux-args determines which options will be passed to the program running on the second tmux pane, and is equivalent to:
This is equivalent to:
./run --gdb-wait
./run-gdb start_kernel
Due to Python’s CLI parsing quicks, if the run-gdb arguments start with a dash -, you have to use the = sign, e.g. to GDB step debug early boot:
./run --gdb --tmux-args=--no-continue
If you are using gem5 instead of QEMU, --tmux has a different effect by default: it opens the gem5 terminal instead of the debugger:
./run --emulator gem5 --tmux
To open a new pane with GDB instead of the terminal, use:
./run --gdb
which is equivalent to:
./run --emulator gem5 --gdb-wait --tmux --tmux-args start_kernel --tmux-program gdb
--tmux-program implies --tmux, so we can just write:
./run --emulator gem5 --gdb-wait --tmux-program gdb
If you also want to see both GDB and the terminal with gem5, then you will need to open a separate shell manually as usual with ./gem5-shell.
From inside tmux, you can create new terminals on a new window with Ctrl-B C split a pane yet again vertically with Ctrl-B % or horizontally with Ctrl-B ".
Loadable kernel modules are a bit trickier since the kernel can place them at different memory locations depending on load order.
So we cannot set the breakpoints before insmod.
However, the Linux kernel GDB scripts offer the lx-symbols command, which takes care of that beautifully for us.
Shell 1:
./run
Wait for the boot to end and run:
insmod timer.ko
Source: kernel_modules/timer.c.
This prints a message to dmesg every second.
Shell 2:
./run-gdb
In GDB, hit Ctrl-C, and note how it says:
scanning for modules in /root/linux-kernel-module-cheat/out/kernel_modules/x86_64/kernel_modules
loading @0xffffffffc0000000: /root/linux-kernel-module-cheat/out/kernel_modules/x86_64/kernel_modules/timer.ko
That’s lx-symbols working! Now simply:
break lkmc_timer_callback
continue
continue
continue
and we now control the callback from GDB!
Just don’t forget to remove your breakpoints after rmmod, or they will point to stale memory locations.
TODO: why does break work_func for insmod kthread.ko not very well? Sometimes it breaks but not others.
TODO on arm 51e31cdc2933a774c2a0dc62664ad8acec1d2dbe it does not always work, and lx-symbols fails with the message:
loading vmlinux
Traceback (most recent call last):
  File "/linux-kernel-module-cheat//out/arm/buildroot/build/linux-custom/scripts/gdb/linux/symbols.py", line 163, in invoke
    self.load_all_symbols()
  File "/linux-kernel-module-cheat//out/arm/buildroot/build/linux-custom/scripts/gdb/linux/symbols.py", line 150, in load_all_symbols
    [self.load_module_symbols(module) for module in module_list]
  File "/linux-kernel-module-cheat//out/arm/buildroot/build/linux-custom/scripts/gdb/linux/symbols.py", line 110, in load_module_symbols
    module_name = module['name'].string()
gdb.MemoryError: Cannot access memory at address 0xbf0000cc
Error occurred in Python command: Cannot access memory at address 0xbf0000cc
Can’t reproduce on x86_64 and aarch64 are fine.
It is kind of random: if you just insmod manually and then immediately ./run-gdb --arch arm, then it usually works.
But this fails most of the time: shell 1:
./run --arch arm --eval-after 'insmod hello.ko'
shell 2:
./run-gdb --arch arm
then hit Ctrl-C on shell 2, and voila.
Then:
cat /proc/modules
says that the load address is:
0xbf000000
so it is close to the failing 0xbf0000cc.
readelf:
./run-toolchain readelf -- -s "$(./getvar kernel_modules_build_subdir)/hello.ko"
does not give any interesting hits at cc, no symbol was placed that far.
TODO find a more convenient method. We have working methods, but they are not ideal.
This is not very easy, since by the time the module finishes loading, and lx-symbols can work properly, module_init has already finished running!
Possibly asked at:
This is the best method we’ve found so far.
The kernel calls module_init synchronously, therefore it is not hard to step into that call.
As of 4.16, the call happens in do_one_initcall, so we can do in shell 1:
./run
shell 2 after boot finishes (because there are other calls to do_init_module at boot, presumably for the built-in modules):
./run-gdb do_one_initcall
then step until the line:
833 ret = fn();
which does the actual call, and then step into it.
For the next time, you can also put a breakpoint there directly:
./run-gdb init/main.c:833
How we found this out: first we got GDB module_init calculate entry address working, and then we did a bt. AKA cheating :-)
This works, but is a bit annoying.
The key observation is that the load address of kernel modules is deterministic: there is a pre allocated memory region https://www.kernel.org/doc/Documentation/x86/x86_64/mm.txt "module mapping space" filled from bottom up.
So once we find the address the first time, we can just reuse it afterwards, as long as we don’t modify the module.
Do a fresh boot and get the module:
./run --eval-after './pr_debug.sh;insmod fops.ko;./linux/poweroff.out'
The boot must be fresh, because the load address changes every time we insert, even after removing previous modules.
The base address shows on terminal:
0xffffffffc0000000 .text
Now let’s find the offset of myinit:
./run-toolchain readelf -- \
  -s "$(./getvar kernel_modules_build_subdir)/fops.ko" | \
  grep myinit
which gives:
30: 0000000000000240 43 FUNC LOCAL DEFAULT 2 myinit
so the offset address is 0x240 and we deduce that the function will be placed at:
0xffffffffc0000000 + 0x240 = 0xffffffffc0000240
Now we can just do a fresh boot on shell 1:
./run --eval 'insmod fops.ko;./linux/poweroff.out' --gdb-wait
and on shell 2:
./run-gdb '*0xffffffffc0000240'
GDB then breaks, and lx-symbols works.
TODO not working. This could be potentially very convenient.
The idea here is to break at a point late enough inside sys_init_module, at which point lx-symbols can be called and do its magic.
Beware that there are both sys_init_module and sys_finit_module syscalls, and insmod uses fmodule_init by default.
Both call do_module_init however, which is what lx-symbols hooks to.
If we try:
b sys_finit_module
then hitting:
n
does not break, and insertion happens, likely because of optimizations? Disable kernel compiler optimizations
Then we try:
b do_init_module
A naive:
fin
also fails to break!
Finally, in despair we notice that pr_debug prints the kernel load address as explained at Bypass lx-symbols.
So, if we set a breakpoint just after that message is printed by searching where that happens on the Linux source code, we must be able to get the correct load address before init_module happens.
This is another possibility: we could modify the module source by adding a trap instruction of some kind.
This appears to be described at: https://www.linuxjournal.com/article/4525
But it refers to a gdbstart script which is not in the tree anymore and beyond my git log capabilities.
And just adding:
asm( " int $3");
directly gives an oops as I’d expect.
Useless, but a good way to show how hardcore you are. Disable lx-symbols with:
./run-gdb --no-lxsymbols
From inside guest:
insmod timer.ko
cat /proc/modules
as mentioned at:
This will give a line of form:
fops 2327 0 - Live 0xfffffffa00000000
And then tell GDB where the module was loaded with:
Ctrl-C
add-symbol-file ../../../rootfs_overlay/x86_64/timer.ko 0xffffffffc0000000
0xffffffffc0000000
Alternatively, if the module panics before you can read /proc/modules, there is a pr_debug which shows the load address:
echo 8 > /proc/sys/kernel/printk
echo 'file kernel/module.c +p' > /sys/kernel/debug/dynamic_debug/control
./linux/myinsmod.out hello.ko
And then search for a line of type:
[ 84.877482] 0xfffffffa00000000 .text
Tested on 4f4749148273c282e80b58c59db1b47049e190bf + 1.
TODO successfully debug the very first instruction that the Linux kernel runs, before start_kernel!
Break at the very first instruction executed by QEMU:
./run-gdb --no-continue
Note however that early boot parts appear to be relocated in memory somehow, and therefore:
-
you won’t see the source location in GDB, only assembly
-
you won’t be able to break by symbol in those early locations
Further discussion at: Linux kernel entry point.
In the specific case of gem5 aarch64 at least:
-
gem5 relocates the kernel in memory to a fixed location, see e.g. https://gem5.atlassian.net/browse/GEM5-787
-
--param 'system.workload.early_kernel_symbols=Trueshould in theory duplicate the symbols to the correct physical location, but it was broken at one point: https://gem5.atlassian.net/browse/GEM5-785 -
gem5 executes directly from vmlinux, so there is no decompression code involved, so you actually immediately start running the "true" first instruction from
head.Sas described at: https://stackoverflow.com/questions/18266063/does-linux-kernel-have-main-function/33422401#33422401 -
once the MMU gets turned on at kernel symbol
__primary_switched, the virtual address matches the ELF symbols, and you start seeing correct symbols without the need forearly_kernel_symbols. This can be observed clearly withfunction_trace = True: https://stackoverflow.com/questions/64049487/how-to-trace-executed-guest-function-symbol-names-with-their-timestamp-in-gem5/64049488#64049488 which produces:0: _kernel_flags_le_lo32 (12500) 12500: __crc_tcp_add_backlog (1000) 13500: __crc_crypto_alg_tested (6500) 20000: __crc_tcp_add_backlog (10000) 30000: __crc_crypto_alg_tested (500) 30500: __crc_scsi_is_host_device (5000) 35500: __crc_crypto_alg_tested (1500) 37000: __crc_scsi_is_host_device (4000) 41000: __crc_crypto_alg_tested (3000) 44000: __crc_tcp_add_backlog (263500) 307500: __crc_crypto_alg_tested (975500) 1283000: __crc_tcp_add_backlog (77191500) 78474500: __crc_crypto_alg_tested (1000) 78475500: __crc_scsi_is_host_device (19500) 78495000: __crc_crypto_alg_tested (500) 78495500: __crc_scsi_is_host_device (13500) 78509000: __primary_switched (14000) 78523000: memset (21118000) 99641000: __primary_switched (2500) 99643500: start_kernel (11000)
so we see that
primary_switchedis the first non-trash symbol (non-crc_*and non-kernel_flags*, which are just informative symbols, not actual executable code)
As mentioned at: GDB step debug early boot, the very first kernel instructions executed appear to be placed into memory at a different location than that of the kernel ELF section.
As a result, we are unable to break on early symbols such as:
./run-gdb extract_kernel
./run-gdb main
gem5 ExecAll trace format>> however does show the right symbols however! This could be because gem5 uses vmlinux to boot, which QEMU uses the compressed version, and as mentioned on the Stack Overflow answer, the entry point is actually a tiny decompresser routine.
I also tried to hack run-gdb with:
@@ -81,7 +81,7 @@ else
 ${gdb} \
 -q \\
 -ex 'add-auto-load-safe-path $(pwd)' \\
--ex 'file vmlinux' \\
+-ex 'file arch/arm/boot/compressed/vmlinux' \\
 -ex 'target remote localhost:${port}' \\
 ${brk} \
 -ex 'continue' \\
and no I do have the symbols from arch/arm/boot/compressed/vmlinux', but the breaks still don’t work.
v4.19 also added a CONFIG_HAVE_KERNEL_UNCOMPRESSED=y option for having the kernel uncompressed which could make following the startup easier, but it is only available on s390. aarch64 however is already uncompressed by default, so might be the easiest one. See also: Section 17.21.1, “vmlinux vs bzImage vs zImage vs Image”.
You then need the associated KERNEL_UNCOMPRESSED to enable it if available:
config KERNEL_UNCOMPRESSED
    bool "None"
    depends on HAVE_KERNEL_UNCOMPRESSED
In gem5 aarch64 Linux v4.18, experimentally the entry point of secondary CPUs seems to be secondary_holding_pen as shown at https://gist.github.com/cirosantilli2/34a7bc450fcb6c1c1a910369be1fdd90
What happens is that:
-
the bootloader goes in in WFE
-
the kernel writes the entry point to the secondary CPU (the address of
secondary_holding_pen) with CPU0 at the address given to the kernel in thecpu-release-addrof the DTB -
the kernel wakes up the bootloader with a SEV, and the bootloader boots to the address the kernel told it
The CPU0 action happens at: https://github.com/cirosantilli/linux/blob/v5.7/arch/arm64/kernel/smp_spin_table.c:
Here’s the code that writes the address and does SEV:
static int smp_spin_table_cpu_prepare(unsigned int cpu)
{
	__le64 __iomem *release_addr;

	if (!cpu_release_addr[cpu])
		return -ENODEV;

	/*
	 * The cpu-release-addr may or may not be inside the linear mapping.
	 * As ioremap_cache will either give us a new mapping or reuse the
	 * existing linear mapping, we can use it to cover both cases. In
	 * either case the memory will be MT_NORMAL.
	 */
	release_addr = ioremap_cache(cpu_release_addr[cpu],
				     sizeof(*release_addr));
	if (!release_addr)
		return -ENOMEM;

	/*
	 * We write the release address as LE regardless of the native
	 * endianess of the kernel. Therefore, any boot-loaders that
	 * read this address need to convert this address to the
	 * boot-loader's endianess before jumping. This is mandated by
	 * the boot protocol.
	 */
	writeq_relaxed(__pa_symbol(secondary_holding_pen), release_addr);
	__flush_dcache_area((__force void *)release_addr,
			    sizeof(*release_addr));

	/*
	 * Send an event to wake up the secondary CPU.
	 */
	sev();
and here’s the code that reads the value from the DTB:
static int smp_spin_table_cpu_init(unsigned int cpu)
{
	struct device_node *dn;
	int ret;

	dn = of_get_cpu_node(cpu, NULL);
	if (!dn)
		return -ENODEV;

	/*
	 * Determine the address from which the CPU is polling.
	 */
	ret = of_property_read_u64(dn, "cpu-release-addr",
				   &cpu_release_addr[cpu]);
start_kernel is the first C function to be executed basically: https://stackoverflow.com/questions/18266063/does-kernel-have-main-function/33422401#33422401
For the earlier arch-specific entry point, see: Linux kernel entry point.
When booting Linux on a slow emulator like gem5, what you observe is that:
-
first nothing shows for a while
-
then at once, a bunch of message lines show at once followed on aarch64 Linux 5.4.3 by:
[ 0.081311] printk: console [ttyAMA0] enabled
This means of course that all the previous messages had been generated earlier and stored, but were only printed to the terminal once the terminal itself was enabled.
Notably for example the very first message:
[ 0.000000] Booting Linux on physical CPU 0x0000000000 [0x410fd070]
happens very early in the boot process.
If you get a failure before that, it will be hard to see the print messages.
One possible solution is to parse the dmesg buffer, gem5 actually implements that: gem5 m5out/system.workload.dmesg file.
QEMU’s -gdb GDB breakpoints are set on virtual addresses, so you can in theory debug userland processes as well.
You will generally want to use gdbserver for this as it is more reliable, but this method can overcome the following limitations of gdbserver:
-
the emulator does not support host to guest networking. This seems to be the case for gem5 as explained at: Section 15.3.1.3, “gem5 host to guest networking”
-
cannot see the start of the
initprocess easily -
gdbserveralters the working of the kernel, and makes your run less representative
Known limitations of direct userland debugging:
-
the kernel might switch context to another process or to the kernel itself e.g. on a system call, and then TODO confirm the PIC would go to weird places and source code would be missing.
Solutions to this are being researched at: Section 3.10.1, “lx-ps”.
-
TODO step into shared libraries. If I attempt to load them explicitly:
(gdb) sharedlibrary ../../staging/lib/libc.so.0
No loaded shared libraries match the pattern `../../staging/lib/libc.so.0'.
since GDB does not know that libc is loaded.
Questions
What is linux-kernel-module-cheat?
cirosantilli/linux-kernel-module-cheat is a public repo on GitHub by cirosantilli. The perfect emulation setup to study and develop the Linux kernel, kernel modules, QEMU, gem5 and x86_64, ARMv7 and ARMv8 userland and baremetal assembly, ANSI C, C++ and POSIX. GDB step debug and KGDB just work. Powered by Buildroot and crosstool-NG. Highly automated. Thoroughly documented. Automated tests. "Tested" in an Ubuntu 24.04 host.
Is linux-kernel-module-cheat open source?
It declares the GPL-3.0 license on GitHub.
Does linux-kernel-module-cheat run on macOS, Windows or Linux?
Its maker has not tagged a system, so it is unknown here. Its README says what it needs.
How do I install linux-kernel-module-cheat?
Open "Take it" on its page: Take My Repo writes an install plan for your machine and hands it to your AI agent (Claude Code, Codex or Cursor), which asks you before each step. Take My Repo has not tested it on any machine.