AlpineFlow
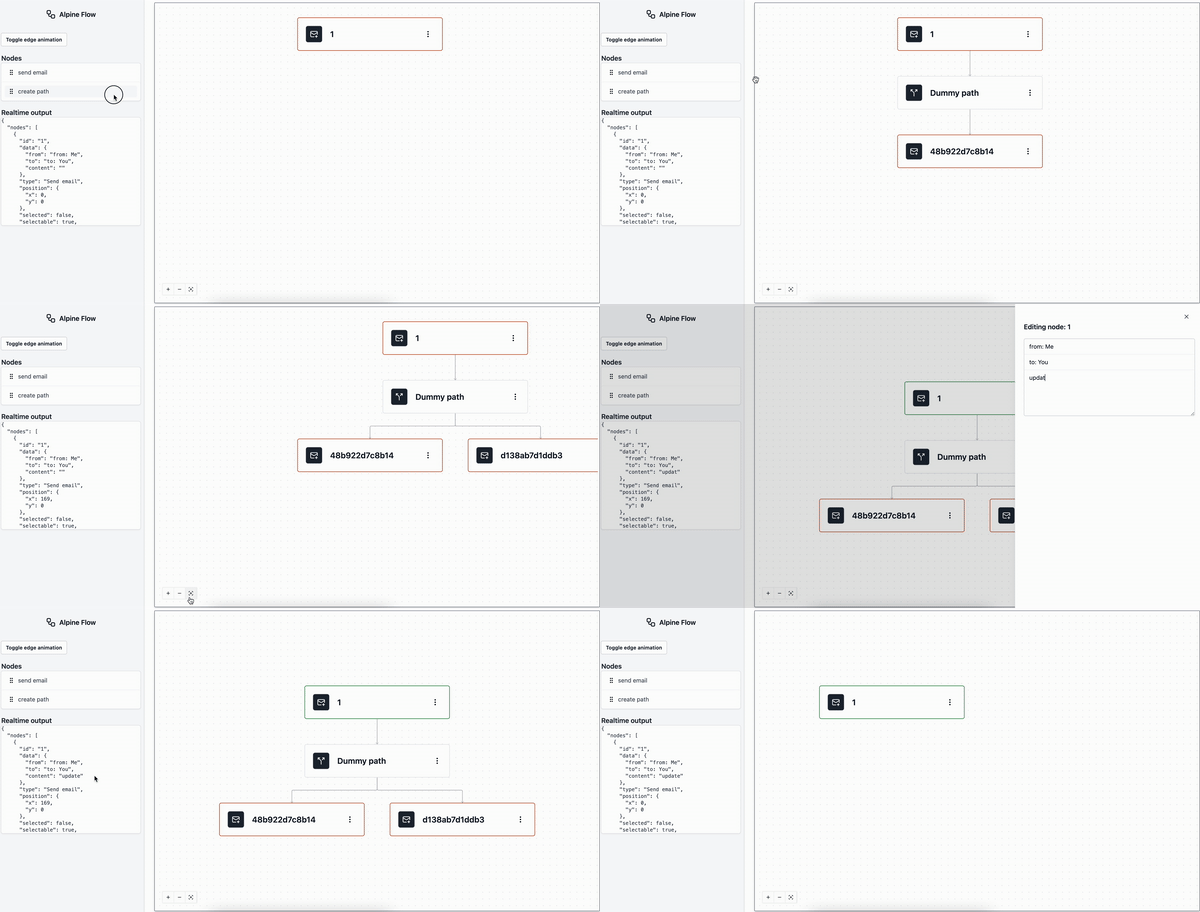
Alpine Flow makes creating directed step based flowcharts and node based workflow UIs (DAG) in AlpineJS an easier task.
- 61
- MIT
- 2 y ago
Repo copyfactory/AlpineFlow, read from GitHub 3 min ago. copyfactory has not joined Take My Repo.
In short
copyfactory/AlpineFlow is a public repo on GitHub by copyfactory. Alpine Flow makes creating directed step based flowcharts and node based workflow UIs (DAG) in AlpineJS an easier task. It declares the MIT license on GitHub. It is written mainly in JavaScript, has 61 stars and last changed on 2024-11-18. Nobody has reviewed it on Take My Repo yet, which says nothing about its quality. Read from GitHub on 2026-11-22.
Alpine Flow
About
Alpine Flow makes creating directed step based flowcharts and node based workflow UIs (DAG) in AlpineJS an easier task.
- Alpine Flow
- About
- Features
- Installation
- Concepts
- Quickstart
- API reference
- Node
- flowEditor
- Configuration
- Methods
- editor.hasNodes()
- editor.hasNoNodes()
- editor.addNode(incompleteNode, dependsOn=null)
- editor.deleteNode(nodeId, dependsOn=null)
- editor.getNodeById(nodeId)
- editor.findParents(nodeId)
- editor.findChildren(nodeId)
- editor.findDescendantsOfNode(nodeId)
- editor.zoomOut(zoomStep = 1 / 1.2)
- editor.zoomIn(zoomStep = 1.2)
- editor.setViewportToCenter(paddingY = 0.1, paddingX = 0.3)
- editor.setViewport(x=0, y=0, zoom=1)
- editor.toObject()
- Events
- Dependencies
Features
- Easy and familiar syntax well integrated with Alpine.js.
- Automatic handling of layout and arrow drawing.
- Full styling control across background, nodes, edges and toolbar. Use Tailwind, CSS or anything you want.
- Built-in zooming, panning and dragging.
- Pre-built toolbar component.
- Methods to delete nodes, add nodes and traverse your workflow.
- Configurable node settings to allow/disallow deleting, branching and children access.
- Custom events to hook-into.
Installation
via cdn
<link
    href="https://unpkg.com/@copyfactory/alpine-flow@latest/dist/flow.css"
    rel="stylesheet"
    type="text/css"
/>
<script
    defer
    src="https://unpkg.com/@copyfactory/alpine-flow@latest/dist/alpine-flow.cdn.min.js"
></script>
via npm
npm i @copyfactory/alpine-flow
import Alpine from 'alpinejs'
import { node, flowEditor } from '@copyfactory/alpine-flow';
import '@copyfactory/alpine-flow/dist/flow.css'

window.Alpine = Alpine
window.Alpine.plugin(node);
window.Alpine.data('flowEditor', flowEditor);
Alpine.start()
Concepts
What is a node?
A node in Alpine Flow is an alpine component with the x-node directive.
That means it can render anything you like. You can find all the options for customizing your nodes further down.
The term 'node' and 'component' will be used interchangeably.
What is an edge?
An edge connects two nodes. Every edge needs a target node ID and a source node ID. The the most part edges addition and removal will be handled for you when using the public methods.
Quickstart
The Alpine flow package is composed of a directive to declare components x-node
and a data component flowEditor to start a new editor.
The flowEditor only requires nodes and edges to get something going.
Building your first flow
1. Create a node component
Nodes are the building blocks of your editor. Building them is easy. Just add the x-node directive
to any Alpine component with a type and add a props object to your x-data.
The props is automatically synced to any node instances data attribute.
Think of the props as being all the attributes you want to persist to your database.
Consider the following example for a node where we want to apply styling based on some state.
When saving this node we likely don't want to save the 'isClicked' attribute.
Having a clear namespace for properties that should be persisted to each node instance makes it easy to separate styling and data.
<div
    x-cloak
    x-node="{type: 'my first node'}"
    x-data="{isClicked: false, props: {text: 'Default text'}}"
    @click="
        props.text = (Math.random() + 1).toString(36).substring(7);
        isClicked = !isClicked"
>
    <div>
        <p :style="isClicked && { color: 'green' }" x-text="props.text"></p>
    </div>
</div>
By declaring a x-node the element is registered as a component in the registry under the name 'my first node'.
As you can see this is pure Alpine so @click and all other directives/magics will work.
The @click here just sets the text to a random 7 character string and changes the color of the text.
It's also worth mentioning that re-usable components work as well:
<div
    x-cloak
    x-node="{type: 'my first node'}"
    @click="handleClick"
    x-data="myFirstNode"
>
    <div>
        <p :style="isClicked && { color: 'green' }" x-text="props.text"></p>
    </div>
</div>

<script>
    document.addEventListener('alpine:init', () => {
        Alpine.data('myFirstNode', () => ({
            isClicked: false,
            props: { text: 'Default text' },

            handleClick() {
                this.props.text = (Math.random() + 1).toString(36).substring(7);
                this.isClicked = !this.isClicked;
            },
        }));
    });
</script>
2. Create an editor
Creating an editor is easy, just set the x-data to flowEditor on an element.
There are many initial parameters you can provide which will be outlined below.
The flowEditor will take up the full width and height of the element it was placed on.
<div x-data="flowEditor" style="width:500px;height:500px"></div>
3. Putting it together
Here is the full example alone with a live rendering of the editor output.
Notice how when you drag or zoom, the viewport updates in real-time?
Finally, clicking on our node will update it's text, reposition the graph as well as update the output.
<!doctype html>
<html lang="en">
    <head>
        <meta charset="UTF-8" />
        <meta
            name="viewport"
            content="width=device-width, user-scalable=no, initial-scale=1.0, maximum-scale=1.0, minimum-scale=1.0"
        />
        <meta http-equiv="X-UA-Compatible" content="ie=edge" />
        <title>Alpine flow basic example</title>
        <link
            href="https://unpkg.com/@copyfactory/alpine-flow@latest/dist/flow.css"
            rel="stylesheet"
            type="text/css"
        />
        <script
            defer
            src="https://unpkg.com/@copyfactory/alpine-flow@latest/dist/alpine-flow.cdn.min.js"
        ></script>
        <script
            defer
            src="https://unpkg.com/alpinejs@3.x.x/dist/cdn.min.js"
        ></script>
    </head>
    <body>
        <div
            x-cloak
            x-node="{type: 'my first node'}"
            x-data="{isClicked: false, props: {text: 'Default text'}}"
            @click="
        props.text = (Math.random() + 1).toString(36).substring(7);
        isClicked = !isClicked"
        >
            <div>
                <p
                    :style="isClicked && { color: 'green' }"
                    x-text="props.text"
                ></p>
            </div>
        </div>

        <div
            x-data="{
        liveEditor: null,
        node1: {id: 1, type: 'my first node'},
        node2: {id: 2, type: 'my first node'},
    }"
            style="display: flex;"
        >
            <div style="flex: 1;">
                <div
                    x-init="liveEditor=editor"
                    x-data="editor = flowEditor({
                nodes: [node1, node2],
                edges: [{source: node1.id, target: node2.id}]
            })"
                    style="width:500px;height:500px"
                ></div>
            </div>
            <div style="flex: 1;">
                <h6>Live output</h6>
                <pre
                    x-text="JSON.stringify(liveEditor.toObject(),null,2)"
                ></pre>
            </div>
        </div>
    </body>
</html>
Done! You have just created an interactive and reactive flowchart using pure Alpine.
API reference
Node
Configuration
Below are the available config options and defaults when registering a new Node.
The type is required and must be unique as we register the Node under that name.
When a new x-node is declared your component has access to a node object which contains the nodeId, it's data and
the node config.
| Name | Type | Description | Default |
|---|---|---|---|
| type | String |
The name of the registered Node. | |
| deletable | Boolean |
True/False for if this node type can be deleted. | true |
| allowBranching | Boolean |
True/False for if this node type can have multiple children. | false |
| allowChildren | Boolean |
True/False for if this node type can have children. | true |
Example usage
Here is an example node structure with the default configuration.
Don't register an
x-initdirective on the same div as the registeredx-nodeas this will get overridden.
Best practice is to add an
x-ignoredirective to the first child so that Alpine doesn't crawl it. Allx-ignoredirectives are removed when rendering a new node instance.
<div
    x-data="{isOpen: false, props: {}}"
    x-cloak
    x-node="{type: 'myNode', deletable: true, allowBranching: false, allowChildren: true}"
>
    <!--  Prevent crawling of the node  -->
    <div x-ignore>
        <div x-init="console.log(node.id)"></div>
    </div>
</div>
The $nodes magic
A $nodes magic is also exposed should you want to know what the registered nodes currently are.
The $nodes magic returns an object where the keys are the registry
names and the values an object of the registered node Element and it's config.
By default all x-node are registered in the default registry. You can specify which registries your nodes belong to
by adding a modifier.
<div x-node.customRegistryName="{type: 'myNode'}"></div>

<div
    x-data="editor = flowEditor({
        nodeTypes: $nodes.customRegistryName,
        // more config
})"
></div>
flowEditor
Configuration
Below are the available config options and defaults when initializing a new flowEditor.
| Name | Type | Description | Default |
|---|---|---|---|
| nodeTypes | Object |
The types of nodes available in the editor. The default is to use the components registered with x-node. |
$nodes.default |
| nodes | Array |
The initial nodes to populate the editor. | [] |
| edges | Array |
The initial edges to populate the editor. | [] |
| viewport | Object |
The viewport positioning to set | {x:0, y:0,zoom:1} |
| zoomOnWheelScroll | Boolean |
Whether to enable zooming on wheel scroll. The default is to panOnScroll. | false |
| zoomOnPinch | Boolean |
Whether to enable zooming on pinch gestures | true |
| panOnScroll | Boolean |
Whether to enable panning on scroll | true |
| panOnScrollSpeed | Number |
The speed of panning on scroll | 0.5 |
| panOnDrag | Boolean |
Whether to enable panning on drag | true |
| minZoom | Number |
The minimum allowed zoom level | 0.5 |
| maxZoom | Number |
The maximum allowed zoom level | 2 |
| zoomDuration | Number |
The duration of zoom animation in milliseconds. | 100 |
| toolbarClasses | String |
The CSS classes to add to the toolbar. | 'bottom left' |
| toolbarBtnClasses | String |
The CSS classes to add to the toolbar buttons. | '' |
| backgroundClasses | String |
The CSS classes for the background. | 'dots' |
Example usage
<div
    x-data="editor = flowEditor({
        nodes: [{id: 1, type: 'myCustomNode', data: {foo: 'bar'}}],
        minZoom: 1,
        maxZoom: 2,
        // more config
})"
></div>
Methods
Below are the public methods for using the flowEditor.
editor.hasNodes()
Returns:
- (
boolean): Returnstrueif the editor has nodes, otherwisefalse.
Example:
editor.hasNodes();
editor.hasNoNodes()
Returns true if the editor has no nodes, otherwise false.
Example:
editor.hasNoNodes();
editor.addNode(incompleteNode, dependsOn=null)
Adds a node to the flow editor.
Parameters:
incompleteNode(Object): The incomplete node to be added.dependsOn(Array|null, optional): The node IDs on which the new node depends. Defaults tonull.
Example:
let newNode = {
    id: 'my-node-id',
    type: 'myNode',
    data: { foo: 'bar' },
};

editor.addNode(newNode, [anotherNode.id]);
editor.deleteNode(nodeId, dependsOn=null)
Delete a node from the graph along with its edges.
Parameters:
nodeId(string): The ID of the node.strategy(string):preserve(the default) tries to keep as many nodes as possible while deleting.allremoves all descendants of the input node.
Example:
// Suppose you had a graph of nodes: '1 -> 2 -> 3'
editor.deleteNode('2', 'preserve');
// by deleting node 2 the new nodes would be: '1 -> 3' since we can repoint node '1' to node '3'.

editor.deleteNode('2', 'all');
// would delete all dependents on 2 onwards.
// by deleting node 2 the new nodes would be: '1' since we delete node '2' and all dependants on node '2' (node '3') in this case.
editor.getNodeById(nodeId)
Gets a node by its ID.
Parameters:
nodeId(string): The ID of the node.
Returns:
- (
Node|null): The node with the given ID, ornullif not found.
Example:
let myNode = editor.getNodeById('my-node-id');
console.log(myNode);
editor.findParents(nodeId)
Get the parent nodes of a given nodeId.
Parameters:
nodeId(string): The ID of the node.
Returns:
- (
Array): An array of nodes.
Example:
let nodes = editor.findParents('my-node-id');
console.log(nodes);
editor.findChildren(nodeId)
Get the children nodes of a given nodeId.
Parameters:
nodeId(string): The ID of the node.
Returns:
- (
Array): An array of nodes.
Example:
let nodes = editor.findChildren('my-node-id');
console.log(nodes);
editor.findDescendantsOfNode(nodeId)
Recursively searches nodes for all descendents of a given nodeId.
Parameters:
nodeId(string): The ID of the node.
Returns:
- (
Array): An array of nodeIds.
Example:
let nodeIds = editor.findDescendantsOfNode('my-node-id');
console.log(nodes);
editor.zoomOut(zoomStep = 1 / 1.2)
Zooms out the viewport.
Parameters:
zoomStep(number, optional): The factor to zoom out. Defaults to1 / 1.2.
Example:
editor.zoomOut();
editor.zoomIn(zoomStep = 1.2)
Zooms in the viewport.
Parameters:
zoomStep(number, optional): The factor to zoom in. Defaults to1.2.
Example:
editor.zoomIn();
editor.setViewportToCenter(paddingY = 0.1, paddingX = 0.3)
Sets the viewport of the canvas to center the content so that all nodes are in view.
Parameters:
paddingY(number, optional): The vertical padding as a percentage of canvas height. Defaults to0.1.paddingX(number, optional): The horizontal padding as a fraction of canvas width. Defaults to0.3.
Returns:
- (
Object): The plain object representation of the viewport.
Example:
editor.setViewportToCenter();
editor.setViewport(x=0, y=0, zoom=1)
Sets the viewport based on X/Y and zoom level.
Parameters:
x(number, optional): The new X. Defaults to0.y(number, optional): The new Y. Defaults to0.zoom(number, optional): The new zoom. Defaults to1.
Returns:
- (
Object): The plain object representation of the viewport.
Example:
editor.setViewPort(100, 100, 1.5);
editor.toObject()
Converts the flow editor to a plain object to save to the DB.
Returns:
- (
Object): The nodes, edges and viewport.
Example:
let flowObject = editor.toObject();
console.log(flowObject);
// {
//   nodes: [];
//   edges: [];
//   viewport: {};
// };

let newEditor = flowEditor(flowObject);
Events
You can hook into events using the normal Alpine syntax of @event-name.
All events emitted by Alpine Flow will have the prefix flow-.
@flow-init.window
Dispatched when the editor has finished its first load.
Event detail
event = $event.detail;
console.log(event);
// {data: true}
@flow-new-node-rendered.window
Dispatched when a new node is rendered.
Event detail
event = $event.detail;
console.log(event);
// {data: 'node-id'}
@flow-nodes-deleted.window
Dispatched when nodes have been deleted.
Event detail
event = $event.detail;
console.log(event);
// {data: [deletedNodeId1, deletedNodeId2]}
Dependencies
Alpine flow depends on the following:
Questions
What is AlpineFlow?
copyfactory/AlpineFlow is a public repo on GitHub by copyfactory. Alpine Flow makes creating directed step based flowcharts and node based workflow UIs (DAG) in AlpineJS an easier task.
Is AlpineFlow open source?
It declares the MIT license on GitHub.
Does AlpineFlow run on macOS, Windows or Linux?
Its maker has not tagged a system, so it is unknown here. Its README says what it needs.
How do I install AlpineFlow?
Open "Take it" on its page: Take My Repo writes an install plan for your machine and hands it to your AI agent (Claude Code, Codex or Cursor), which asks you before each step. Take My Repo has not tested it on any machine.
Is AlpineFlow still maintained?
Its last change on GitHub was on 2024-11-18. GitHub counts 0 open issues and pull requests. Take My Repo does not judge from that whether it is maintained.
What do people who ran AlpineFlow say?
Nobody has reviewed it on Take My Repo yet, which says nothing about its quality.