mini-react
The maintainer has not written a description at the source.
- 2
- 4 y ago
Repo mengjian-github/mini-react, read from GitHub 1 min ago. mengjian-github has not joined Take My Repo.
In short
mengjian-github/mini-react is a public repo on GitHub by mengjian-github. It declares no license on GitHub. Public does not mean open source: without a license, nobody is granted the right to reuse it. It is written mainly in JavaScript, has 2 stars and last changed on 2022-08-31. Nobody has reviewed it on Take My Repo yet, which says nothing about its quality. Read from GitHub on 2026-11-21.
React源码学习入门(十三)我用300行代码实现了React
之前我们基本将React源码的加载、更新过程分析完了,现在我们完全可以上手写一个自己实现的React,让我们一起来到学习金字塔的下层,印证之前所学。
准备工作
我们先使用最新版create-react-app,在example/目录下创建一个demo项目:
npx create-react-app demo
跑起来后,将index.js替换如下(要去掉webpack的ModuleScopePlugin插件,否则会报错):
import React from '../../../react';
import ReactDOM from '../../../reactDom';
import './index.css';
import App from './App';

ReactDOM.render(<App />, document.getElementById('root'));
在根目录补充react.js和reactDom.js,其中reactDom.js给一个render的实现:
export default class ReactDom {
    static render(element, container) {
        console.log('触发了render', element, container);
    }
}
跑起来项目后,我们发现控制台已经输出了:
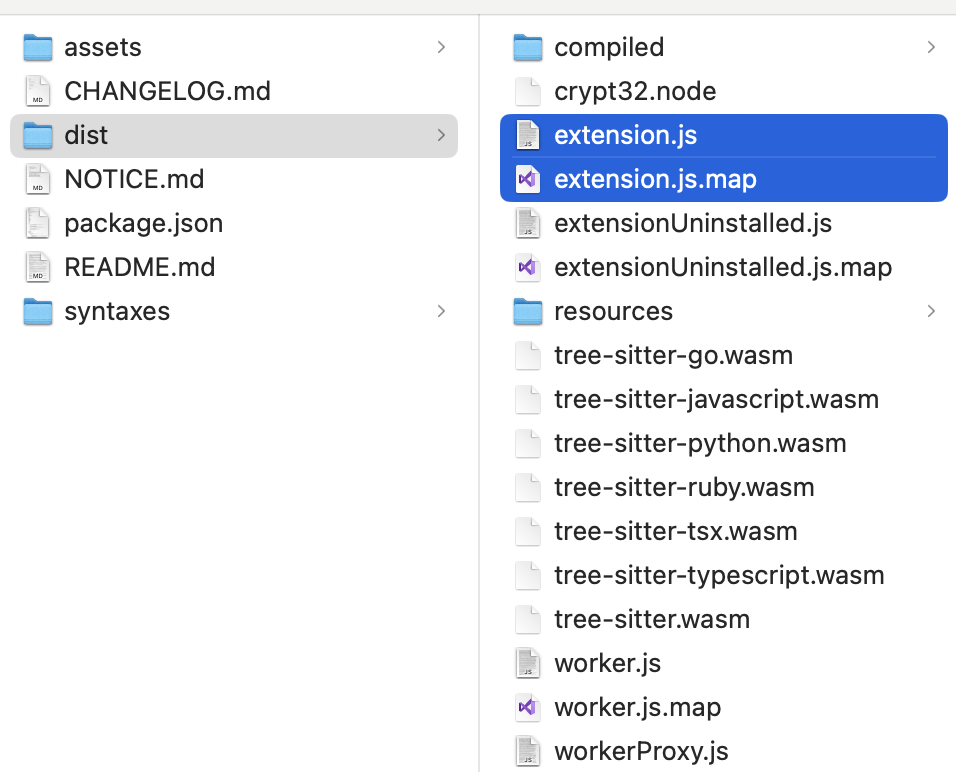
代码目录结构是这样:
这个时候初始的准备工作就完成了,接下来我们可以聚焦在如何实现上。
实现React的挂载
初始化控制类
根据我们之前对React挂载机制的分析,首先需要实现的是相应控制类,在这里我们可以简化一下,实现两个控制类就好:
- compositeComponent
- domComponent
我们先分别初始化好这两个控制类:
export default class CompositeComponent {
    constructor(element) {
        this.element = element;
    }
}

export default class DomComponent {
    constructor(element) {
        this.element = element;
    }
}
实例化入口
然后实现一个实例化方法,这里可以根据jsx element的type来分别实例化两种控制类:
import CompositeComponent from "./compositeComponent";
import DomComponent from "./domComponent";

export function instantiate(element) {
    if (typeof element.type === 'string') {
        return new DomComponent(element);
    }
    return new CompositeComponent(element);
}
mount入口
最后我们在render里面实例化控制类,并执行mount流程:
export default class ReactDom {
    static render(element, container) {
        const controller = instantiate(element);
        controller.mount();
    }
}
当然,我们还需要实现一个mount的方法,先在composite实现:
export default class CompositeComponent {
    constructor(element) {
        this.element = element;
    }

    mount() {
        console.log('开始执行mount');
    }
}
可以看到我们的控制台输出,已经走到了mount方法,至此我们的目录结构是这样:
实现CompositeComponent的mount
接下来我们需要实现React组件的挂载逻辑,对于React组件来讲,其实挂载就相当于触发生命周期以及执行render,在做这些之前,我们首先得创建组件的实例:
export default class CompositeComponent {
    constructor(element) {
        this.component = element.type;
        this.props = element.props;
    }

    mount() {
        this.instantiate();
    }

    instantiate() {
        if (this.component.isClassComponent) {
            this.instance = new this.component(this.props);
        } else {
            this.instance = null;   // 函数组件不需要实例化
        }
    }
}
注意这里我们根据isClassComponent来区分React组件是类组件还是函数组件,后面我们在实现类组件的时候会加上这个属性。
函数组件是不需要实例化的。
在实例化之后,就需要触发render:
    mount() {
        // ...
        this.render();
        console.log(this.renderedElement);
    }

    render() {
        if (this.instance) {
            this.renderedElement = this.instance.render();
        } else {
            this.renderedElement = this.component(this.props);
        }
    }
要注意这里,如果对于类组件的话是调用render方法,对于函数组件则是直接调用函数。
我们看到控制台已经输出了render之后的element。最后我们让这个element再执行mount,从而开启递归挂载的流程:
    mount() {
        this.instantiate();
        this.render();
        // 递归执行mount
        if (this.renderedElement) {
            return instantiate(this.renderedElement).mount();
        }
        return null;
    }
最终叶子节点会走到DOM的mount:
至此,CompositeComponent的挂载过程就已经实现好了。
实现DomComponent的mount
接下来实现DomComponent的挂载过程,实际上对于DOM组件来说,我们需要实际创建一个DOM节点出来:
export default class DomComponent {
    constructor(element) {
        this.element = element;
        this.tag = element.type;
        this.props = element.props;
    }

    mount() {
        const element = document.createElement(this.tag);

        console.log(element);
        return element;
    }
}
可以看到控制台上已经输出了我们创建好的DOM节点。
然后我们需要处理一下DOM属性:
    mount() {
        this.createElement();
        this.setAttribute();

        console.log(this.node);
        return this.node;
    }

    createElement() {
        this.node = document.createElement(this.tag);
    }

    setAttribute() {
        Object.keys(this.props).forEach(attribute => {
            if (attribute !== 'children') {
                if (attribute === 'className') {
                    this.node.setAttribute('class', this.props[attribute])
                } else {
                    this.node.setAttribute(attribute, this.props[attribute]);
                }
            }
        })
    }
注意这里对于属性的两点处理:
- 跳过了
children属性,这个属于jsx子元素语法,不属于DOM属性 - 修正了
className属性,在DOM中应该设置class
可以看到控制台,DOM属性已经生效了。
接着我们需要递归挂载DOM的子节点。
在我们挂载子节点时,发现jsx还会生成一类文本类型的element,我们需要额外再处理下,调整一下instantiate的代码:
import CompositeComponent from "./compositeComponent";
import DomComponent from "./domComponent";
import TextComponent from "./textComponent";

export function instantiate(element) {
    if (typeof element === 'string' || typeof element === 'number') {
        return new TextComponent(element);
    }
    if (typeof element.type === 'string') {
        return new DomComponent(element);
    }
    if (typeof element.type === 'object' || typeof element.type == 'function') {
        return new CompositeComponent(element);
    }

    return null;
}
增加一个TextComponent:
export default class TextComponent {
    constructor(element) {
        this.text = element;
    }

    mount() {
        this.createElement();

        console.log(this.node);
        return this.node;
    }

    createElement() {
        this.node = document.createTextNode(this.text);
    }
}
然后,我们就可以对DOM子节点进行遍历递归挂载了:
    mount() {
        this.createElement();
        this.setAttribute();
        this.mountChildren();

        console.log(this.node);
        return this.node;
    }

    mountChildren() {
        let children = this.props.children || [];

        if (!Array.isArray(children)) {
            children = [children];
        }

        const nodeList = [];
        children.forEach(childElement => {
            const node = instantiate(childElement).mount();
            if (node) {
                nodeList.push(node);
            }
        });
        // 挂载子节点
        nodeList.forEach(node => {
            this.node.appendChild(node);
        });
    }
可以看到目前我们的控制台中已经完全输出了被挂载好的DOM元素,现在只差最后一步了。
挂载DOM至Container
最后一步其实非常简单,我们只需要将拿到的DOM元素挂载到container上:
export default class ReactDom {
    static render(element, container) {
        const controller = instantiate(element);
        const domElement = controller.mount();
        container.appendChild(domElement);
    }
}
撒花💐💐💐!!!
写到这里,我们create-react-app的代码已经被正确地渲染到屏幕上了。
回顾一下整个渲染的代码,加起来也就50行左右,我们就实现了React挂载的核心,这就是代码的魅力,也是我们努力坚持看源码所获得的成果。
我们目前的目录结构:
实现React的更新
由于create-react-app默认生成的是一个函数组件,我们做更新目前暂时需要类组件去更新state,所以我们新写一个class组件,把React之前的Counter组件搬过来:
支持类组件
import { Component } from "../../../react";

export default class Counter extends Component {
  state = {
    count: 0,
  };

  handleClick = () => {
    this.setState({
      count: this.state.count + 1,
    });
  };

  render() {
    return (
      <button onClick={this.handleClick}>
        Click me! Number of clicks: {this.state.count}
      </button>
    );
  }
}
然后我们在react.js中实现一下Components:
export class Component {
    static isClassComponent = true;

    constructor(props) {
        this.props = props;
    }
}
支持事件触发
由于这里我们是通过事件触发的,我们在挂载里面加一下事件的支持:
   setAttribute() {
        Object.keys(this.props).forEach(attribute => {
            if (attribute !== 'children') {
                if (attribute === 'className') {
                    this.node.setAttribute('class', this.props[attribute])
                } else if (EventListener.isEventAttribute(attribute)) {
                    EventListener.listen(attribute, this.props[attribute], this.node);
                } else {
                    this.node.setAttribute(attribute, this.props[attribute]);
                }
            }
        })
    }
增加一个event.js,简单封装一下事件的处理:
export const EventMap = {
    'onClick': 'click'
}

const callbackMap = new Map();

export default class EventListener {
    static isEventAttribute(attribute) {
        return !!EventMap[attribute];
    }

    static listen(attribute, callback, dom) {
        dom.addEventListener(EventMap[attribute], callback);

        // 存储callback
        if (!callbackMap.has(dom)) {
            callbackMap.set(dom, {});
        }
        callbackMap.get(dom)[attribute] = callback;
    }

    static remove(attribute, dom) {
        dom.removeEventListener(EventMap[attribute], callbackMap.get(dom)[attribute])
    }
}
然后我们在handleClick回调里输出一下:
  handleClick = () => {
    console.log('事件触发');
    // this.setState({
    //   count: this.state.count + 1,
    // });
  };
可以看到事件回调已经被执行,一个简单的事件就支持好了。
缓存控制类实例和组件实例的关系
在实现setState之前,我们首先要缓存一下组件实例和控制类的关系,来方便我们更新的时候可以精准找到之前挂载时的控制实例:
export const InstanceMap = new Map();
在组件初始化实例的时候存入:
    instantiate() {
        if (this.component.isClassComponent) {
            this.instance = new this.component(this.props);
            InstanceMap.set(this.instance, this);
        } else {
            this.instance = null;   // 函数组件不需要实例化
        }
    }
在setState的时候取出:
    setState(state) {
        const controller = InstanceMap.get(this);
        console.log(controller);
    }
可以看到控制台中我们已经取到了控制实例。
实现setState
其实setState的核心逻辑就是update,我们直接调用控制类的update方法即可。
    setState(state) {
        const controller = InstanceMap.get(this);
        controller.update(state);
    }
    update(state) {
        // 更新state
        this.instance.state = {...this.instance.state, ...state};
        // 重新触发render
        this.render();
        console.log(this.renderedElement);
    }
这里update,首先要更新组件的state,其次触发一下render,我们看一下控制台结果:
可以看到已经拿到了最新的element。
接下来要将DOM更新,我们需要找到之前的DOM节点,实现一个getHostNode方法:
     getHostNode() {
        return this.renderedComponent?.getHostNode();
    }
对于compositeComponent来说,其实是递归查找叶子节点的,这里的renderedComponent是我们之前挂载的时候赋值的:
    mount() {
        this.instantiate();
        this.render();
        // 递归执行mount
        if (this.renderedElement) {
            this.renderedComponent = instantiate(this.renderedElement);
            return this.renderedComponent.mount();
        }
        return null;
    }
最终会找到叶子节点的getHostNode:
    getHostNode() {
        return this.node;
    }
我们输出一下看看:
console.log(this.getHostNode());
可以看到已经拿到了hostNode。
接着我们先不考虑Diff,直接粗暴更新节点,先将当前组件挂载:
    unmount() {
        this.renderedComponent?.unmount();
    }
对于React组件的挂载,递归执行叶子节点的挂载。
    unmount() {
        this.childComponents.forEach(child => {
            child.unmount();
        });
        this.node = null;
    }
注意在domComponent和textComponent我们也不能直接删除DOM元素,因为在删除后需要把新的DOM节点插回到原来的位置,这个时候我们在外面用replaceChild更方便,就不在里面处理了。
在外面我们update的时候,采用销毁重建的方式将子节点替换:
    update(state) {
        // 更新state
        this.instance.state = {...this.instance.state, ...state};

        // 销毁重建
        const hostNode = this.getHostNode();
        this.unmount();
        const newNode = this.toMount();
        // 替换DOM节点(这里简便起见将更新DOM操作写在这里,理论上React组件和平台无关,应该依赖注入)
        hostNode.parentNode.replaceChild(newNode, hostNode);
    }
注意这里的toMount方法重新抽象了一下,相比mount排除掉了实例化的过程:
    mount() {
        this.instantiate();
        return this.toMount();
    }

    toMount() {
        this.render();
        // 递归执行mount
        if (this.renderedElement) {
            this.renderedComponent = instantiate(this.renderedElement);
            return this.renderedComponent.mount();
        }
        return null;
    }
这样我们的节点就会更新到最新了:
至此我们其实已经实现了React更新状态的逻辑,整个功能实现已经完成!
我们最终的目录结构:
实现简易的diff算法
实际上当我们判断两个组件类型没有发生变化的时候,是不需要销毁重建的,我们将diff算法实现一下:
  update(state) {
    if (state) {
      // 更新state
      this.instance.state = { ...this.instance.state, ...state };
    }

    const prevElement = this.renderedElement;
    this.render();
    const nextElement = this.renderedElement;

    if (prevElement.type === nextElement.type) {
      // 可以进行增量更新
      this.renderedComponent?.receive(nextElement)
    } else {
      // 销毁重建
      const hostNode = this.getHostNode();
      this.unmount();
      const newNode = this.toMount();
      // 替换DOM节点(这里简便起见将更新DOM操作写在这里,理论上React组件和平台无关,应该依赖注入)
      hostNode.parentNode.replaceChild(newNode, hostNode);
    }
  }
这里update是setState的入口,为了区分是当前组件自更新还是由于父组件更新引起的子组件更新,我们分为update和receive两个方法,当前后的子元素类型没有发生变化的时候,我们可以直接走receive。
接着分两部分来看receive的实现,一个是React组件本身,一个是叶子节点,先看React组件本身:
  receive(nextElement) {
    this.element = nextElement;
    this.component = nextElement.type;
    this.props = nextElement.props;
    this.instance.props = this.props; // 更新组件的props

    this.update(); // 递归执行子组件更新
  }
当组件本身调用receive的时候,说明是父组件的更新引起当前组件更新,那需要更新当前组件的所有信息,并且递归子组件的更新(这里调用update接口递归)。
再来实现一下DOMComponent的receive:
  receive(nextElement) {
    this.updateAttribute(nextElement.props);
    this.updateChildren(nextElement.props);

    this.element = nextElement;
    this.tag = nextElement.type;
    this.props = nextElement.props;
  }
当DOM节点走到receive的时候,说明当前DOM节点类型是一致的,那我们先对当前DOM节点的属性进行更新,再递归它的子元素。
首先是更新属性:
  updateAttribute(nextProps) {
    const prevProps = this.props;

    // 更新新的属性
    Object.keys(nextProps).forEach((attribute) => {
      if (attribute !== "children") {
        if (attribute === "className") {
          this.node.setAttribute("class", this.props[attribute]);
        } else if (EventListener.isEventAttribute(attribute)) {
          EventListener.remove(attribute, this.node);
          EventListener.listen(attribute, this.props[attribute], this.node);
        } else {
          this.node.setAttribute(attribute, this.props[attribute]);
        }
      }
    });

    // 删除旧的属性
    Object.keys(prevProps).forEach((attribute) => {
        if (attribute !== "children") {
          if (!nextProps.hasOwnProperty(attribute)) {
            this.node.removeAttribute(attribute);
          }
        }
      });
  }
我们首先考虑到的是新属性的更新替换,需要额外处理一下事件的重新监听。然后是新属性不存在的老属性的删除。
在更新完当前节点的属性后,需要递归更新子元素:
 updateChildren(nextProps) {
    const prevChildren = this.formatChildren(this.props.children);
    const nextChildren = this.formatChildren(nextProps.children);


    for (let i = 0; i < nextChildren.length; i++) {
        const prevChild = prevChildren[i];
        const nextChild = nextChildren[i];
        const prevComponent = this.childComponents[i];
        const nextComponent = instantiate(nextChild);

        if (!nextComponent) {
            continue;
        }

        if (prevChild == null) {
            // 旧的child不存在,说明是新增的场景
            this.node.appendChild(nextComponent.mount())
        } else if (prevChild.type === nextChild.type) {
            // 相同类型的元素,可以直接更新
            prevComponent.receive(nextChild);
        } else {
            // 销毁重建
            const prevNode = prevComponent.getHostNode();
            prevComponent.unmount();
            this.node.replaceChild(nextComponent.mount(), prevNode);
        }
    }

    for (let i = nextChildren.length; i < prevChildren.length; i++) {
        // next里面不存在的,要删除
        const prevComponent = this.childComponents[i];
        const prevNode = prevComponent.getHostNode();
        prevComponent.unmount();
        this.node.removeChild(prevNode);
    }
  }
这里其实就是DOM Diff的实现了,除了没有支持key的优化外,和之前我们分析过的DOM Diff算法保持一致,有三种情况:
- 新节点直接插入(旧节点不存在)
- 新节点替换(类型相同,递归receive,类型不同,销毁重建,replaceChild)
- 旧节点删除
最后是文本叶子节点的实现,可以直接替换文本内容:
  receive(nextElement) {
    this.text = nextElement;
    // 直接更改文本内容
    this.node.textContent = this.text;
  }
至此我们就实现了整个Diff算法,现在点击按钮是不会触发DOM的销毁重建的:
生命周期钩子支持
最后我们来完善一下React生命周期函数的支持,主要是React组件的几个声明周期:
componentWillMountcomponentDidMountcomponentWillUpdatecomponentDidUpdatecomponentWillReceiveProps
import { InstanceMap } from "./instanceMap";
import { instantiate } from "./instantiate";
export default class CompositeComponent {
  constructor(element) {
    this.element = element;
    this.component = element.type;
    this.props = element.props;
  }

  execHook(name, ...args) {
    if (this.instance?.[name]) {
        this.instance[name].call(this.instance, ...args);
    }
  }

  mount() {
    this.instantiate();
    this.execHook('componentWillMount');
    this.render();

    return this.toMount();
  }

  toMount() {
    // 递归执行mount
    let result = null;
    if (this.renderedElement) {
      this.renderedComponent = instantiate(this.renderedElement);
      result = this.renderedComponent.mount();
    }

    this.execHook('componentDidMount');
    return result;
  }


  receive(nextElement) {
    this.execHook('componetWillReceiveProps', nextElement.props);
    const prevProps = this.props;

    this.element = nextElement;
    this.component = nextElement.type;
    this.props = nextElement.props;
    this.instance.props = this.props; // 更新组件的props

    this.update({}, prevProps); // 递归执行子组件更新
    this.execHook('componentDidUpdate');
  }

  update(state, prevProps = this.props) {
    const prevState = this.instance.state;
    const nextState = { ...this.instance.state, ...state };
    this.execHook('componentWillUpdate', this.props, nextState);

    if (state) {
      // 更新state
      this.instance.state = nextState;
    }

    const prevElement = this.renderedElement;
    this.render();
    const nextElement = this.renderedElement;


    if (prevElement.type === nextElement.type) {
      // 可以进行增量更新
      this.renderedComponent?.receive(nextElement)
    } else {
      // 销毁重建
      const hostNode = this.getHostNode();
      this.unmount();
      const newNode = this.toMount();
      // 替换DOM节点(这里简便起见将更新DOM操作写在这里,理论上React组件和平台无关,应该依赖注入)
      hostNode.parentNode.replaceChild(newNode, hostNode);
    }

    this.execHook('componentDidUpdate', prevProps, prevState);
  }

  unmount() {
    this.execHook('componentWillUnmount');
    this.renderedComponent?.unmount();
  }
}
这里对代码进行微调,update的hook需要注意时机。通过execHook来触发相应的Hook,在组件里面做个测试:
import { Component } from "../../../react";

export default class Counter extends Component {
  componentWillMount() {
    console.log('componentWillMount触发');
  }

  componentDidMount() {
    console.log('componentDidMount触发');
  }

  componentWillUpdate(nextProps, nextState) {
    console.log('componentWillUpdate触发', nextProps, nextState);
  }

  componentDidUpdate(prevProps, prevState) {
    console.log('componentDidUpdate触发', prevProps, prevState);
  }

  componentWillReceiveProps(nextProps) {
    console.log('componentWillReceiveProps触发', nextProps);
  }
}
可以看到相应的生命周期我们已经能正常运作。
至此一个最小版本的React已经全部开发完成!
小结一下
我们通过300行左右的代码实现了React的核心逻辑,麻雀虽小,但五脏俱全,让我们回顾下实现了什么:
- 支持React挂载,DOM挂载,JSX语法render
- 支持函数式组件、类组件的写法
- 支持通过
setState更新组件状态 - 支持React完整的生命周期
- 支持diff算法,不会频繁进行DOM的挂载与删除
这些特性也是支撑React的核心逻辑。
而我们不支持的绝大多数是React16之后的特性,如:
- 不支持fiber架构
- 不支持React hooks
- 不支持Fragment等
本篇文章的实现可以作为对之前React源码分析的成果检验,事实证明通过之前源码的学习,我们现阶段是完全可以实现React的。
本文相关代码已上传github,相关资源:
mini-react仓库(求赞,求关注:https://github.com/mengjian-github/mini-reactReact源码全解Gitbook:https://meng-jian.gitbook.io/react-yuan-ma-quan-jie/微信公众号:https://files.mdnice.com/user/13429/4ff4b664-c615-44e0-8359-9da1a578f698.png知乎专栏:https://www.zhihu.com/column/c_1541151499358449664掘金专栏:https://juejin.cn/column/7130596324042342437
Questions
What is mini-react?
mengjian-github/mini-react is a public repo on GitHub by mengjian-github. Its maker has not written a description.
Is mini-react open source?
It declares no license on GitHub. Public does not mean open source: without a license, nobody is granted the right to reuse it.
Does mini-react run on macOS, Windows or Linux?
Its maker has not tagged a system, so it is unknown here. Its README says what it needs.
How do I install mini-react?
Open "Take it" on its page: Take My Repo writes an install plan for your machine and hands it to your AI agent (Claude Code, Codex or Cursor), which asks you before each step. Take My Repo has not tested it on any machine.
Is mini-react still maintained?
Its last change on GitHub was on 2022-08-31. Take My Repo does not judge from that whether it is maintained.
What do people who ran mini-react say?
Nobody has reviewed it on Take My Repo yet, which says nothing about its quality.