
expressive-code
A text marking & annotation engine for presenting source code on the web.
- 969
- TypeScript
- MIT
- 4 d ago
Codeblock Customizer plugin for Obsidian
Repo mugiwara85/CodeblockCustomizer, read from GitHub 1 min ago. mugiwara85 has not joined Take My Repo.
mugiwara85/CodeblockCustomizer is a public repo on GitHub by mugiwara85. Codeblock Customizer plugin for Obsidian. It declares the MIT license on GitHub. It is written mainly in TypeScript, has 362 stars and last changed on 2026-11-19. Nobody has reviewed it on Take My Repo yet, which says nothing about its quality. Read from GitHub on 2026-11-21.
This is a plugin for Obsidian (https://obsidian.md).
The plugin lets you customize the code blocks in the following way:
prompt:.parse parameter to parse raw CLI output for promtpshide parameter to hide lines or rangesFor a more detailed list of changes, check the Changelog.
Parameters can be defined in the opening line of a code block (after the three opening backticks).
All parameters can be defined using : or =.
| Name | Value | Description |
|---|---|---|
| fold | Defines that the code block is in folded state when the document is opened. | |
| unfold | Defined that the code block is in unfolded state when the document is opened and the Inverse fold behavior option is enabled, otherwise ignored. |
|
| exclude | Exclude the code block from the plugin. | |
| hl | Multiple | Everything that applies to the hl parameter also applies to alternative highlight colors!Multiple values can be combined with a , (e.g: hl:test,3,5-6,9|abc,test1,test2,10-15|test3)Highlights specified lines on different formats: |
| hl:{number} | hl:5 - Highlights line 5. |
|
| hl:{range} | hl:5-7 - Highlights lines from 5 to 7. |
|
| hl:{string} | hl:test - Highlights all lines containing the word test. |
|
| hl:{number}|{string} | hl:5|test - Highlights line 5 if it contains the word test. |
|
| hl:{range}|{string} | hl:5-7|test - Highlights lines 5 to 7 if they contain the word test. |
|
| hlt | Multiple | Everything that applies to the hlt parameter also applies to alternative highlight colors!Multiple values can be combined with a , just like for the hl parameter.Highlights specified text on different formats: |
| hlt:{string} | hlt:test - Highlights the word test in every line it is found. |
|
| hlt:{number} | hlt:5 - Highlights all the text in line 5. |
|
| hlt::{string} | hlt::xyz - If the start position is not defined but the end position is, the text will be highlighted from the beginning of the line up to the end position. |
|
| hlt:{string}: | hlt:abc: - If the start position is defined, but the end position is not, the text will be highlighted from the start position, until the end of the line. |
|
| hlt:{string}:{string} | hlt:abc:xyz - Highlights text in lines starting with abc and ending with xyz. |
|
| hlt:{number}|... | All the above options can be prepended with an optional number and a | to specify in which line to highlight the text. |
|
| hlt:{number}[occurence]|... | All the above options can be prepended with an optional occurence before the | to specify which occurence to highlight in the text. (e.g. hlt:5[2,5-8]|test -> highlights the second, and the 5th, 6th, 7th and 8th occurence of test in line five) |
|
| hlt:{range}|... | All the above options can be prepended with an optional range and a | to specify in which range to highlight the text. |
|
| hlt:{range}[occurence]|... | All the above options can be prepended with an optional occurence before the | to specify which occurence to highlight in the text. (e.g. hlt:5-7[2,5-8]|test -> highlights the second, and the 5th, 6th, 7th and 8th occurence of test in the lines 5, 6, 7) |
|
| lsep | char | Line separator. Optionally you can define a line separator (a single character) for text highlight instead of the default |. Useful, if you want to highlight text starting and/or ending with |. This can be set globally as well. |
| tsep | char | Text separator. Optionally you can define a text separator (a single character) for text highlight instead of the default :. Useful, if you want to highlight text starting and/or ending with :. This can be set globally as well. |
| file | {string} | Sets the display text for the header. (e.g: file:hello or file:"Hello World!") |
| title | {string} | Alias for file |
| ln | Multiple | |
| true | Displays line numbers for that specific code block, even if Enable line numbers is disabled |
|
| false | Does not display line numbers for that specific code block, even if Enable line numbers is enabled |
|
| {number} | Sets the offset for line number to start (e.g: ln:5 -> line numbering starts from 5) |
|
| {number}:{number} | Specifies a line number jump. The first number defined at which line number should the jump occur, and the second number defined the new value. (e.g.: ln:10:20 -> line number changes on 10 to 20) |
|
| parse | parse:{promptName} | Specifies what prompts to look for when parsing the code block text. Usefull when raw CLI output was pasted in the code block and the prompts should get colors. (e.g. parse:bash) |
| hide | hide:{line or range} | Specifies which lines or ranges should be hidden. If defined, a separator will be inserted where you can unhide the hidden ranges. |
| prompt | {prompt} | Sets the name of the prompt to be used in the code block e.g. prompt:kali. Line numbers and ranges can also be specified in which lines the prompt should be displayed e.g. prompt:1-2,4|bash |
| noprompt | Disables prompts for a specific code block, which is useful when the auto-use prompt option is enabled. It is also possible to specify lines or ranges for which the prompt should not be shown e.g. noprompt or noprompt:1-3,5 |
|
| user | {string} | Overrides the default user for the current prompt. |
| host | {string} | Overrides the default host for the current prompt. |
| path | {string} | Overrides the default path for the current prompt. |
| db | {string} | Overrides the default database for the current prompt (postgres). |
| branch | {string} | Overrides the default git branch for the current prompt (zshgit). |
| module | {string} | Overrides the default module for the current prompt (metasploit). |
| group | {string} | Assigns the code block to a group. Consecutive blocks with the same group name will be rendered as a single tabbed component. |
| tab | {string} | Sets a custom display name for the tab when using grouped code blocks. If not provided, the language name is used. |
This is an experimental setting, but it is worth talking about this.
Small background information:
The syntax highlighting wasn't the same in editing and reading mode, because Obsidian uses two different engines. The one used in editor mode is CodeMirror 6, and the other for reading mode is PrismJS. The problem with this is, that CodeMirror supports less languages then PrismJS, and even if it supports the same language it will probably still differ, because it works different.
So what does this setting do? It forces the editor to use PrismJS in editor mode. This results, that when this setting is enabled, the syntax highlighting is the same in editing and reading modes!
But that's not all! This setting also has a positive side effect. CodeMirror does support a lot of languages, but nearly not as many as PrismJS. When this setting is enabled, that also means that languages which CodeMirror does not support (e.g. graphql or makefile or hlsl) also get syntax highlighting, because PrismJS does support it.
Even though this setting is not as thoroughly tested as others, I wanted to release it earlier. Should you encounter some errors or bugs, just open an issue.
Example code block in editor mode with the setting disabled:

Same code block with setting enabled (matches reading mode):

The plugin comes with multiple themes (Obsidian, Solarized, Dracula, Gruvbox, Nord, Tokyo Night). The default theme is Obsidian.
Obsidian Theme

Solarized Theme

Dracula Theme

Gruvbox Theme

Nord Theme

Tokyo Night Theme

How the themes work:
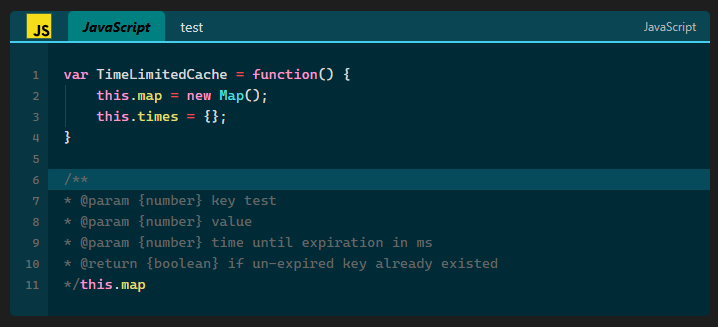
To display a filename specify file: or title: followed by a filename in the first line of the code block. If the filename contains space, specify it between "" e.g.: file:"long filename.cpp". title is basically an alias for file. If both are defined, then file will be used
Example:
```cpp file:test.cpp
```cpp title:test.py
```cpp file:"long filename.cpp"

If you want to display text which contains a " or ' you'll have to escape it with a backslash. For example: file:"Hello \" World!"
The header is displayed in the following cases:
file: or title:fold. If you specified fold but did not specify file: or title: a default text Collapsed code will be displayed on the headerAlways display codeblock language or the Always display codeblock language icon option in settings, but did not specify file: or title: or foldIf the header is displayed, folding works as well. If Always display codeblock language is enabled then the header will display the code block language as well.
Example:


There are currently around 170 icons available for different languages. You can enable the option in the settings page to display icons in the header. If you enable this option, and if the language specified in the code block has an icon, and the header is displayed, then the icon will be displayed. You can also force to always display the icon (which also means that the header will be also displayed) even if the header is not displayed, because the file or title parameter is not defined.

To enable line numbers go to the plugin settings and enable the Enable line numbers option. After that the line numbers will be displayed before code blocks.
Example:

The ln: parameter can have 4 values: true, false, number and {number}:{number}
ln is set to ln:true, then for that specific code block only, the line numbers will be displayed, even if line numbers are not enabled in the settings.ln is set to ln:false, then for that specific code block only, the line numbers will NOT be displayed, even if line number are enabled in the settings.ln is set to a number, e.g. ln:5, then it sets the offset for the line numbers.ln is set to {number}:{number} (e.g. ln:10:20), then a line number jump will occur on lines 10. The line numbering changes from 10 to 20. An additional separator will be inserted to make it more clear that a jump happened.
Simple Line number jump:

Syntax Themes let you change the colors used for syntax highlighting in code blocks. Pick a built-in theme or create your own. Each theme automatically adapts to Obsidian's dark and light mode.
Built-in themes: Obsidian, Dracula, Gruvbox, Nord, Solarized, Tokyo Night, VS Code Modern, Monokai, GitHub, Catppuccin.
An example JavaScript code block, with the default PrismJS syntax highlighting:

Same code block with Nord syntax theme applied:

You can set a syntax theme globally for all languages, or override it for specific languages. For example, use Dracula globally but apply Nord to Python code blocks only.
Note: This feature works only with
PrismJStokens. For the best result, enableUse PrismJS for syntax highlighting in editor mode. Without it, syntax themes only apply in reading mode, not in editing mode.
Syntax highlighting works by analyzing the text in a code block. Each word is identified as a token, which can be a keyword (if, else), a string, a number, a comment, etc. A color is then assigned based on the token type. The full list of tokens can be found here. Syntax Themes let you customize the color for each of these token types.
To highlight lines specify hl: followed by line numbers in the first line of the code block.
hl:1,3,5,7. This would highlight the specified lineshl:2-5 This would highlight lines from 2 to 5.hl:test. This would highlight all lines containing the word test. You can also prepend this value with a line number, or range and a | like this: hl:5|test,5-7|test2hl:1,3,4-6,test,5|test,7-9|test3 This would highlight lines 1, 3 and lines from 4 to 6.Example:
```cpp hl:1,3,4-6

You can define multiple highlight colors. This means, that you have to define a name for the highlight color. This name will be used as a parameter, and you can use it just like with the hl parameter.
Example:
You define three types of highlight colors (info, warn, error). After that set the colors. After that you can use it in the first line of code blocks:
```cpp info:2 warn:4-6 error:8

Example code block with multiple highlight colors:

It is possible now to highlight text instead of lines. To use this feature use the hlt parameter.
hlt: parameter a string is defined, then the string is highlighted in every line it is present in the code block. Example: hl:extensionhlt: parameter a number is defined, then all words in the specified lines are highlighted . Example: hl:5hlt: parameter a number is defined, followed by a pipe |, followed by a string, then the word is highlighted only in this line if it is present. Example: hl:9|printhlt: parameter a range is defined, followed by a pipe | character, followed by a string, then the word is highlighted only in these line ranges, if it present. Example: hl:6-7|printhlt: parameter a string, followed by a :, followed by a string is defined, then the string will be highlighted which starts with the string before the :, and ends with the string after : e.g.: hlt:<startString>:<endString>. Example:
hlt:abc: -> startString is defined, but endString is not defined. This will highlight the text starting with startString until the end of the linehlt::xyz -> startString is not defined, but endString is defined. This will highlight the text starting from the beginning of the line until endStringhlt:abc:xyz -> highlights text starting with abc and ending with xyz in all lines it is present| character. You can specify indexes, or index ranges comma separated, and negativ indexes, which will highlight from the lines end. e.g. hlt:5[1,3-5,-1]|test will highlight the 1st,3rd,4th and the last occurence of test in line 5All the above options can be prepended with an optional number or range and a | to specify in which line to highlight the text.
Note
error, then you can use the error parameter for line highlighting. To highlight text simply append a t after the alternative color name. This means that if you want to highlight text using the error color, you'll have to use the errort (note the t at the end) of the parameter." or ' you'll have to escape it with a backslash. For example: hlt:start\"text:end\"text or hlt:"start \" text:end \" text"| or the default text separator :, you can redefine them, with the lsep and tsep parameters. For example: hlt:5^|ˇ: lsep:^ tsep:ˇ would highlight text from | to :. You can also globally define themhlt:\5 highlights the text 5 and hlt:\1-3 highlights the text 1-3, put it between quotes. For example: hlt:","An example code block with text highlight, using three different colors is shown below:

An example code block with text highlight, using from and to markers:

An example code block with text and occurence highlight is shown below:

In the settings, on the 🎨 Appearance & Styling settings page under Language Specific Color Overrides it is now possible to define colors for languages. These colors will only apply to code blocks with the defined language. If you defined colors for "Python", then those colors will only apply to every Python code block. If you want to specify colors for code blocks which do not have a language defined, specify nolang as a language.
First, you have to add a language. Then you can select which color you want to set. Available options are:
An example is shown below, where the background color has been defined for "Python", "JavaScript" and "C++" languages.

Example code blocks with border colors set:

Don't forget to set Codeblock border styling position, otherwise border colors will not be displayed!
If the header is displayed, simply clicking on it, will fold the code block below it.
To specify an initial fold state when the document is opened, specify fold in the first line of the code block. If fold is defined in a code block, then when you open the document, the code block will be automatically collapsed, and only the header will be displayed. You can unfold the code block by clicking on the header.
Example:
```cpp fold

You can enable semi-folding in settings tab:

After enabling it, you have to select the count of the visible lines (default is 5). Optionally you can also enable an additional uncollapse button, which will be displayed in the last line. Semi-fold works just like the normal fold with the following differences:
The number of the "fade" lines is constant, and cannot be changed. Example: You set the count of visible lines to 5, and you have a code block with 10 lines. In this case semi-fold will be used. The first 5 lines remain visible, and the next 4 lines will "fade away".
Note
In editing mode the opening and closing lines (with the three backticks) do not count!
Example semi-folded code block (light theme):

Example semi-folded code block (dark theme):

Example semi-folded code block with additional uncollapse button:

When this options is enabled in the settings page, code blocks are collapsed by default when a document is opened, even if fold was NOT defined. If you enabled this option, and want some code blocks unfolded by default, you can use the unfold parameter.
Wrapping code lines was already present in the plugin, but only in reading mode. Now, I also added this feature in editing mode. If you enabled the "Wrap code" button previously, you don't have to do anything else. If not, enable it in the settings page. A new button will be displayed, which when click will wrap/unwrap code lines.

You can combine multiple consecutive code blocks into a single, user-friendly tabbed interface. This is perfect for showing code in multiple languages or breaking up a long script into logical steps.
Use the group parameter with the same name for each block. Use the optional tab parameter to set a custom name for each tab.
Example:

Important
Limitations
Create realistic and beautifully styled terminal prompts that can simulate commands like cd and su. To use a prompt, specify the language as prompt:<name>.
You can design your own prompts with custom templates, colors, and auto-use rules in the dedicated Prompts section of the plugin settings.
There are 3 type of prompts:
By default, the plugin comes with the following prompts:
| PromptID | Description |
|---|---|
| bash | Bash prompt |
| bashalt | Alternative bash prompt |
| cmd | Windows CMD Prompt |
| cstrike | Cobalt Strike Prompt |
| docker | Docker prompt |
| fish | Fish Prompt |
| kali | Kali Linux Prompt |
| msf | Metasploit prompt |
| postgres | Postgres Prompt |
| ps | PowerShell prompt |
| zsh | ZSH prompt |
| zshgit | ZSH+Git prompt |
You can use them simply defining prompt:<promptID> on the first line of code blocks e.g.: prompt:kali. You can change the default values globally in the settings page, or code block specific in using the user, host, path, db, branch and module parameters.
In the settings page you can simply create your own prompt. For example if you create a prompt with the name myprompt, you can use that simply by defining its name e.g.: prompt:myprompt.
You can create a custom prompt by defining its structure, parsing logic, and styling rules using three key settings:
basePrompt: This is the visual template for your prompt. Use placeholders ({user}, {host}, {path}, {db}, {module} and {branch}) to insert dynamic information."{user}@{host}:{path}$"parsePromptRegex: A Regular Expression used to identify and extract parts of a prompt string. It relies on named capture groups (e.g., (?<user>...)) to label the parts it finds.^(?<user>[^@]+)@(?<host>[^:]+) captures the username and hostname.highlightGroups: A JSON object that maps the names from your regex capture groups (e.g., "user") to style classes. This tells the plugin which color to apply to each part of the prompt.{ "user": "user", "host": "host" }The parsePromptRegex finds the text for the user and host. The highlightGroups setting then links these parts to their respective styles, which are used to apply the correct colors.
You can also create prompts dynamically in a code block e.g.: prompt:test would display test at the beginning of every line. You can also use placeholder for the above mentioned parameters, and then define them. In this case the values will be replaced e.g.: prompt:"{user} at {host} in {path}" user:mugiwara host:PC1 path:/var/www/html.
Important
Limitation The colors can NOT be set for On-Thy-Fly prompts!
The following commands are supported:
| Command | Description |
|---|---|
cd |
Go to home (~) |
cd ~ |
Also goes to home |
cd folder |
Go into a folder |
cd .. |
Go one level up |
cd ../.. |
Go two levels up |
cd - |
Go back to previous dir |
cd "some dir" |
Quoted folder name |
cd.. |
Common typo for cd .. |
cd ~/folder |
Inside home dir |
cd /absolute |
Full path |
pwd |
Shows current working directory |
su |
Switch to root user |
su <user> |
Switch to specific user |
whoami |
Shows the current user |
\c |
Change database in postgress |
exit |
Switch back to the previous user after using su or su <user> |
git checkout <branch> |
Change branch |
git switch <branch> |
Change branch |
use |
Change the Metasploit module |
Example:

If the code block contains raw CLI output text including prompts, and you would just want to color the prompts automatically, you can use the parse parameter. You can specify the names of the default prompts, and the ones you created. For example parse:bash would look for bash prompts, that match the bash regex defined in the prompts settings page. If one is found, than the corresponding colors are automatically assigned.
Example:

Bring your code comments to life by turning them into styled annotations. This feature helps draw attention to important notes, warnings, or questions directly within your code.
Simply use the [!type] syntax within a standard line comment. Supported types include note, warn, error, todo, question, and see.
You can also define an optional title using the [!<type>|<title>] syntax.
Example:

You can enable the option Hide Fence Lines under the 👆 Behavior & Interaction settings tab. After enabling the opening and closing fence lines will be hidden by default. They will only reappear when the cursor is moved into the code block.

Using the hide parameter it is possible to hide lines and/or ranges. The specified lines will be hidden and a separator will be inserted so you can unhide the lines. If a hidden line/range has been unhidden an additional button (eye) will be displayed, so you can re-hide the lines again. To hide lines simply specify the line numbers or ranges e.g. hide:3,5,7-10

If you want to style inline code, you have to enable it first. After that you can set the background color and the text color for inline code.

If you want to use syntax highlighted inline code then enable the appropriate option from the above settings. After enabling you can simply do {cpp} printf("\nHello World!"). This will then be rendered as shown below:

There are five commands available in the command palette. You can:
If you collapsed/uncollapsed all code blocks there is no need to restore them to their original state. When you switch documents they are automatically restored to their original state.

By default, the light colors are used for printing, but if you want to force the dark colors, you can enable the toggle.

Code blocks in lists, are now indented properly as shown below. Simply, mark the text in the code block, and press TAB. This will shift the code block right, by adding margin to the left side. Pressing TAB multiple times, indents the code block more. If you want to undo it, just select the text again, and press SHIFT+TAB.

If you want to convert markdown, wiki and normal http/https link syntax to actual links inside code blocks, then you have to mark them as comment according to the current code block language, and enable the setting Enable links usage in the settings on the 👆 Behavior & Interaction settings page. Links can also be used in the header.
For example if you are in a python code block, then you have write a "#" before the link (comment it out), and it will be automatically converted to a link.
By default the links, which point to another document in your vault, are not updated, if you rename the file. This is because Obsidian does not provide (yet) a way to add these links to the metadata cache. A temporary solution for that is to enable the option Enable automatically updating links on file rename option in settings.
Important
Please note, that this method iterates over all of your documents in you vault! If you have a large vault, this process could take some time, although it is generally efficient.
Sample code block with links, but with the option Enable links usage disabled:

Same code block with the Enable links usage option enabled:

It is possible to use custom SVGs, and assign existing syntax highlighting for code blocks. To use this feature create the following folder <VaultFolder>\.obsidian\plugins\codeblock-customizer\customSVG. In this folder create a file called svg.json with similar content:
{
  "languages": [
    {
      "codeblockLanguages": ["language1", "language2"],
      "displayName": "iRule",
      "svgFile": "f5.svg",
      "format": "tcl"
    }
  ]
}
Explanation:
viewBox is used, so icons of any size are displayed correctly. Alternatively, the file can contain only the content of the SVG without the <svg> tag. In this case the content must be drawn on a 32x32 grid (viewBox="0 0 32 32"). Look at Const.ts for examples.Important
Obsidian uses two different methods for syntax highlighting. For editing mode it uses CodeMirror 6, and for reading mode it uses Prism.js. Because of this there is a slight difference between how this works.
language1 does not have syntax highlighting, therefore the tcl syntax highlighting will be applied successfully. The languages specified in codeblockLanguages are case sensitive in editing modecodeblockLanguages are NOT case sensitive in reading mode.An example using the above shown JSON file, where tcl syntax highlighting is applied to language1 code blocks, using the custom SVG file, and the custom display name:

PrismJS provides syntax highlighting for a lot of languages, but there are still some, which it doesn't support. This feature lets you define your own syntax highlighting rules for those unsupported languages by creating a JSON configuration file. If Use PrismJS for syntax highlighting in editor mode is enabled (see PrismJS Syntax Highlighting), the rules apply in both editor and reading mode. If it is not enabled, the rules will only apply in reading mode.
To get started, create a customPrismLanguages.json file in your <VaultFolder>\.obsidian\plugins\codeblock-customizer\ folder. In this file you can define the RegExes used by PrismJS to provide syntax highlighting for those languages. You will need to define RegExes for the tokens. There are a few examples on the official PrismJS website.
Important
The RegExes are stored as strings in the customPrismLanguages.json file. This means, that you will have to escape the backslashes. So instead of one backslash (\), you'll have to write two (\\).
Note
If the JSON file is malformed or contains invalid RegExes, a notice will be shown when the plugin loads.
A sample customPrismLanguages.json which provides syntax highlighting for the ma3 language would look like this:
{
  "ma3": {
    "comment": "/(^|[^\\\\#])#.*/gim",
    "string": [
      {
        "pattern": "/'(?:\\\\[\\s\\S]|[^\\\\''])*'/",
        "greedy": true
      },
      {
        "pattern": "/\"(?:\\\\[\\s\\S]|[^\\\\\"])*\"/",
        "greedy": true
      }
    ],
    "number": "/(?:\\b\\d+(?:\\.\\d*)?|\\B\\.\\d+)/gi",
    "operator": "/[-+*%]/",
    "slashModifier": {
      "pattern": "/(\\/\\w+)/",
      "alias": "class-name"
    },
    "macroInputPrompt": {
      "pattern": "/\\((?:\\\\[\\s\\S]|[^\\\\(\\\\)])*\\)/",
      "alias": "variable",
      "greedy": true
    },
    "macroVariableResolve": {
      "pattern": "/\\$.[^\\s]*/",
      "alias": "variable",
      "greedy": true
    },
    "keyword": "/\\b(?:\\w+)\\b/"
  }
}
ma3 language without custom syntax highlight definition:

ma3 language with custom syntax highlight definition:

You can enable bracket highlighting for matching and also for non-matching brackets. If you click next to a bracket ((,),{,},[,]), then the bracket itself, and the corresponding opening/closing bracket will be highlighted. You can set individual background, and highlight colors for matching and non-matching brackets:

Below is a simple example. Notice that that the matching and non-matching bracket are highlighted with different colors:

If you enable selection matching, you can set the background color for the matches to be highlighted with. Simply select a string, or double click on a word, and the same text will be highlighted if found:

Note
Selection matching (currently) has a limit of 750 matches. If there are more matches than this, then selection matching will not highlight anything. Should you encounter a case where this number is not enough, contact me, and I'll increase it.
The Plugin is compatible with Admonition and Execute Code plugins. In the settings page, there is a dedicated page for plugin compatibility settings.
The plugin also works with Admonitions in editing mode and reading mode as well.

For Execute Code you can choose if you want the "basic" styling (which is just the background color), or you want the more advanced styling (which includes lines numbers, highlighting lines and text in the output).
To highlight lines and text in the Execute Code output you have to append an "o" to the highlight parameters. So hl works for normal code, but hlo works on execute code output. The same is with hlt. hlt work for normal code and hlto works for Execute code output. This logic also aplies to all of your custom highlight colors as well.

The plugin supports all languages that Execute Code supports by default. If you use a fork of Execute Code which supports additional languages (or Execute Code added a new language which isn't supported by this plugin yet), and the run button disappears for that language, add it to the Additional Execute Code languages setting as a comma-separated list (e.g. tcl, perl). Reload the plugin after changing this setting.
main.js, styles.css, manifest.json to your vault VaultFolder/.obsidian/plugins/codeblock-customizer/.Found a bug or have a feature request? Please open an issue on the GitHub repository.
If you like this plugin, and would like to help support continued development, use the button below!
mugiwara85/CodeblockCustomizer is a public repo on GitHub by mugiwara85. Codeblock Customizer plugin for Obsidian.
It declares the MIT license on GitHub.
Its maker has not tagged a system, so it is unknown here. Its README says what it needs.
Open "Take it" on its page: Take My Repo writes an install plan for your machine and hands it to your AI agent (Claude Code, Codex or Cursor), which asks you before each step. Take My Repo has not tested it on any machine.
Its last change on GitHub was on 2026-11-19. Take My Repo does not judge from that whether it is maintained.
Nobody has reviewed it on Take My Repo yet, which says nothing about its quality.
A text marking & annotation engine for presenting source code on the web.
Bring projects, wikis, and teams together with AI. AppFlowy is the AI collaborative workspace where you achieve more without losing control of your data. The leading open source Notion alternative.
Graphs that teach > graphs that impress. Turn any code into an interactive knowledge graph you can explore, search, and ask questions about. Works with Claude Code, Codex, Cursor, Copilot, Gemini CLI, and more.
Flutter Code Editor is a multi-platform code editor supporting syntax highlighting, code blocks folding, autocompletion, read-only code blocks, hiding specific code blocks, themes, and more.
Syntax highlighting for code blocks, terminal output, diffs, and activity logs on macOS
A TSLint config for JavaScript Standard Style with a plus of useful rules.