

vfox
A cross-platform and extendable version manager with support for Java, Node.js, Golang, Python, Flutter, .NET & more
- 4k
- Go
- Apache-2.0
- 3 d ago
Setting up a Java development environment on Ubuntu.
Repo ockertbotha/java-dev-on-ubuntu, read from GitHub 1 min ago. ockertbotha has not joined Take My Repo.
ockertbotha/java-dev-on-ubuntu is a public repo on GitHub by ockertbotha. Setting up a Java development environment on Ubuntu. It declares no license on GitHub. Public does not mean open source: without a license, nobody is granted the right to reuse it. It has 1 stars and last changed on 2018-10-26. Nobody has reviewed it on Take My Repo yet, which says nothing about its quality. Read from GitHub on 2026-11-21.
Setting up a basic Java development environment on Ubuntu desktop.
Our development environment is going to consist of:
Off of the back of this guide I hope to make a few more available in particular to cover SSH access and which git GUI tool to use in Windows.
This guide is not going to cover the installation and configuration of the OS or the tools and utilities used to reach this point but they are confirmed here for completeness:
Unless it is stated differently, all commands should be entered using the Terminal.
This will enable us to not only install our JDKs but also switch between them on a per project basis, install the core of the utility following the instructions here: https://github.com/asdf-vm/asdf
Close the Terminal and start a new one so that the changes can take effect.
Once asdf is installed and configured, add the Java plugin with:
asdf plugin-add java
Check for the available versions with:
asdf list-all java
We're going to install Java oracle-8.181:(While we still can!)
asdf install java oracle-8.181
The command initiates the download of the selected JDK which can take a while, but once complete the JDK should have been successfully installed.
We'll use this version system wide:
asdf global java oracle-8.181
But once setup properly you could use different versions per project by setting the asdf java on that directory.
Check for the current version with:
asdf current java
Since we applied our version globally running the following anywhere should confirm the asdf settings:
java -version
If all is not as it seems you can confirm which java is running with:
which java
This should point to your version of the shims file:
/home/yourusername/.asdf/shims/java
Intrepid readers can learn more about shims here (https://en.wikipedia.org/wiki/Shim_(computing))
If during some future tinkering you need to modify something about your locally installed versions of the JDK then you can find the install directories here:
/home/yourusername/.asdf/installs/java
We will install Eclipse Photon in this guide, download it from https://www.eclipse.org/downloads/
From your Downloads directory:
cd ~/Downloads
Extract:
tar xfz ~/Downloads/eclipse-inst-linux64.tar.gz
Launch the GUI installer with:
~/Downloads/eclipse-installer/eclipse-inst
You can select whichever version you wish but if you want to follow this guide then choose:
Eclipse IDE for Java EE Developers
Accept the default installation folder which should be your version of:
/home/yourusername/eclipse/jee-photon
Read and accept the licenses. When the installation completes, choose the launch option; the first action is to select a directory as a workspace, you can select any directory but of you want to follow this guide exactly then set it to:
/home/yourusername/Studio/Dev/eclipse-workspace
Once Eclipse has started you may dismiss the Welcome screen and uncheck the "Always show Welcome at start up" option, unless you like it and want to be welcomed every time, totally up to you.
This section covers a few large and complicated topics, we don't have the scope here to cover them in detail, but here are some links please take the time to read each one you are not familiar with.
If you're here there's a good chance you know what version control is, if not just know it's a type of system used by developers to manage the source code they write. Obviously there is a lot more to it than that and the following link provides an excellent overview of how Git works and compares it to some of the other systems. Git for Eclipse Users
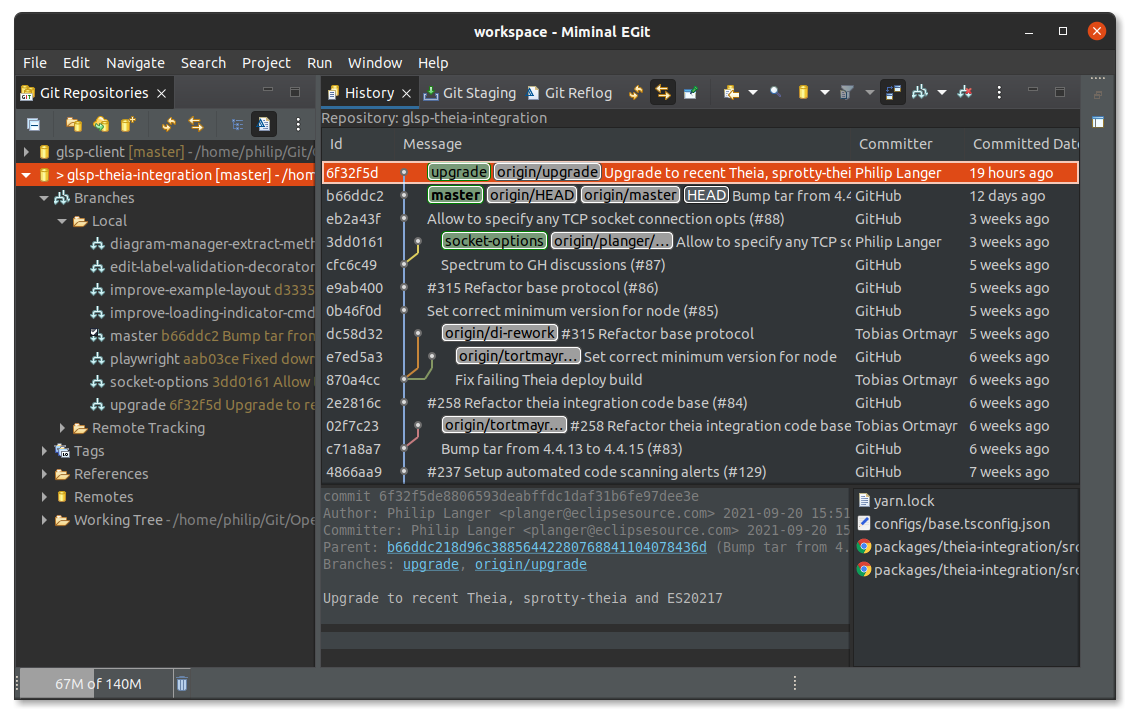
Our version of Eclipse already as Egit installed. We will confirm this in the next section.
The guides listed in this section are extensive and cover many aspects of EGit, you may not use it all, but it might be good to know they exist.
You may jump to the next section to continue with a simple step-by-step guide, but remember the guides listed here have much more information which you may find useful.
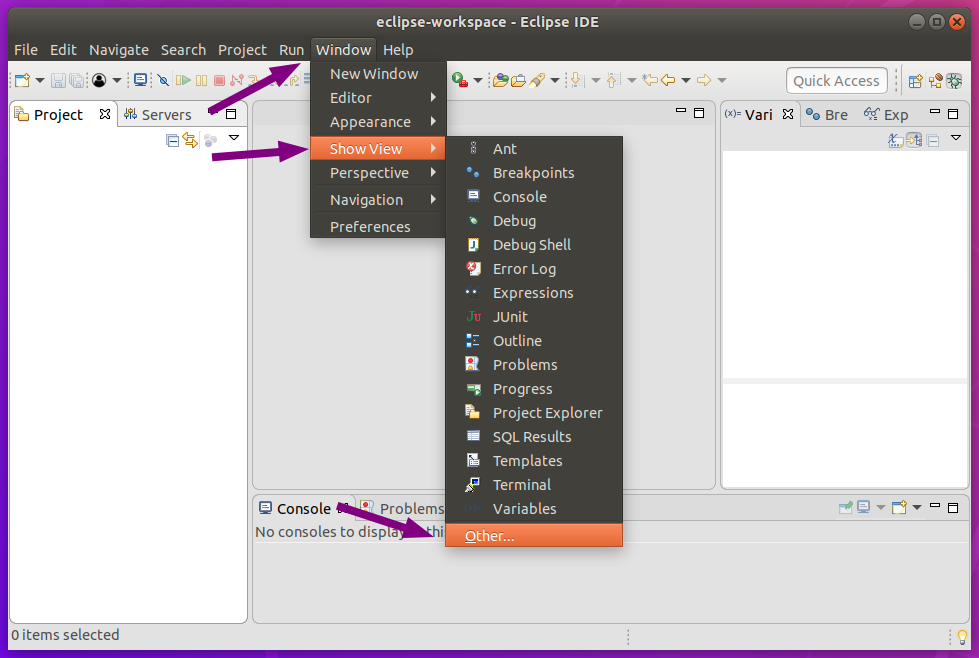
From the main Eclipse window navigate to
Window > Show View > Other this will open the Show View window.

In the search bar enter 'Git' if everything is installed correctly this will
display a list of the available Git views. If the 'Git' options are
not displayed then you will need to perform some troubleshooting which is
beyond the scope of the current guide; but as a hint make sure you've
installed the correct version of Eclipse.

While we're here let's add the Git Repositories view to our workspace
by selecting it and choosing Open. It might be added to the bottom
part of your workspace like this:

I prefer to have it to the left, next to the Project View you can simply
drag it by clicking in the title bar and moving it to your desired destination.
Like this:

There are many (...well a few) ways to clone these projects. We'll start with the simplest.
Using HTTPS
In a web browser navigate to a GitHub project home of your choice, but
definitely choose to go to this one if you're following the guide closely:
On the page; make sure you're viewing the <> Code tab, click on the
'Clone or download' button, if the box opens up a Clone with SSH title,
click the 'Use HTTPS' link.

With the Clone with HTTPS details showing you can copy the URL by
clicking the copy button.

From the Git Repositories view we opened earlier click on the
'Clone a Git repository' link this will open the 'Clone Git Repository'
window, paste the URL we copied from 'GitHub' into the URI field the
rest of the underlined fields automatically populate after the paste,
but check that they match the values below. For this type of 'Clone'
we won't need any authentication and you may click 'Next'.

When the 'Branch Selection' window launches it should have selected the
'master' by default, if not then make sure it is selected, and click
'next'.

Since we're keeping things simple this time around, in the 'Local Destination' window change the value of the 'Directory' field to:
/home/yourusername/Studio/Dev/test-github-clone
and click 'Finish'.

Voila! The project is cloned.

Let's use the Terminal to take a look at what was cloned, the first command navigates us to the correct starting place for the commands that follow, but as long as the path given to any of the commands resolves correctly you can do this anyway you like:
cd ~/Studio/Dev

tree test-github-clone/

As you can see there is currently only the README.md file in the root of the project, this might change as we test a few concepts but as long as you have the directory and some files you're good.
That view of the project is as much as we are really interested in, but of course there is a lot more to a git project and if you want to see the full scope of what we have cloned you can run the following command:
tree -lsa test-github-clone/

Before we go any further, if you've paid attention and particularly if you're familiar with Eclipse you will have noticed that we did not clone the Project into our Workspace, we will be importing the Project into our Workspace. This is only to add a level of separation between the IDE and version control systems, at least until we're more familiar with both.
First we'll import the cloned project into our workspace. On the 'Git' tab,
select the cloned project, right-click to launch
the context-sensitive menu and select 'Import Projects'.

We're keeping things simple with a plain import so, on the
'Import Projects...' window that opens make sure that the path of the
'Import Source' field points to the root of the cloned project and select
'Finish'.

Once the import has completed the project including the README.md is available
to view in your 'Eclipse Workspace'

Now would be a good time for you to make a change and commit it. But before we go wild let's switch to a branch created just for that purpose.
The branch is called 'Users' and we can switch to it from the
'Project Explorer' by right-clicking on the project folder to open the context
sensitive menu then opening the 'Team' menu, then the 'Switch To' menu which
will open a menu of the available branches, currently there are only the
'master' and 'Users' branches available and since we're already on the 'master'
branch only the 'Users' option is enabled. Go ahead and click it to make the
switch.

Once the switch is complete (and it should only take moments) the branch
indicator in the 'Project Explorer' will confirm that 'Users' is the
current branch.

Now we're ready to make a change and commit it. We really want to keep things as simple as possible, so we'll add a file in the 'users' directory, with some deeply meaningful text and commit the change.
With the project explorer selected you should be able to see your new file
which could be similar to mine. Open the 'Git Staging' view if it isn't and
your new file should be listed in 'Unstaged Changes', note that git has
enough information to know you are the Author and Committer, this information
can be set globally or on a per-project basis, but in this case I think it is
known because we cloned the project via HTTPS and would have had to have been
logged in to 'github.com' when we did and it's the details from that account
which have been used here.

Making a commit to a server in Git is actually a 3 step process, first you stage your changes, second you commit them and finally you push those changes to server. You don't need to push your commits, in some cases you might be on a local only repository so wouldn't have anywhere to push to, but in our example we'll push the changes to 'GitHub'
With the 'Git Staging' view still open, we're going to commit the new file.
Let's stage our changes by clicking on the 'Add' button in the
'Unstaged Changes' pane, your file should now be in the 'Staged Changes'
pane. Next add a 'Commit Message', every commit has to have a message and
in practice try to make these succinctly descriptive, you get better at that
with practice! Now we'll live on the Egit edge and combine the last steps
by clicking the 'Commit and Push' button.

Unless Egit has previously saved your user credentials you will need to provide them now to be able to continue.
Once the 'Commit and Push' has completed a 'Push Results' window will
confirm what action was performed.

You can now also view the change on 'GitHub' by heading back to:
where on the 'Code' tab you can select the 'Users' branch and your new
file should be listed.

With your changes now pushed to 'GitHub' we can safely remove the project from your local machine. This is a straightforward 'Eclipse' delete but we'll cover in detail for those that are unsure.
From the 'Project Explorer' right-click on our project and select
'Delete' .

On the 'Delete Resources' dialogue you can safely select
'Delete project contents on disk...' because your changes have been pushed
to the server, just confirm that it the 'Project Location' value is correct
and click 'OK'. All the project files including the directory will be removed
from your 'Eclipse Workspace' and local machine. You are welcome to step back
in this guide and 'Clone' it all back again.

I hope this guide helped you and please do let me know if you spot any errors or have any comments.
As stated earlier, I hope to make a few more available in particular to cover SSH access and which git GUI tool to use in Windows.
ockertbotha/java-dev-on-ubuntu is a public repo on GitHub by ockertbotha. Setting up a Java development environment on Ubuntu.
It declares no license on GitHub. Public does not mean open source: without a license, nobody is granted the right to reuse it.
Its maker tagged it for Linux. That is declared by the maker; Take My Repo has not tested it.
Open "Take it" on its page: Take My Repo writes an install plan for your machine and hands it to your AI agent (Claude Code, Codex or Cursor), which asks you before each step. Take My Repo has not tested it on any machine.
Its last change on GitHub was on 2018-10-26. Take My Repo does not judge from that whether it is maintained.
Nobody has reviewed it on Take My Repo yet, which says nothing about its quality.
A cross-platform and extendable version manager with support for Java, Node.js, Golang, Python, Flutter, .NET & more
The agent harness performance optimization system. Skills, instincts, memory, security, and research-first development for Claude Code, Codex, Opencode, Cursor and beyond.
Reverse engineer anything with agents, from app behavior down to native binaries.