divaKey
Mechanical Keyboard Controller for Project Diva
- 8
- 5 y ago
Repo touchgadget/divaKey, read from GitHub 20 h ago. touchgadget has not joined Take My Repo.
In short
touchgadget/divaKey is a public repo on GitHub by touchgadget. Mechanical Keyboard Controller for Project Diva. It declares no license on GitHub. Public does not mean open source: without a license, nobody is granted the right to reuse it. It is written mainly in C++, has 8 stars and last changed on 2021-07-24. Nobody has reviewed it on Take My Repo yet, which says nothing about its quality. Read from GitHub on 2026-11-22.
DIY Project Diva Slide for Nintendo Switch
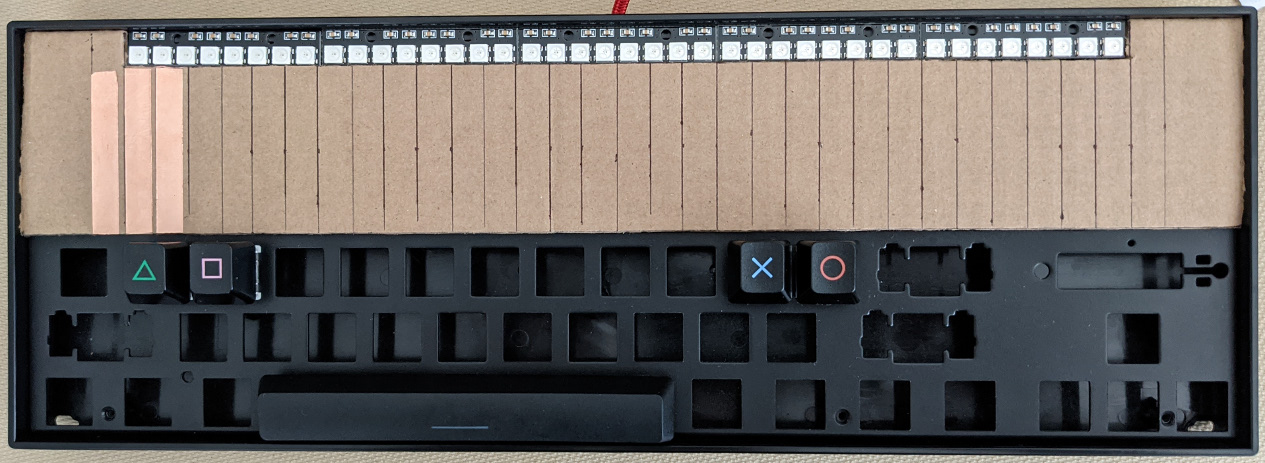
DIY Project Diva controller with slide for Nintendo Switch in progress. Cardboard Diva controller with slide. The flattest Diva controller ever? The Arcade Controller option must be enabled to use this.
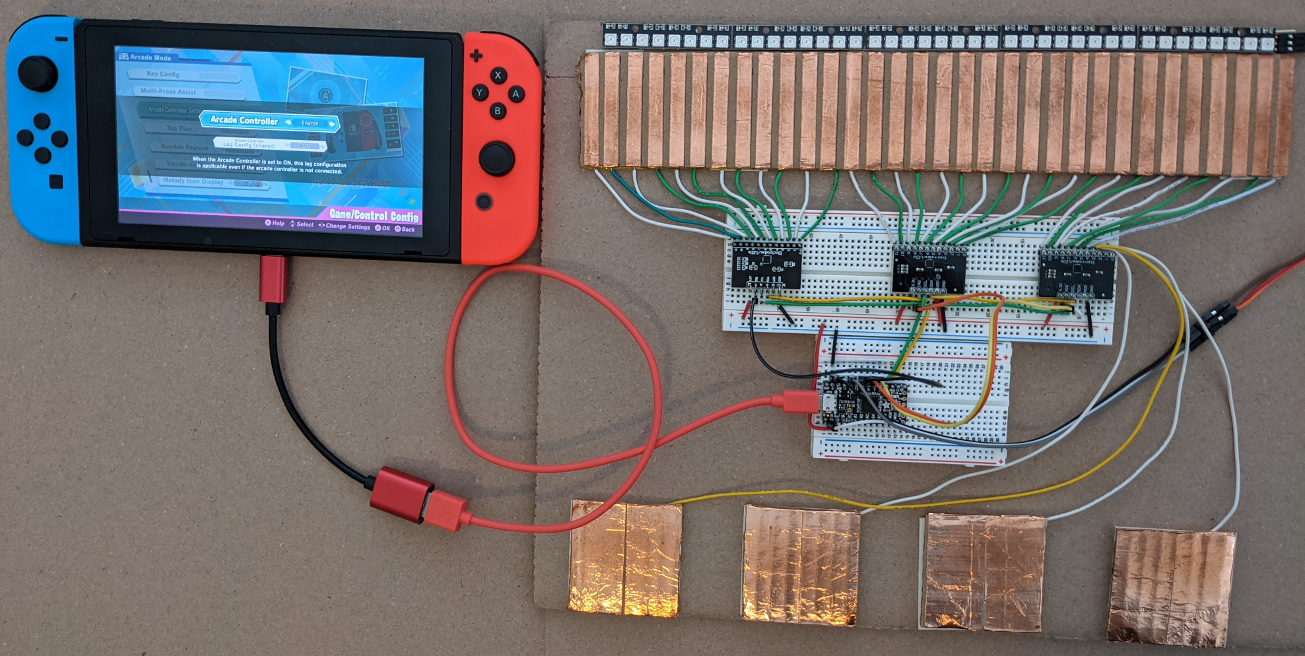
Mechanical keyboard with slider. Work in progress.
Hardware
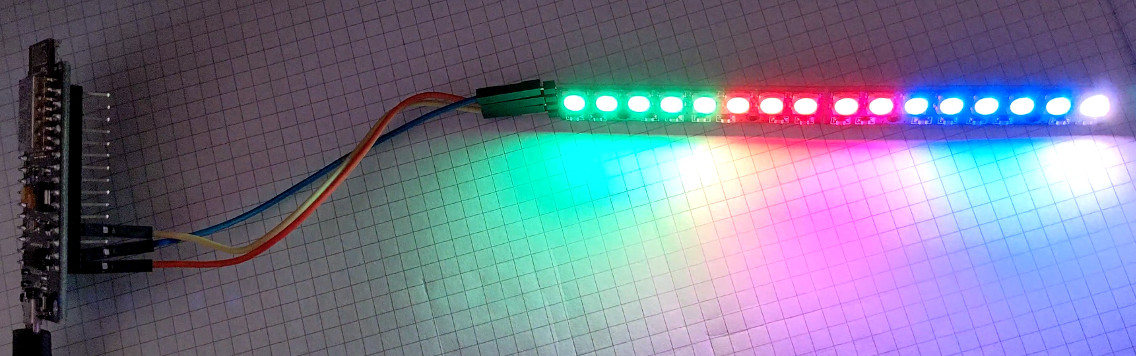
WS2812 RGB LED sticks
The LEDs are optional. They are handy for trouble shooting crossed wires, touch sensitivity too high, etc. My design powers the LEDs using 3.3V instead of 5V. The LEDs are dimmer but this is fine for me. If you want to use max brightness and/or more LEDs use a separate power supply for the LEDs.
https://www.amazon.com/dp/B07KD55QKJ
5 sticks with 8 LEDs per stick. Soldered end to end this comes out slighly less than 12 inches. The 40 LEDs do not line up with the 32 slide electrodes.
Alternative: https://www.adafruit.com/product/1426
Each stick is 2 inches long so 6 sticks is exactly fits a 12 inch slide. The 48 LEDs will not exactly line up with the 32 slide electrodes but it is close enough. Each stick is $6 so the Amazon sticks are much cheaper.
Alternative: Flexible RGB LED strip with 144 LEDs/meter.
Copper tape with adhesive in various widths
https://www.amazon.com/dp/B07JNJCNVT
8mm width is about right for a 12 inch long slide. 12" / 32 electrods = 9.53 mm per electrode
Each slide electrode has 8 mm of copper with 1.53 mm spacing.
My first prototype used 6 mm tape but PCB cap touch slide designs have much less space between the electrodes so the next prototype build will use 8 mm tape.
MPR121 capacitive touch controller with I2C interface
Be sure to jumper the ADD/ADR address pin so each board has its own address. The leftmost board is set for i2c address 0x5A, the center board is set to 0x5B, and leftmost board is set to 0x5C. The IRQ pins are connected to the SAMD21 pins so it can quickly detect input changes without the overhead of using I2C. I2C is used only when a change is detected.
https://www.amazon.com/dp/B085W85P95
The older version of this board is a clone of the SparkFun MPR121 board. See the SparkFun page on how to change the I2C address. One trace must be cut.
The new version (July 2021) looks similar but the ADD (address) pin works differently. As far as I can tell the ADD pin is floating so jumper it to GND for 0x5A, 3.3V for 0x5B, SDA for 0x5C. No trace cut required. The two rows of pins are not properly aligned so be careful using this with breadboards or protoboards.
Alternative: https://www.adafruit.com/product/1982
Works fine and is properly documented.
Adafruit ItsyBitsy M0 Express (SAMD21)
The game controller emulation is based on TinyUSB so not all SAMD21 boards can be used. I think all Adafruit SAMD21 and SAMD51 boards support TinyUSB. I am not sure if the QT Py has enough pins for this.
https://www.adafruit.com/product/3727
| ItsyBitsy Pin | Connects to... |
|---|---|
| G | Ground connects to ground on the 3 MPR121 boards and the LED strip. |
| 3V | 3.3V output connects to 3.3V on the 3 MPR121 boards and LED strip VCC. |
| A0 | Button or key switch |
| A1 | Button or key switch |
| A2 | Button or key switch |
| A3 | Button or key switch |
| A4 | Button or key switch |
| SCL | SCL on the 3 MPR121 boards |
| SDA | SDA on the 3 MPR121 boards |
| 10 | MPR121-0x5A IRQ pin |
| 9 | MPR121-0x5B IRQ pin |
| 7 | MPR121-0x5C IRQ pin |
Software
NSSlide.ino and NSGadget_tinyuse.h contain the source code. NSSlide.ino.itsybitsy_m0.bin.uf2 holds the compiled code.
If you want to skip installing the Arduino IDE and libraries, compiling, uploading, etc. read on. Plug the Adafruit board into your computer. Double click the board reset button. Â USB Flash drive named ITSYBOOT should appear. Drag and drop the UF2 file on the ITSYBOOT drive. Wait a few seconds for the board to reboot. It should running the NSSlide program.
Dependencies
All the following Arduino libraries are installed using the IDE Library Manager.
The "Bounce2" library handles debouncing buttons and switches.
The "Adafruit DotStar" library is used trivally to turn off the single DotStar LED on the Adafruit board.
The "Adafruit MPR121" library is for the MP121 touch input boards. The "Adafruit BusIO" library is required by the MPR121 library.
The "Adafruit DMA neopixel" is used to drive the WS2812 LEDs. This library avoids disabling interrupts and bit-banging the WS2812 like the regular NeoPixel library. This is necessary to avoid slowing down scanning for button and touch input.
The "Adafruit NeoPixel" library is still required by the DMA neopixel library.
Questions
What is divaKey?
touchgadget/divaKey is a public repo on GitHub by touchgadget. Mechanical Keyboard Controller for Project Diva.
Is divaKey open source?
It declares no license on GitHub. Public does not mean open source: without a license, nobody is granted the right to reuse it.
Does divaKey run on macOS, Windows or Linux?
Its maker has not tagged a system, so it is unknown here. Its README says what it needs.
How do I install divaKey?
Open "Take it" on its page: Take My Repo writes an install plan for your machine and hands it to your AI agent (Claude Code, Codex or Cursor), which asks you before each step. Take My Repo has not tested it on any machine.
Is divaKey still maintained?
Its last change on GitHub was on 2021-07-24. Take My Repo does not judge from that whether it is maintained.
What do people who ran divaKey say?
Nobody has reviewed it on Take My Repo yet, which says nothing about its quality.