
prompts.chat
f.k.a. Awesome ChatGPT Prompts. Share, discover, and collect prompts from the community. Free and open source — self-host for your organization with complete privacy.
- 178k
- MDX
- 6 h ago
React Basics ( v19.x )
Repo learning-zone/react-basics, read from GitHub 1 min ago. learning-zone has not joined Take My Repo.
learning-zone/react-basics is a public repo on GitHub by learning-zone. React Basics ( v19.x ). It declares no license on GitHub. Public does not mean open source: without a license, nobody is granted the right to reuse it. It has 1,661 stars and last changed on 2026-06-13. Nobody has reviewed it on Take My Repo yet, which says nothing about its quality. Read from GitHub on 2026-11-18.
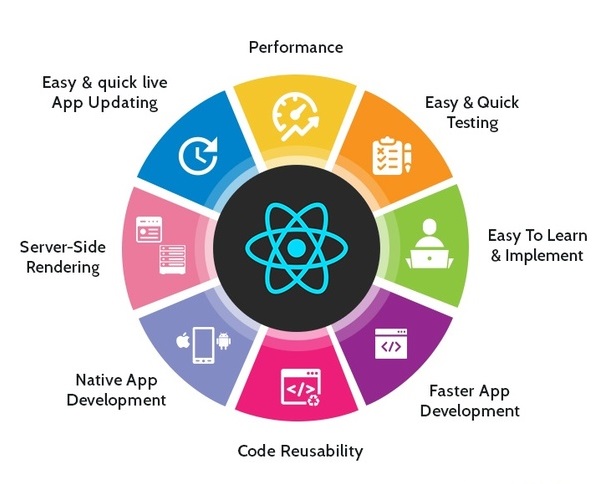
Click ★ if you like the project. Your contributions are heartily ♡ welcome.
Focus: React basics, environment setup, JSX syntax, and core component concepts.
Focus: Components, props, state, hooks, events, lists, and forms.
Focus: Styling, routing, API integration, context, and advanced component patterns.
Focus: Internationalization, TypeScript, accessibility, security, and data fetching libraries.
Focus: Concurrent features, GraphQL, micro-frontend, real-time data, and technical leadership.
React is a JavaScript library created for building fast and interactive user interfaces for web and mobile applications. It is an open-source, component-based, front-end library responsible only for the application view layer.
The main objective of ReactJS is to develop User Interfaces (UI) that improves the speed of the apps. It uses virtual DOM (JavaScript object), which improves the performance of the app. The JavaScript virtual DOM is faster than the regular DOM. We can use ReactJS on the client and server-side as well as with other frameworks. It uses component and data patterns that improve readability and helps to maintain larger apps.
Reference:
Virtual DOM: React maintains a lightweight copy of the actual DOM in memory. When state changes, React creates a new virtual DOM tree, compares it with the previous one (diffing), and calculates the minimal set of changes needed to update the real DOM.
Component-Based Architecture: React apps are built from reusable components - JavaScript functions or classes that return JSX (HTML-like syntax). Each component manages its own state and props (data passed from parent).
Reconciliation: When data changes, React uses its reconciliation algorithm to efficiently update only the parts of the DOM that actually changed, rather than re-rendering everything.
Unidirectional Data Flow: Data flows one way - from parent to child components via props. Child components communicate back via callback functions, maintaining predictable data flow.

Major Advantages:
Limitations:
React emphasizes unidirectional data flow (also called "one-way data binding") because it provides a predictable, easy-to-debug, and modular way to manage how data moves through an application.
In this pattern, data is passed from parent to child components via read-only props. If a child needs to change the data, it doesn't modify it directly; instead, it triggers a callback function provided by the parent to update the "single source of truth".
Key Benefits
Example:
// Parent controls state
function Parent() {
  const [data, setData] = useState('hello');

  return <Child data={data} onChange={setData} />;
}

// Child receives data and callback
function Child({ data, onChange }) {
  return <input value={data} onChange={(e) => onChange(e.target.value)} />;
}
Destructuring in React.js is a JavaScript ES6 feature that allows you to extract values from arrays or properties from objects into distinct variables. In React, it is widely used to make code cleaner and more readable.
Key Uses in React:
1. Props Destructuring:
// Without destructuring
function Welcome(props) {
  return <h1>Hello, {props.name}</h1>;
}

// With destructuring
function Welcome({ name, age }) {
  return <h1>Hello, {name}, you are {age} years old</h1>;
}
2. State Destructuring with Hooks:
// Array destructuring with useState
const [counter, setCounter] = React.useState(0);
const [name, setName] = React.useState("John");

// Object destructuring with useContext
const { user, theme } = useContext(AppContext);
3. Nested Object Destructuring:
const user = {
  name: "Alice",
  address: {
    city: "New York",
    country: "USA"
  }
};

// Destructure nested properties
const { name, address: { city } } = user;
// name = "Alice", city = "New York"
4. Class Component State:
class App extends React.Component {
  render() {
    const { isLoggedIn, user } = this.state;
    return <div>{isLoggedIn ? user.name : "Guest"}</div>;
  }
}
In React, component names must start with a capital letter because of how JSX distinguishes between HTML elements and React components:
Key Reasons:
1. JSX Compilation Behavior:
<component /> → compiles to React.createElement('component') (treated as HTML tag string)<Component /> → compiles to React.createElement(Component) (treated as React component)2. Built-in vs Custom Components:
<div>, <span>, <button>3. Exception:
Lowercase with dot notation works: <obj.component /> compiles to React.createElement(obj.component)
Example:
//  Wrong - React treats this as HTML <mybutton> tag
function myButton() {
  return <button>Click me</button>;
}

// Using it: <myButton /> // Won\'t work as expected

//  Correct - React treats this as a component
function MyButton() {
  return <button>Click me</button>;
}

// Using it: <MyButton /> // Works correctly
React Fragments are a way to group multiple elements without adding an extra node to the browser's DOM.
Why use Fragments?
<div> inside elements like <table>, <tr>, or <ul> can break the browser's layout rules.Example:
// Long syntax
import React, { Fragment } from 'react';

function MyComponent() {
  return (
    <Fragment>
      <h1>Title</h1>
      <p>Description</p>
    </Fragment>
  );
}

// Short syntax (more common)
function MyComponent() {
  return (
    <>
      <h1>Title</h1>
      <p>Description</p>
    </>
  );
}
The Virtual DOM is a programming concept where a "virtual" representation of a User Interface is kept in memory and synchronized with the "real" browser DOM by a library like ReactDOM
How it works:
1. Initial Render: React creates a lightweight tree of JavaScript objects (the Virtual DOM) that mirrors the structure of the real DOM.
2. State Change: When a component's state or props change, React creates a new Virtual DOM tree.
3. Diffing: React compares the new tree with the previous version to identify exactly what changed. This is handled by a highly efficient diffing algorithm.
4. Reconciliation: Based on the "diffs," React calculates the minimal set of changes needed and updates only those specific parts in the real DOM.
Benefits:
Example:
// When count changes from 0 to 1
const [count, setCount] = useState(0);

return <div>Count: {count}</div>;
React only updates the text node containing the count value, not the entire <div> element.

1. Document Object Model:
It a way of representing a structured document via objects. It is cross-platform and language-independent convention for representing and interacting with data in HTML, XML, and others. Web browsers handle the DOM implementation details, so we can interact with it using JavaScript and CSS.
2. Virtual DOM:
Virtual DOM is any kind of representation of a real DOM. Virtual DOM is about avoiding unnecessary changes to the DOM, which are expensive performance-wise, because changes to the DOM usually cause re-rendering of the page. It allows to collect several changes to be applied at once, so not every single change causes a re-render, but instead re-rendering only happens once after a set of changes was applied to the DOM.
3. Shadow DOM:
Shadow DOM is mostly about encapsulation of the implementation. A single custom element can implement more-or-less complex logic combined with more-or-less complex DOM. Shadow DOM refers to the ability of the browser to include a subtree of DOM elements into the rendering of a document, but not into the main document DOM tree.
Difference:
The virtual DOM creates an additional DOM. The shadow DOM simply hides implementation details and provides isolated scope for web components.
Virtual DOM is about performance (efficiently updating the UI), while Shadow DOM is about encapsulation (isolating component styles and structure from the rest of the page).
Note:
React uses Virtual DOM but doesn't use Shadow DOM by default.
React (or React DOM) is a JavaScript library for building web user interfaces that render to the browser's DOM.
React Native is a framework for building native mobile applications for iOS and Android using React concepts — but instead of rendering HTML to the browser, it renders native platform components (like UIView on iOS and View on Android).
How React Native works:
Your JavaScript/JSX code
         ↓
React Native Bridge (JS thread ↔ Native thread)
         ↓
Native Platform APIs → Real iOS/Android UI components
Syntax differences:
// React (Web) — renders HTML elements
import React from 'react';

function WebButton({ label, onClick }) {
  return (
    <div style={{ padding: '10px', backgroundColor: 'blue' }}>
      <button onClick={onClick}>{label}</button>
    </div>
  );
}

// React Native — renders native components (NOT HTML)
import { View, Text, TouchableOpacity, StyleSheet } from 'react-native';

function NativeButton({ label, onPress }) {
  return (
    <View style={styles.container}>
      <TouchableOpacity onPress={onPress}>
        <Text>{label}</Text>
      </TouchableOpacity>
    </View>
  );
}

const styles = StyleSheet.create({
  container: { padding: 10, backgroundColor: 'blue' },
});
Key differences:
| Feature | React (Web) | React Native |
|---|---|---|
| Renders to | Browser DOM (div, span, button) | Native platform views (View, Text, Image) |
| Styling | CSS (class names, CSS-in-JS, modules) | StyleSheet API (subset of CSS, no cascading) |
| Navigation | React Router, History API | React Navigation, Expo Router |
| Flexbox | Standard CSS flex | Flex with column direction default |
| Animations | CSS animations, Framer Motion | Animated API, Reanimated |
| Platform access | Web APIs (localStorage, fetch) | Device APIs (camera, GPS, notifications) |
| Build output | HTML/CSS/JS bundle | iOS .ipa / Android .apk |
| Dev tooling | Browser DevTools | Expo Go, Metro Bundler, Flipper |
What React and React Native share:
useState, useEffect, useContext, useRef, etc.Code sharing strategies:
monorepo/
├── packages/
│   ├── shared/          ← Shared business logic, hooks, utilities (no UI)
│   │   ├── useAuth.ts
│   │   └── formatDate.ts
│   ├── web/             ← React DOM components
│   └── mobile/          ← React Native components
Expo: The most common React Native development environment. Provides a managed workflow with pre-built native modules, OTA updates, and a simple build system.
npx create-expo-app my-app
React, Vue, and Angular are the three dominant front-end technologies, but they serve different purposes and follow different philosophies.
React (by Meta):
react-router), state management (Redux, Zustand, Context), and form handling.Vue (by Evan You):
.vue files): HTML template, script, and style in one file.v-model).vue-router) and state (Vuex/Pinia) are official packages.Angular (by Google):
ngModel.ReactiveFormsModule), HTTP client, and testing.Comparison Table:
| Feature | React | Vue | Angular |
|---|---|---|---|
| Type | UI Library | Progressive Framework | Full Framework |
| Language | JSX | HTML Templates | TypeScript |
| Data Binding | One-way | One-way + v-model | Two-way (ngModel) |
| State Mgmt | External (Redux, Zustand) | Pinia / Vuex | NgRx / Services |
| Learning Curve | Medium | Low | High |
| Backed By | Meta | Community | |
| Mobile | React Native | NativeScript/Ionic | Ionic |
When to choose:
Vite is a modern, fast build tool that provides a superior development experience compared to traditional bundlers. It offers instant server start, lightning-fast Hot Module Replacement (HMR), and optimized builds.
It replaces older tools like Create React App by providing a leaner, faster build process
Requirements:
Installation:
npm create vite@latest my-react-app -- --template react   #Initialize the Project
cd my-react-app
npm install   #Install Dependencies
npm run dev   #Start the Development Server
Essential Vite Commands:
npm run dev     #Starts the development server with Hot Module Replacement (HMR).
npm run build   #Creates an optimized production bundle in the /dist folder.
npm run preview #Locally previews the production build you just created.
Available Templates:
react - React with JavaScriptreact-ts - React with TypeScriptreact-swc - React with SWC (faster compilation)react-swc-ts - React with TypeScript and SWCProject Structure:
my-react-app
├── node_modules
├── public
│   └── vite.svg
├── src
│   ├── assets
│   │   └── react.svg
│   ├── App.css
│   ├── App.jsx
│   ├── index.css
│   └── main.jsx
├── .gitignore
├── index.html
├── package.json
├── vite.config.js
└── README.md
Key Differences from Create React App:
Reference:
Vite is a modern build tool and development server with these key features:
Core Features
Optimized Production Build
Rich Features
1. ESLint:
ESLint is a popular JavaScript linter. There are plugins available that analyse specific code styles. One of the most common for React is an npm package called eslint-plugin-react.
npm install -g eslint-plugin-react
This will install the plugin we need, and in our ESLint config file, we just need a few extra lines.
"extends": [
    "eslint:recommended",
    "plugin:react/recommended"
]
"scripts": {
    "start": "react-scripts start",
    "build": "react-scripts build",
    "test": "react-scripts test --env=jsdom",
    "eject": "react-scripts eject",
    "lint": "eslint src/**/*.js src/**/*.jsx"
}
2. eslint-plugin-jsx-a11y:
alt text, tabindex, and other accessibility concerns3. Other Popular Options:
React applications are supported by all modern web browsers. Because React uses JavaScript ES5 features as its baseline, it can be extended to older browsers with the right configuration.
Support for Internet Explorer 9, 10, and 11 requires polyfills. For a set of polyfills to support older browsers, use react-app-polyfill.
Browser Configuration:
The browserslist configuration in package.json controls which browsers are supported by determining what JavaScript transformations are applied:
Example:
// package.json

"browserslist": {
  "production": [
    ">0.2%",          // Browsers with >0.2% market share
    "not dead",       // Still maintained browsers
    "not op_mini all" // Exclude Opera Mini
  ],
  "development": [
    "last 1 chrome version",
    "last 1 firefox version",
    "last 1 safari version"
  ]
}
1. Webpack (The Transpiler):
Webpack primary job is to take all your individual files (JavaScript, CSS, images) and "bundle" them into a few optimized files.
Dependency Management: It starts from an entry point (usually index.js) and creates a dependency graph to understand how every file is connected.
Asset Handling: It treats everything—including CSS and images—as a module, allowing you to import them directly into your JavaScript components.
Performance: It performs optimizations like tree shaking (removing unused code), minification, and code splitting (loading only what is needed).
Development Features: Tools like webpack-dev-server enable Hot Module Replacement (HMR), allowing you to see changes instantly without a full page refresh.
2. Babel (The Module Bundler):
Babel is a "translator" that converts modern code into a version that all browsers can understand.
JSX Transformation: Browsers cannot natively read JSX (the HTML-like syntax in React). Babel converts JSX into standard React.createElement() calls.
Modern JS (ES6+) Support: It transpiles newer features (like arrow functions, classes, and destructuring) into ES5 syntax for compatibility with older browsers.
Future-Proofing: It allows developers to use experimental JavaScript features before they are officially supported by browsers
How they work together:
ReactDOM is a package that provides DOM-specific methods for managing DOM elements in web applications. It serves as the bridge between React components and the browser's DOM.
ReactDOM provides the developers with an API containing the following methods
Key Methods (React 18+):
createRoot() - Creates a React root for displaying content inside a browser DOM element. Use it to render and update your React component tree.
hydrateRoot() - Replaces hydrate() for server-side rendering. Attaches React to existing server-rendered HTML and enables React to manage it.
root.unmount() - Destroys a rendered React tree inside a root, cleaning up all associated resources.
createPortal() - The createPortal() allows rendering a component into a DOM node that resides outside the current DOM hierarchy of the parent component.
Note:
ReactDOM.render(), ReactDOM.hydrate(), ReactDOM.unmountComponentAtNode(), and ReactDOM.findDOMNode() are deprecated as of React 18. Use the react-dom/client APIs instead.
Syntax:
import { createRoot, hydrateRoot } from 'react-dom/client';
import { createPortal } from 'react-dom';

const root = createRoot(container);   // createRoot()
root.render(element);                 // render()
root.unmount();                       // unmount()

hydrateRoot(container, element);      // hydrateRoot() — replaces hydrate()

createPortal(child, container);       // createPortal()
Example:
import { createRoot } from 'react-dom/client';

const rootElement = document.getElementById('root');
const root = createRoot(rootElement);

root.render(<App />);
React is the core library that contains the fundamental React functionality used across all platforms (web, mobile, etc.)
ReactDOM is a separate package that provides DOM-specific methods for web applications - it's the bridge between React components and the browser's DOM.
Key Differences:
| React | ReactDOM |
|---|---|
| It is core engine. It manages component logic, state, hooks, and props. | The web renderer. It translates React components into actual HTML DOM nodes. |
| It is used for Creating the Virtual DOM (a blueprint of what the UI should look like). | Updating the Real DOM (the actual elements visible in the browser). |
| It is Platform-independent; used for Web, Mobile, VR, etc. | Browser-specific; used only for web applications. |
| useState, useEffect, createElement, Component. | createRoot, createPortal, hydrateRoot. |
Example:
/**
 * React vs ReactDOM
 */
import React from 'react';                      // Core functionality
import { createRoot } from 'react-dom/client';  // DOM rendering

export default function App() {
  return <h1>Hello React</h1>;
}

const rootElement = document.getElementById("root");
const root = createRoot(rootElement);

root.render(<App />);
⚝ Try this example on CodeSandbox
A Progressive Web App (PWA) is a web application that uses modern web capabilities to deliver an app-like experience to users. React applications can be converted into PWAs by adding service workers, manifest files, and implementing offline capabilities.
Building a Progressive Web App (PWA) with React is mostly about adding a web app manifest, a service worker (for Offline, Caching, and updates), and meeting installability criteria (HTTPS, icons, etc).
Steps to Build a PWA with React:
1. Vite with PWA Template:
Vite offers a modern approach for building PWAs using the vite-plugin-pwa package.
# Create new React app with PWA template
npm create vite@latest my-pwa-app -- --template react
cd my-pwa-app
npm install

npm install vite-plugin-pwa -D # Install the PWA package
2. Registering the Service Worker:
The Service Worker manage tasks between browser and server, intercepting network requests, managing caching, and providing offline functionality.
Basic Service Worker Registration:
Add this code to your src/main.jsx file:
import React from 'react'
import ReactDOM from 'react-dom/client'
import App from './App.jsx'
import './index.css'

ReactDOM.createRoot(document.getElementById('root')).render(
  <React.StrictMode>
    <App />
  </React.StrictMode>
)

// Service Worker registration
if ('serviceWorker' in navigator) {
  // Check if browser supports Service Worker
  window.addEventListener('load', () => {
    // Execute after page is fully loaded
    navigator.serviceWorker.register('/sw.js')
      .then(registration => {
        console.log('SW registered: ', registration);
        // Registration successful
      })
      .catch(registrationError => {
        console.log('SW registration failed: ', registrationError);
        // Registration failed
      });
  });
}
3. Configuring the Manifest File:
Modify your vite.config.js to include and configure the plugin, specifying manifest and service worker options.
import { defineConfig } from 'vite'
import react from '@vitejs/plugin-react'
import { VitePWA } from 'vite-plugin-pwa'

export default defineConfig({
  plugins: [
    react(),
    VitePWA({
      registerType: 'autoUpdate',  // Automatically update Service Worker
      includeAssets: ['favicon.ico', 'robots.txt', 'apple-touch-icon.png'],  // Files to cache
      manifest: {
        name: 'My First PWA',  // Full app name
        short_name: 'PWA App',  // Short name displayed on home screen
        description: 'My first Progressive Web App built with React',
        theme_color: '#ffffff',  // Color of the top bar
        background_color: '#ffffff',  // Splash screen background color
        display: 'standalone',  // Makes it look like a native app (hides browser UI)
        icons: [
          {
            src: 'pwa-192x192.png',  // Small icon
            sizes: '192x192',
            type: 'image/png'
          },
          {
            src: 'pwa-512x512.png',  // Large icon
            sizes: '512x512',
            type: 'image/png',
            purpose: 'any maskable'  // Works in various environments
          }
        ]
      }
    })
  ]
})
Key PWA Features:
Reference:
The primary difference between Vite and Webpack is how they handle code during development. While Webpack bundles your entire application before serving it, Vite serves individual files directly to the browser using modern web standards.
Key Differences:
Webpack:
Webpack is a module bundler that:
Vite:
Example: Webpack Configuration (Manual Setup)
// webpack.config.js
const path = require('path');
const HtmlWebpackPlugin = require('html-webpack-plugin');

module.exports = {
  entry: './src/index.js',
  output: {
    path: path.resolve(__dirname, 'dist'),
    filename: 'bundle.js'
  },
  module: {
    rules: [
      {
        test: /\.(js|jsx)$/,
        exclude: /node_modules/,
        use: {
          loader: 'babel-loader',
          options: {
            presets: ['@babel/preset-env', '@babel/preset-react']
          }
        }
      },
      {
        test: /\.css$/,
        use: ['style-loader', 'css-loader']
      }
    ]
  },
  plugins: [
    new HtmlWebpackPlugin({
      template: './public/index.html'
    })
  ],
  devServer: {
    port: 3000,
    hot: true
  }
};
Example: Vite (Zero Configuration)
# Just one command!
npx create-react-app my-app
cd my-app
npm start
When to Use Webpack:
When to Use Vite:
JSX (JavaScript XML) is a syntax extension that allows you to write HTML-like code directly in JavaScript. It is used in React to describe what the UI should look like.
JSX is not required for React, but it makes code more readable and easier to write. Under the hood, it's just syntactic sugar for React.createElement() calls.
Key Points:
createElement() or appendChild()Example:
// JSX syntax
const hello = <h1 className="greet">Hello World</h1>

// Compiles to:
const hello = React.createElement("h1", {
  className: "greet"
}, "Hello World")
In a component:
export default function App() {
  return (
    <div className="App">
      <h1>Hello World!</h1>
    </div>
  );
}
⚝ Try this example on CodeSandbox
JSX prevents injection attacks, specifically Cross-Site Scripting (XSS), by automatically escaping any values embedded within JSX elements before they are rendered to the DOM. This means all dynamic content is converted into plain strings, neutralizing potentially malicious code.
Example:
export default class JSXInjectionExample extends React.Component {

  constructor(props) {
    super(props);
    this.state = {
      userContent: `JSX prevents Injection Attacks Example
          <script src="http://example.com/malicious-script.js></script>`
    };
  }

  render() {
    return (
      <div>User content: {this.state.userContent}</div>
    );
  }
}

// Output
User content: JSX prevents Injection Attacks Example
<script src="http://example.com/malicious-script.js></script>
⚝ Try this example on CodeSandbox
The new JSX transform, React 19, provides several key benefits for developers and application performance
No Explicit React Import: You can use JSX syntax without having to import React from 'react' at the top of every file. The compiler now automatically imports special functions from new entry points (react/jsx-runtime) to handle the transformation.
Reduced Bundle Size: The new transform generates more optimized code compared to the old React.createElement() method, which can lead to a slight reduction in the overall application bundle size.
Performance Optimizations: It eliminates some of the overhead associated with the previous transformation process, enabling faster runtime performance and more efficient rendering.
Simplified Configuration: Modern versions of React include this transform by default, reducing the need for manual Babel or TypeScript configuration with multiple presets and plugins.
Enhanced Developer Experience: The streamlined process can result in cleaner stack traces and more useful error messages, making debugging more straightforward.
It is possible with latest version (>=16.2). Below are the possible options:
// 1. Return false
render() {
  return false
}

// 2. Return null (most common)
render() {
  return null
}

// 3. Return empty array
render() {
  return []
}

// 4. Return empty Fragment (long syntax)
render() {
  return <React.Fragment></React.Fragment>
}

// 5. Return empty Fragment (short syntax)
render() {
  return <></>
}
Note:
React can also run on the server side so, it will be possible to use it in such a way that it doesn't involve any DOM modifications (but maybe only the virtual DOM computation).
Writing comments in React components can be done just like comment in regular JavaScript classes and functions.
React comments:
function App() {

  // Single line Comment

  /*
  * multi
  * line
  * comment
  **/

  return (
    <h1>My Application</h1>
  );
}
JSX comments:
export default function App() {
  return (
    <div>
      {/* A JSX comment */}
      <h1>My Application</h1>
    </div>
  );
}
Custom attributes are supported natively in React 16+. This means that adding a custom attribute to an element is now as simple as adding it to a render function, like so:
Syntax:
// 1. Custom DOM Attribute
render() {
  return (
    <div custom-attribute="some-value" />
  );
}

// 2. Data Attribute ( starts with "data-" )
render() {
  return (
    <div data-id="10" data-user-role="admin"/>
  );
}

// 3. ARIA Attribute ( starts with "aria-" )
render() {
  return (
    <button aria-label="Close" onClick={onClose} />
  );
}
Example:
function CustomAttributeExample() {
  return (
    <div
      custom-attribute="custom-value"
      data-testid="my-component"
      data-category="widgets"
      aria-label="Product information"
    >
      Content with custom attributes
    </div>
  );
}
⚝ Try this example on CodeSandbox
A JSX expression must have only one outer element. For Example:
const headings = (
    <div id = "outermost-element">
       <h1>I am a heading </h1>
       <h2>I am also a heading</h2>
    </div>
)
To loop inside JSX, use the Array.prototype.map() method with ES6 arrow functions. This is the standard React pattern for rendering lists of elements.
Example:
/**
 * Loop inside JSX
 */
const items = ['Apple', 'Banana', 'Cherry'];

function FruitList() {
  return (
    <ul>
      {items.map((item) => (
        <li key={item}>{item}</li>
      ))}
    </ul>
  );
}
⚝ Try this example on CodeSandbox
In React, boolean values (true and false), null, and undefined are valid children, but these values will not be rendered in UI if you put them directly inside {} in JSX.
For example, all these JSX expressions will result in the same empty div:
<div />
<div></div>
<div>{false}</div>
<div>{null}</div>
<div>{undefined}</div>
<div>{true}</div>
If you want a value like false, true, null, or undefined to show in the output, you have to convert it to a string first.
<div>{String(true)}</div>
<div>{String(false)}</div>
<div>{String(undefined)}</div>
<div>{String(null)}</div>
In the output, this will render true, false, undefined, and null respectively.
⚝ Try this example on CodeSandbox
In React, you cannot use the standard HTML for attribute with <label> elements because for is a reserved keyword in JavaScript. Instead, React uses htmlFor.
Wrong - Using for (produces warning):
<label for={'user'}>{'User'}</label>
<input type={'text'} id={'user'} />
Correct - Using htmlFor:
<label htmlFor={'user'}>{'User'}</label>
<input type={'text'} id={'user'} />
Example:
function LoginForm() {
  return (
    <div>
      <label htmlFor="username">Username:</label>
      <input type="text" id="username" name="username" />

      <label htmlFor="password">Password:</label>
      <input type="password" id="password" name="password" />
    </div>
  );
}
The innerHTML is risky because it is easy to expose users to a cross-site scripting (XSS) attack. React provides dangerouslySetInnerHTML as a replacement for innerHTML. It allows to set HTML directly from React by using dangerouslySetInnerHTML and passing an object with a __html key that holds HTML.
Example:
/**
 * InnerHtml in React
 */
export default function App() {
  return (
    <div
      dangerouslySetInnerHTML={{
        __html: "<p>This text is set using <b>dangerouslySetInnerHTML</b></p>"
      }}
    ></div>
  );
}
Example: Using sanitization
import DOMPurify from 'dompurify';

function SafeHTML({ html }) {
  const sanitizedHTML = DOMPurify.sanitize(html);

  return (
    <div dangerouslySetInnerHTML={{ __html: sanitizedHTML }} />
  );
}
⚝ Try this example on CodeSandbox
1. Returning Null:
const AddToCart = ({ available }) => {
  if (!available) return null

  return (
    <div className="full tr">
      <button className="product--cart-button">Add to Cart</button>
    </div>
  )
}
2. Ternary Display:
When you need to control whether one element vs. another is displayed, or even one element vs. nothing at all (null), you can use the ternary operator embedded inside of a larger portion of JSX.
<div className="half">
  <p>{description}</p>

  {remaining === 0 ? (
    <span className="product-sold-out">Sold Out</span>
  ) : (
    <span className="product-remaining">{remaining} remaining</span>
  )}
</div>
In this case, if there are no products remaining, we will display "Sold Out"; otherwise we will display the number of products remaining.
3. Shortcut Display:
It involves using a conditional inside of your JSX that looks like checkIfTrue && <span>display if true</span>. Because if statements that use && operands stop as soon as they find the first value that evaluates to false, it won't reach the right side (the JSX) if the left side of the equation evaluates to false.
<h2>
  <span className="product--title__large">{nameFirst}</span>
  {nameRest.length > 0 && (
    <span className="product--title__small">{nameRest.join(" ")}</span>
  )}
</h2>
4. Using Style Property:
<div style={{ display: showInfo ? "block" : "none" }}>info</div>
Babel is a JavaScript compiler that converts modern JavaScript (including JSX) into backwards-compatible JavaScript that browsers can understand. JSX is not valid JavaScript on its own — Babel transforms it into React.createElement() calls at build time.
Step-by-step transpilation:
1. Old JSX Transform (React 16 and earlier):
// What you write
const element = <h1 className="title">Hello, World!</h1>;

// What Babel compiles it to
const element = React.createElement(
  "h1",
  { className: "title" },
  "Hello, World!"
);
This required import React from 'react' in every file.
2. New JSX Transform (React 17+):
// What you write
const element = <h1 className="title">Hello, World!</h1>;

// What Babel compiles it to (automatic runtime)
import { jsx as _jsx } from "react/jsx-runtime";
const element = _jsx("h1", { className: "title", children: "Hello, World!" });
The new transform automatically imports the jsx runtime, so you no longer need to import React at the top of every file.
How it works in the build pipeline:
Your JSX code
     ↓
Babel (with @babel/preset-react)
     ↓
React.createElement() / jsx() calls (plain JavaScript)
     ↓
Webpack/Vite bundles the output
     ↓
Browser executes standard JavaScript
Babel Configuration:
// babel.config.json
{
  "presets": [
    ["@babel/preset-react", { "runtime": "automatic" }]
  ]
}
Key Points:
runtime: "automatic" option enables the new JSX transform (no manual React import).@vitejs/plugin-react (which uses Babel under the hood) to handle JSX transformation.React components are the essential building blocks of a React application. They are independent, reusable pieces of code that serve the same purpose as JavaScript functions but work in isolation to return UI elements.
Two Main Types:
1. Stateless Component:
const Welcome = (props) => {
    return <h1>Hello, {props.name}</h1>;
};

const App = () => {
  const name = 'React'
  return (
    <div>
      <Welcome name={name} />
    </div>
  );
};

export default App;
The above example shows a stateless component named Welcome which is inserted in the <App/> component. The Welcome just comprises of a <h1> element. Although the Stateless component has no state, it still receives data via props from a parent component.
2. Stateful Component:
import React, { useState } from 'react'

const ExampleComponent = (props) => {
  const [email, setEmail] = useState(props.defaultEmail) // state

  const changeEmailHandler = (e) => {
    setEmail(e.target.value)
  }

  return (
    <input type="text" value={email} onChange={changeEmailHandler} />
  );
}


const App = () => {
  const defaultEmail = "suniti.mukhopadhyay@gmail.com"
  return (
    <div>
      <ExampleComponent defaultEmail={defaultEmail} />
    </div>
  );
};

export default App;
The above example shows a stateful component named ExampleComponent which is inserted in the <App/> component. The ExampleComponent contains a <input>. First of all, in the ExampleComponent, we need to assign defaultEmail by props to a local state by a useState() hook in ExampleComponent.
Next, we have to pass email to value property of a input tag and pass a function changeEmailHandler to an onChange() event for a purpose keeping track of the current value of the input.
In React, the "Component" (specifically a "Presentational" component) vs. "Container" distinction refers to a popular design pattern used to separate logic from presentation. While every "Container" is technically a React component, they serve different architectural roles.
Presentational Components:
Container Components:
Example: Presentational Component
/**
 * Presentational Component
 */
const Users = props => (
  <ul>
    {props.users.map(user => (
      <li>{user}</li>
    ))}
  </ul>
)
Example: Container Component
/**
 * Container Component
 */
class UsersContainer extends React.Component {
  constructor() {
    this.state = {
      users: []
    }
  }

  componentDidMount() {
    axios.get('/users').then(users =>
      this.setState({ users: users }))
    )
  }

  render() {
    return <Users users={this.state.users} />
  }
}
React components are typically separated into individual files to keep code modular and manageable. React uses standard JavaScript ES6 module syntax for this purpose, primarily utilizing Default and Named exports
1. Default Export and Import (Recommended):
Use a default export when a file exports only one primary component.
Example:
// Button.js
export default function Button() {
  return <button>Click me</button>;
}

// Or with class components
class Button extends Component {
  render() {
    return <button>Click me</button>;
  }
}
export default Button;

// App.js
import MyButton from './Button'; // No curly braces; can rename 'Button' to 'MyButton'
2. Named Export and Import
Use named exports when you want to export multiple components or values from a single file.
Example:
// Components.js
export function Header() { return <h1>Header</h1>; }
export function Footer() { return <footer>Footer</footer>; }

// App.js
import { Header, Footer } from './Components'; // Must use exact names
Key Differences
| Default Export | Named Export |
|---|---|
| One per file | Multiple per file |
| Import with any name | Import with exact name (or rename with as) |
export default Component |
export { Component } |
import Component from './file' |
import { Component } from './file' |
The main difference is that imperative programming focuses on how to perform a task using explicit, step-by-step instructions, while declarative programming (which React uses) focuses on what the desired outcome should be, and lets the system figure out the how.
1. Declarative programming:
In React, you simply describe what the UI should look like for a given state, and React handles updating the DOM efficiently. You don't manually manipulate DOM elements—you declare the desired outcome and React takes care of the "how."
This makes React code more:
Example:
/**
 * React is Declarative
 */
const Welcome = () => (
  <div id="App">
    <h1>Hello World</h1>
  </div>
)

render(<Welcome />, document.getElementById('root'))
2. Imperative programming:
Imperative programming requires you to write a sequence of commands that explicitly change the program's state step-by-step. This is common in vanilla JavaScript when directly manipulating the DOM.
/**
 * vanilla JavaScript
 */
const string = "Hi there, I'm a web developer";
let removeSpace = "";

for (let i = 0; i < i.string.length; i++) {
  if (string[i] === " ") removeSpace += "-";
  else removeSpace += string[i];
}
console.log(removeSpace);
This example demonstrates imperative programming by looping through each character and replacing spaces one by one. The code requires extensive comments to convey its intent—without them, the logic is difficult to understand.
In contrast, declarative programming uses self-documenting syntax that clearly expresses the desired outcome while abstracting away the implementation details.
1. React Element:
It is a simple object that describes a DOM node and its attributes or properties. It is an immutable description object and you can not apply any methods on it.
Example:
const element = <h1>React Element Example!</h1>;
ReactDOM.render(element, document.getElementById('app'));
2. React Component:
A React Component is a function or class that accepts inputs (props) and returns a React element. It keeps references to DOM nodes and child component instances.
Example:
function Message() {
  return <h2>React Component Example!</h2>;
}
ReactDOM.render(<Message />, document.getElementById('app'));
Key Differences:
| React Element | React Component |
|---|---|
| A plain JavaScript object. | A function or a class. |
| Describes what to see on screen. | Defines how to build the UI and logic. |
| Immutable (cannot be changed). | Dynamic (can change via state/props). |
| No Input (it is the data). | Accepts "Props" as arguments. |
| No lifecycle | Has hooks (useEffect) and lifecycle. |
Conditional rendering is a term to describe the ability to render different user interface (UI) markup if a condition is true or false. In React, it allows us to render different elements or components based on a condition.
1. if/else Statements (and Element Variables):
You can use variables to store elements. This can help you conditionally render a part of the component while the rest of the output doesn't change.
Example:
import { createRoot } from 'react-dom/client';

function<
learning-zone/react-basics is a public repo on GitHub by learning-zone. React Basics ( v19.x ).
It declares no license on GitHub. Public does not mean open source: without a license, nobody is granted the right to reuse it.
Its maker has not tagged a system, so it is unknown here. Its README says what it needs.
Open "Take it" on its page: Take My Repo writes an install plan for your machine and hands it to your AI agent (Claude Code, Codex or Cursor), which asks you before each step. Take My Repo has not tested it on any machine.
Its last change on GitHub was on 2026-06-13. Take My Repo does not judge from that whether it is maintained.
Nobody has reviewed it on Take My Repo yet, which says nothing about its quality.
f.k.a. Awesome ChatGPT Prompts. Share, discover, and collect prompts from the community. Free and open source — self-host for your organization with complete privacy.
Reverse engineer anything with agents, from app behavior down to native binaries.
🔥 A well-tested feature-rich modular Firebase implementation for React Native. Supports both iOS & Android platforms for all Firebase services.
Flutter makes it easy and fast to build beautiful apps for mobile and beyond
Build Agentic workflows, RAG pipelines, with rich AI model and tool support on one collaborative workspace. Deploy on cloud, VPC, or self-hosted, so teams move from prototype to production without rebuilding the stack.
freeCodeCamp.org's open-source codebase and curriculum. Learn math, programming, and computer science for free.